Bedroom Update of Sorts… or Not

And just as I promise to get back on track with the bedroom updates, my life goes in a completely different direction…

I’m nearly finished with what seems like 2 years at least of planning and renovating my room, and I was incredibly excited to see the end result. Sadly I don’t think the stars will align in quite that way. I’ve decided it’s best to move out and get my own place to avoid any further drama at my current house.

After many unsuccessful attempts of finding an apartment in the area that will allow three kitties, and looking at the absurdly high rent rates, my best option seems to be to actually buy my own place – a terrifying thought for someone who’s largest purchase to date has been a treadmill… Actually, my largest purchase would be the hard wood floors I just installed in my room, but after that fiasco {and still not having the ones I wanted}, and now moving out, I really don’t even want to think about the money I just lost. I actually feel pretty ripped off if you ask me, but that’s another story.

So there will probably not be any more bedroom updates, but maybe {hopefully} new house updates…  I’m terrified at the idea of buying my own place, but I no longer feel like this place is home. It’s unfortunate and sad, but it’s time to go and put this chapter of my life and the people in it behind me. *Sigh*

A friend of mine is going to set up a meeting with the realtor that helped her get her house, so we’ll see where things go.

Here’s to new and exciting adventures, and hopefully a cute new place to call my own.

Signature Update


Bedroom Project Update

It was a little over a year ago I first introduced my bedroom remodel to this blog. I never did a great job at posting much about it after that. Today seems as good as any day to start.

A lot has changed in the past year, and I’m happy to say the big projects are slowly getting completed.

The first big change actually happened a year ago – PAINT. I do have to say, I’m still incredibly fond of the pink and green paint scheme I came up with at 15. I’m also proud of the painstaking multi-step process of painting, tracing, and then taping a level stripe around my room. It was a labor of love that I was truly sad to see go. {Plus it’s pretty hard to be sad or tired when your room looks like a bag of Skittles exploded.}PicMonkey Collage2

But we all have to grow up sometime, and bubble gum pink and lime green while still two of my favorite colors, screams high school not adult. After 8 hours of work, I wanted something a bit more relaxing. As you can see from the pictures above, I had some help from Mr. Chase, who at this point is more skilled at climbing up ladders than some of my human family members. I also committed a blogger no-no and forgot to take pictures BEFORE I started patching the walls. Whoops…

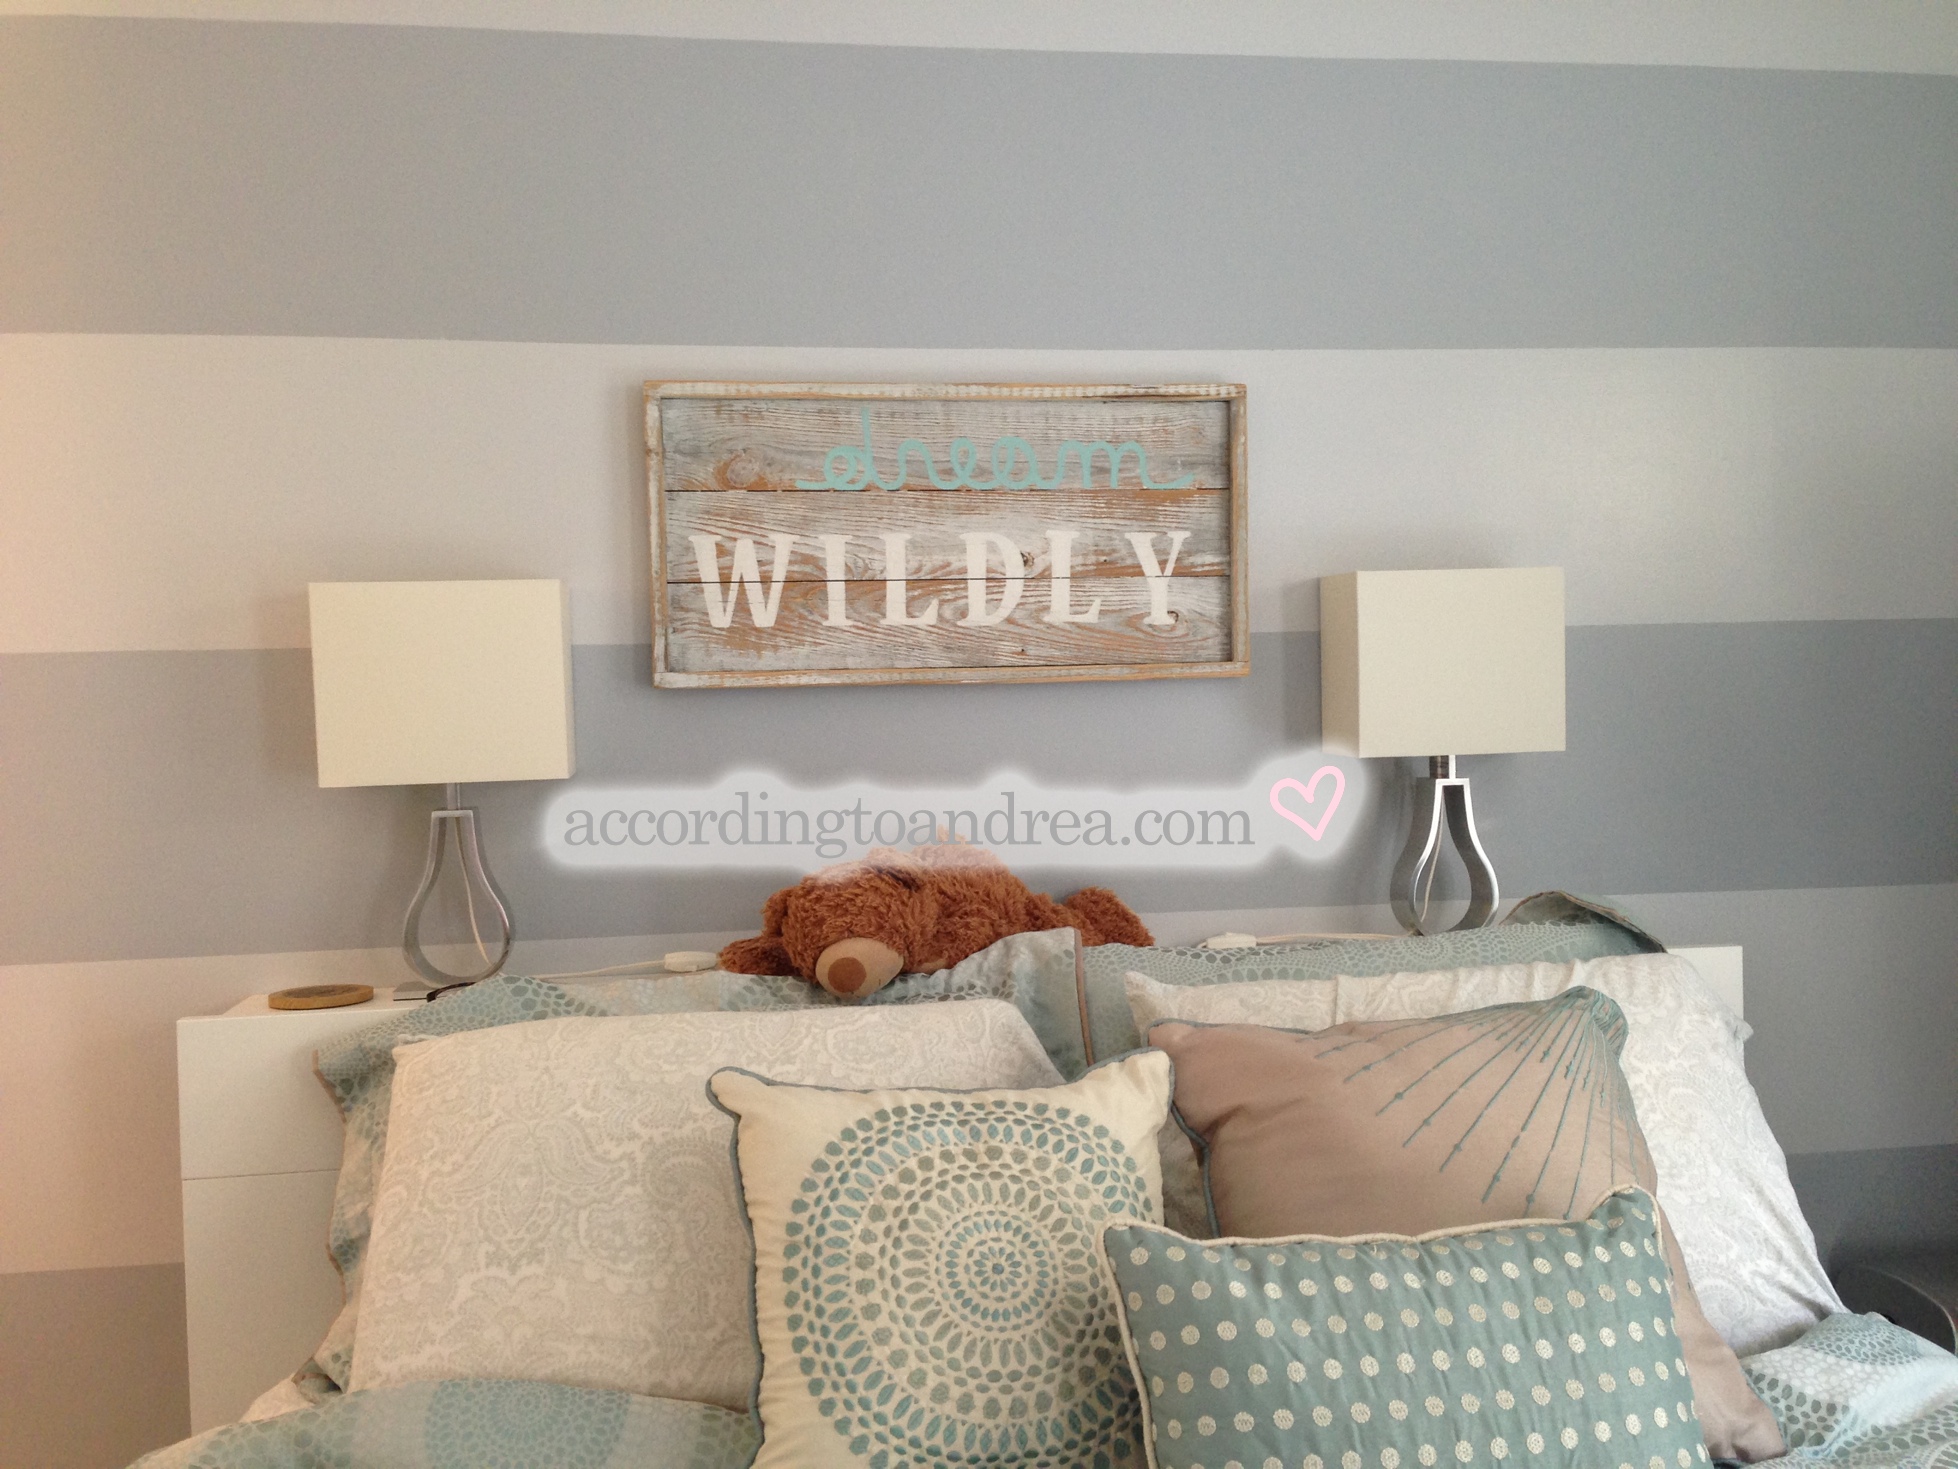
I actually had a family friend paint the majority of the room while I was at work. I ended up going with Behr’s Skyline Steel (the darker grey) for the bedroom, and Twilight Gray for the bathroom. Since my bathroom and bedroom share a wall, I needed to come up with something creative and better than the harsh vertical white stripe I previously had separating the two rooms. I opted for stripes on the wall they share which not only makes the transition between rooms work, it actually draws your eyes to the bathroom wall a bit and the wall definitely looks larger. I agreed I’d do the stripes on my own since I had experience with stripes before. These were a lot easier, and the whole thing took maybe an hour. This time around I had help {in the form of them sleeping…} from Zoey and Remington. Zoey was not impressed with the bow I made her out of painter’s tape.

PicMonkey Collage


With the room painted, I turned to furniture. With my wallet $1000 lighter, and 2 cars full of things from IKEA, the construction was on. That night I started putting things together. Brimnes headboard from IKEA went together without a hitch. I love how it gives me the option of storage without having nightstands on either side of the bed. {My cats have claimed that space already with their cat tower and food/water.} It went together so easy, I started on the storage base, but that was a whole different story. Hours later, after stripped screws, sore hands, and even tears, I accepted this bed was not happening, and opted to sleep on the floor for the night. The next day I put it together just enough so I could sleep on it instead of the floor, but it stayed that way for nearly 2 months. Multiple trips back to IKEA for replacement or missing pieces later, it’s finally put together although missing some minor screws because I just got tired of fighting with it.

PicMonkey Collage1


So now, onto a sneak peek of where things are heading… *Drum roll*

IMG_3037


It’s coming together nicely, but admittedly my room does NOT look like that right now. It’s actually empty, and I’ve been sleeping in another room because, tomorrow’s the big day, the day the hardwood floors go in! With three cats, I’m ready to say goodbye to the smelly stained carpet. My allergies will also surely appreciate the lack of dust filled carpet as well.

More updates soon, and I promise this time it won’t take a year for the next one.

Signature Update

{Bedroom Project} The Introduction

I’ve been talking about this room remodel for what seems like forever on here {even longer offline}, yet this is the first actual post about it.

It all started when a mischievous cat, who goes by [Mr.] Chase, chewed through a bottle of bathroom cleaner while I was at work. That’s what set this whole bedroom redesign in motion. That bathroom cleaner happened to be sitting on my sofa, and this was what I came home to…

Sofastain

My dark grey sofa was ruined. The cleaner actually ate through the fabric. Now the reason this started it all is because this is not your typical sofa. It’s incredibly small (53 inches wide, perfect for a bedroom) AND it folds out into a bed of sorts (handy for those nights when I was too lazy to move myself to the bed during a late night Netflix binge.) Now I could have just repurchased the same sofa. IKEA still makes it, and it’s only $129. I just didn’t really want to buy another insanely cheap sofa that I didn’t plan to keep long in the first place. I bought it with the idea that it’d last me until I decided to move. So with that settled, I was getting a new sofa.

BUT… there’s a catch. Apparently not many companies actually make 53″ sofas that aren’t utter crap or designed to actually be sat on for more than a couple minutes. If I wanted a decent sofa, I would have to get a larger one, and in order to do that, I’d need to make some space in my room by rearranging furniture. Thankfully my cat had me covered on that front as well. Within a couple months of the sofa incident, he decided to knock over quite a few drinks while I wasn’t looking effectively ruining my TV stand, desk, and storage cube shelf.

IKEABesta

So now I was in the market for basically all new furniture, and I designed a wall unit from IKEA’s Besta line. I came up with the design you see above which would combine my TV stand, desk, and a TON of storage in one. {You can never have too much storage right?}

Now here’s where my story starts taking a bit of a “If You Give a Moose a Muffin” twist. I figured, if I’m going to be mounting things to the wall, I might as well paint before I do that. So I went off to pick paint colors. Paint colors for my room turned into also painting my bathroom since they share a wall. Paint colors and furniture choices needed to be saved somewhere so they turned into a board on Pinterest, and before I knew it, I had everything from flooring to furniture to new lighting and drawer organizers picked out for my room and bathroom.

It’s been a massive undertaking, and while the painting is wrapping up this week, the fun really starts in the next few months where I get to start getting the furniture, and actually blogging about the process.

Signature