Condo Project – Week 24

This past Saturday, IKEA held their “BYOF” (Bring Your Own Friends) event. If you’ve never attended, it’s basically a normal IKEA day with a lot more people, free breakfast and bag, and some other offers thrown in. After attending the first with my mom last year, I suppose it’s become a tradition. I, of course, took this trip as an opportunity to stock up on all the IKEA goodies I’d been wanting to grab.

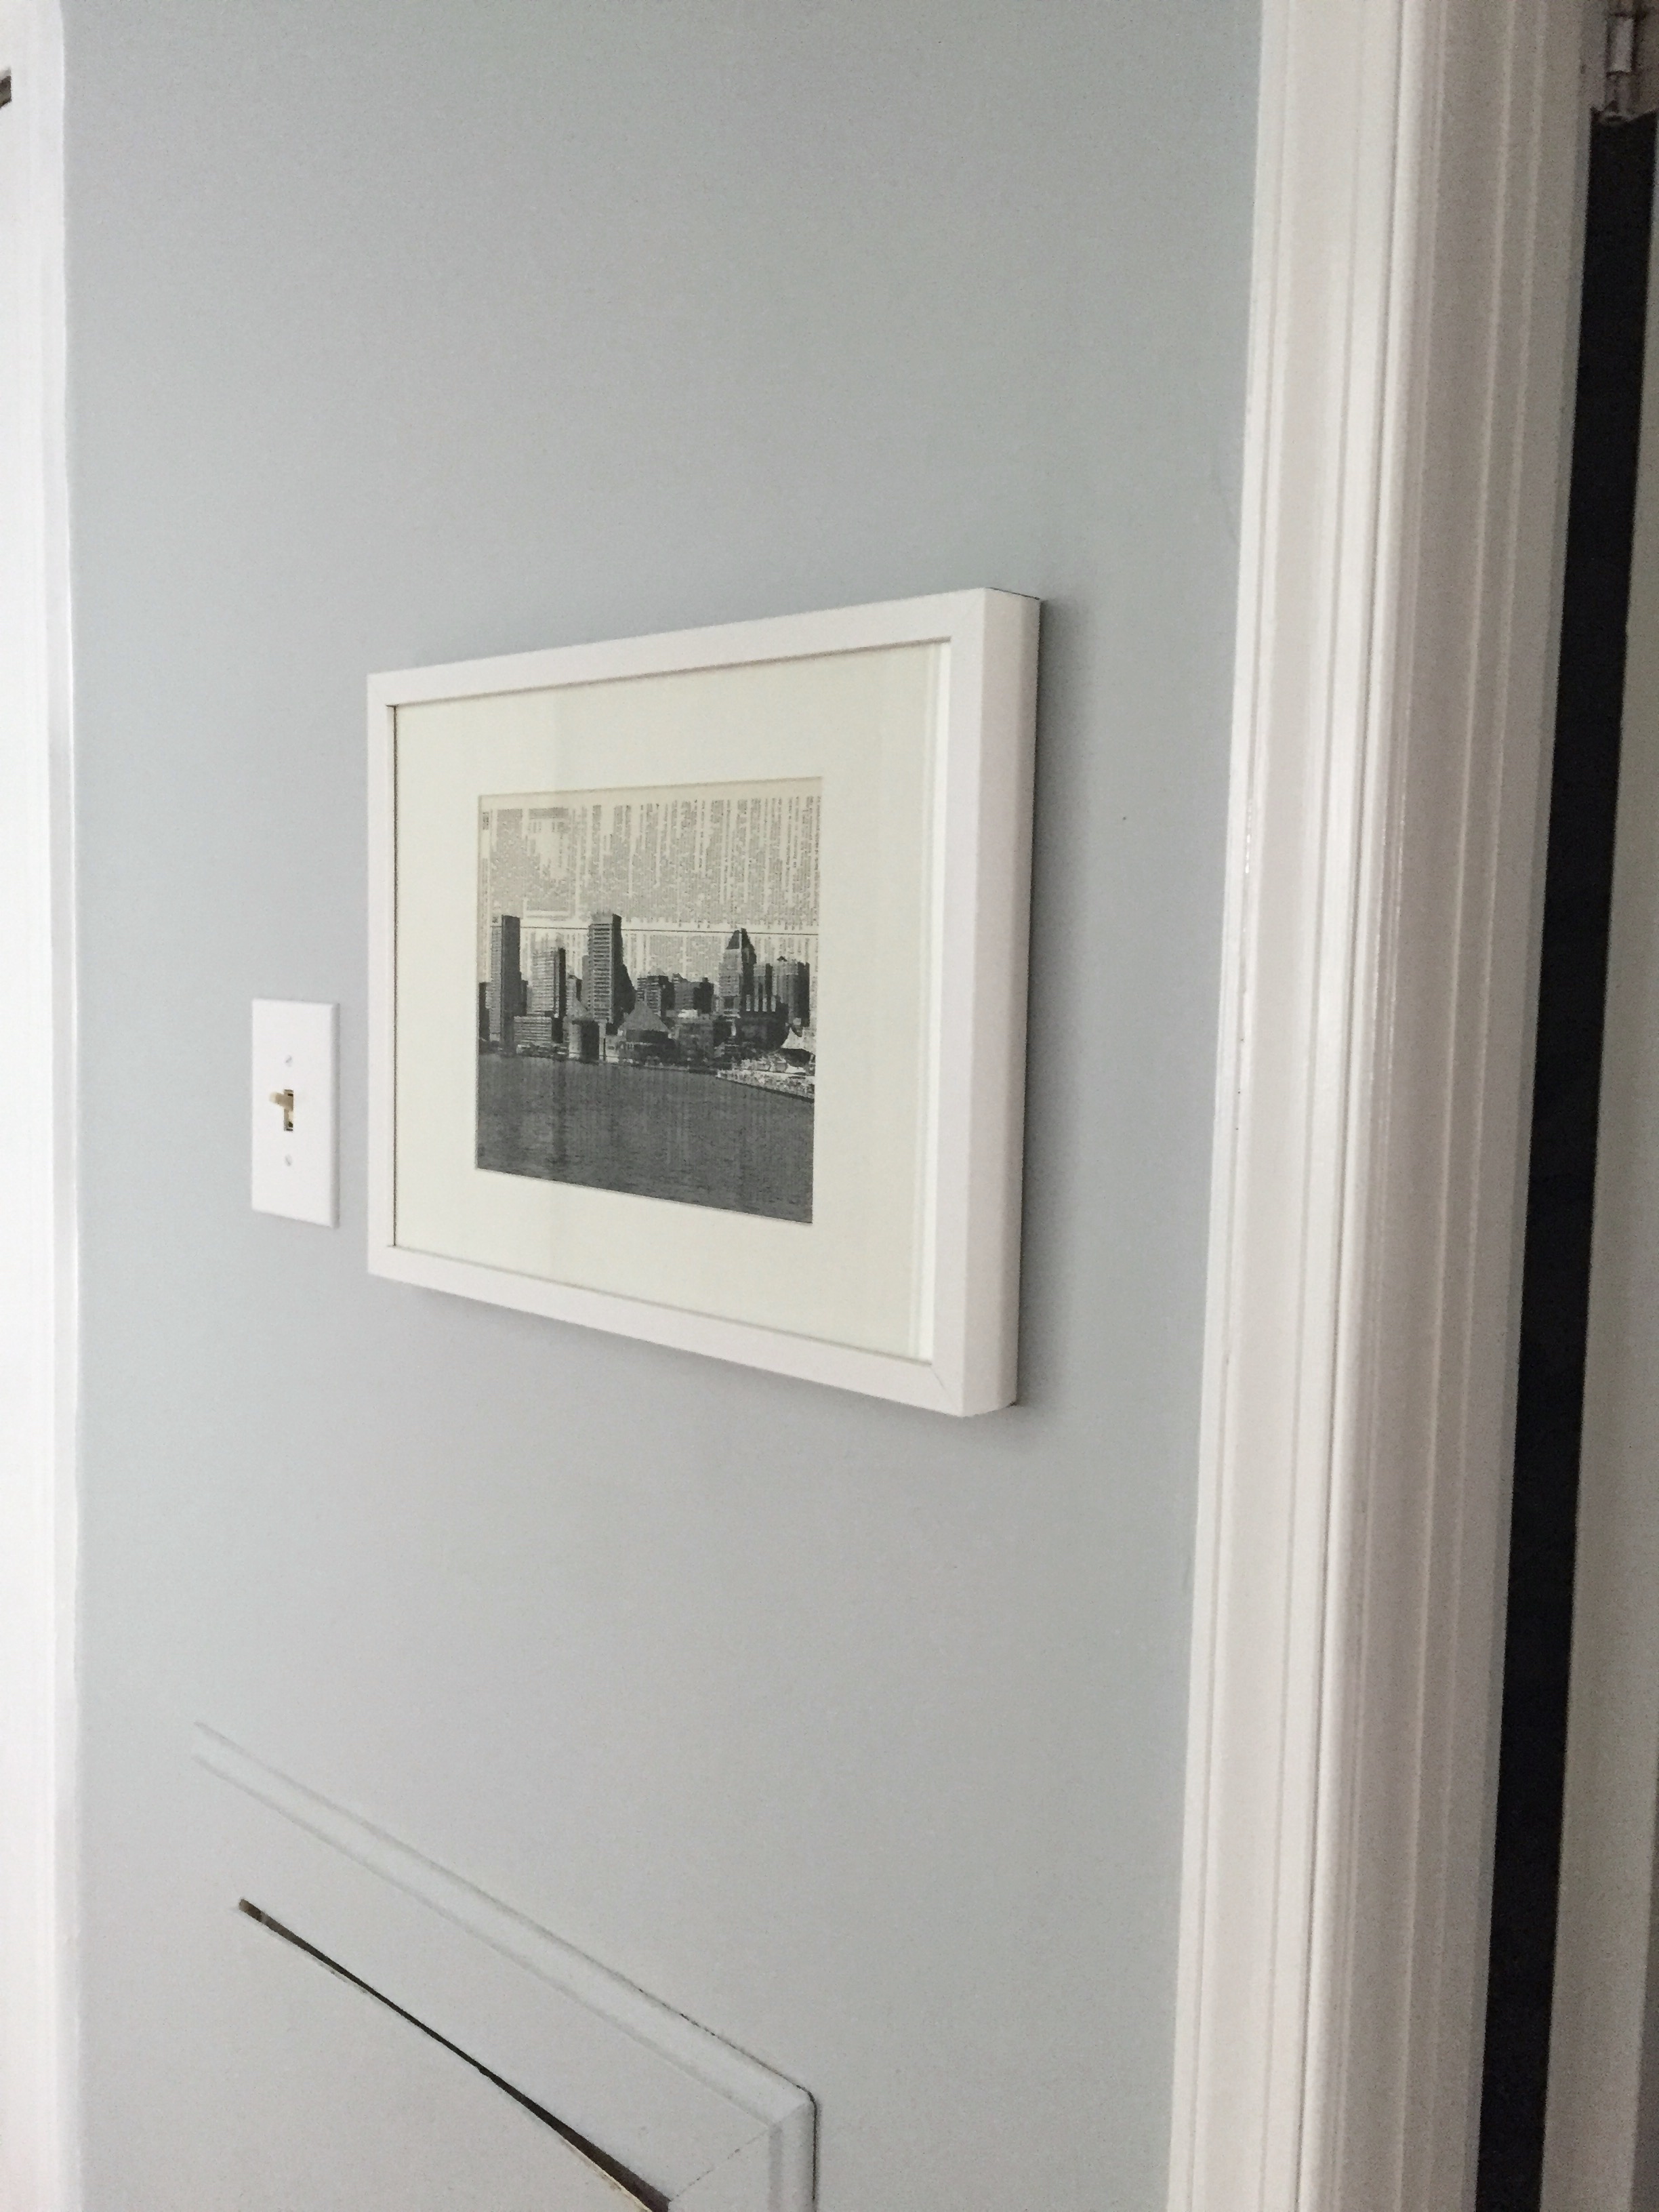
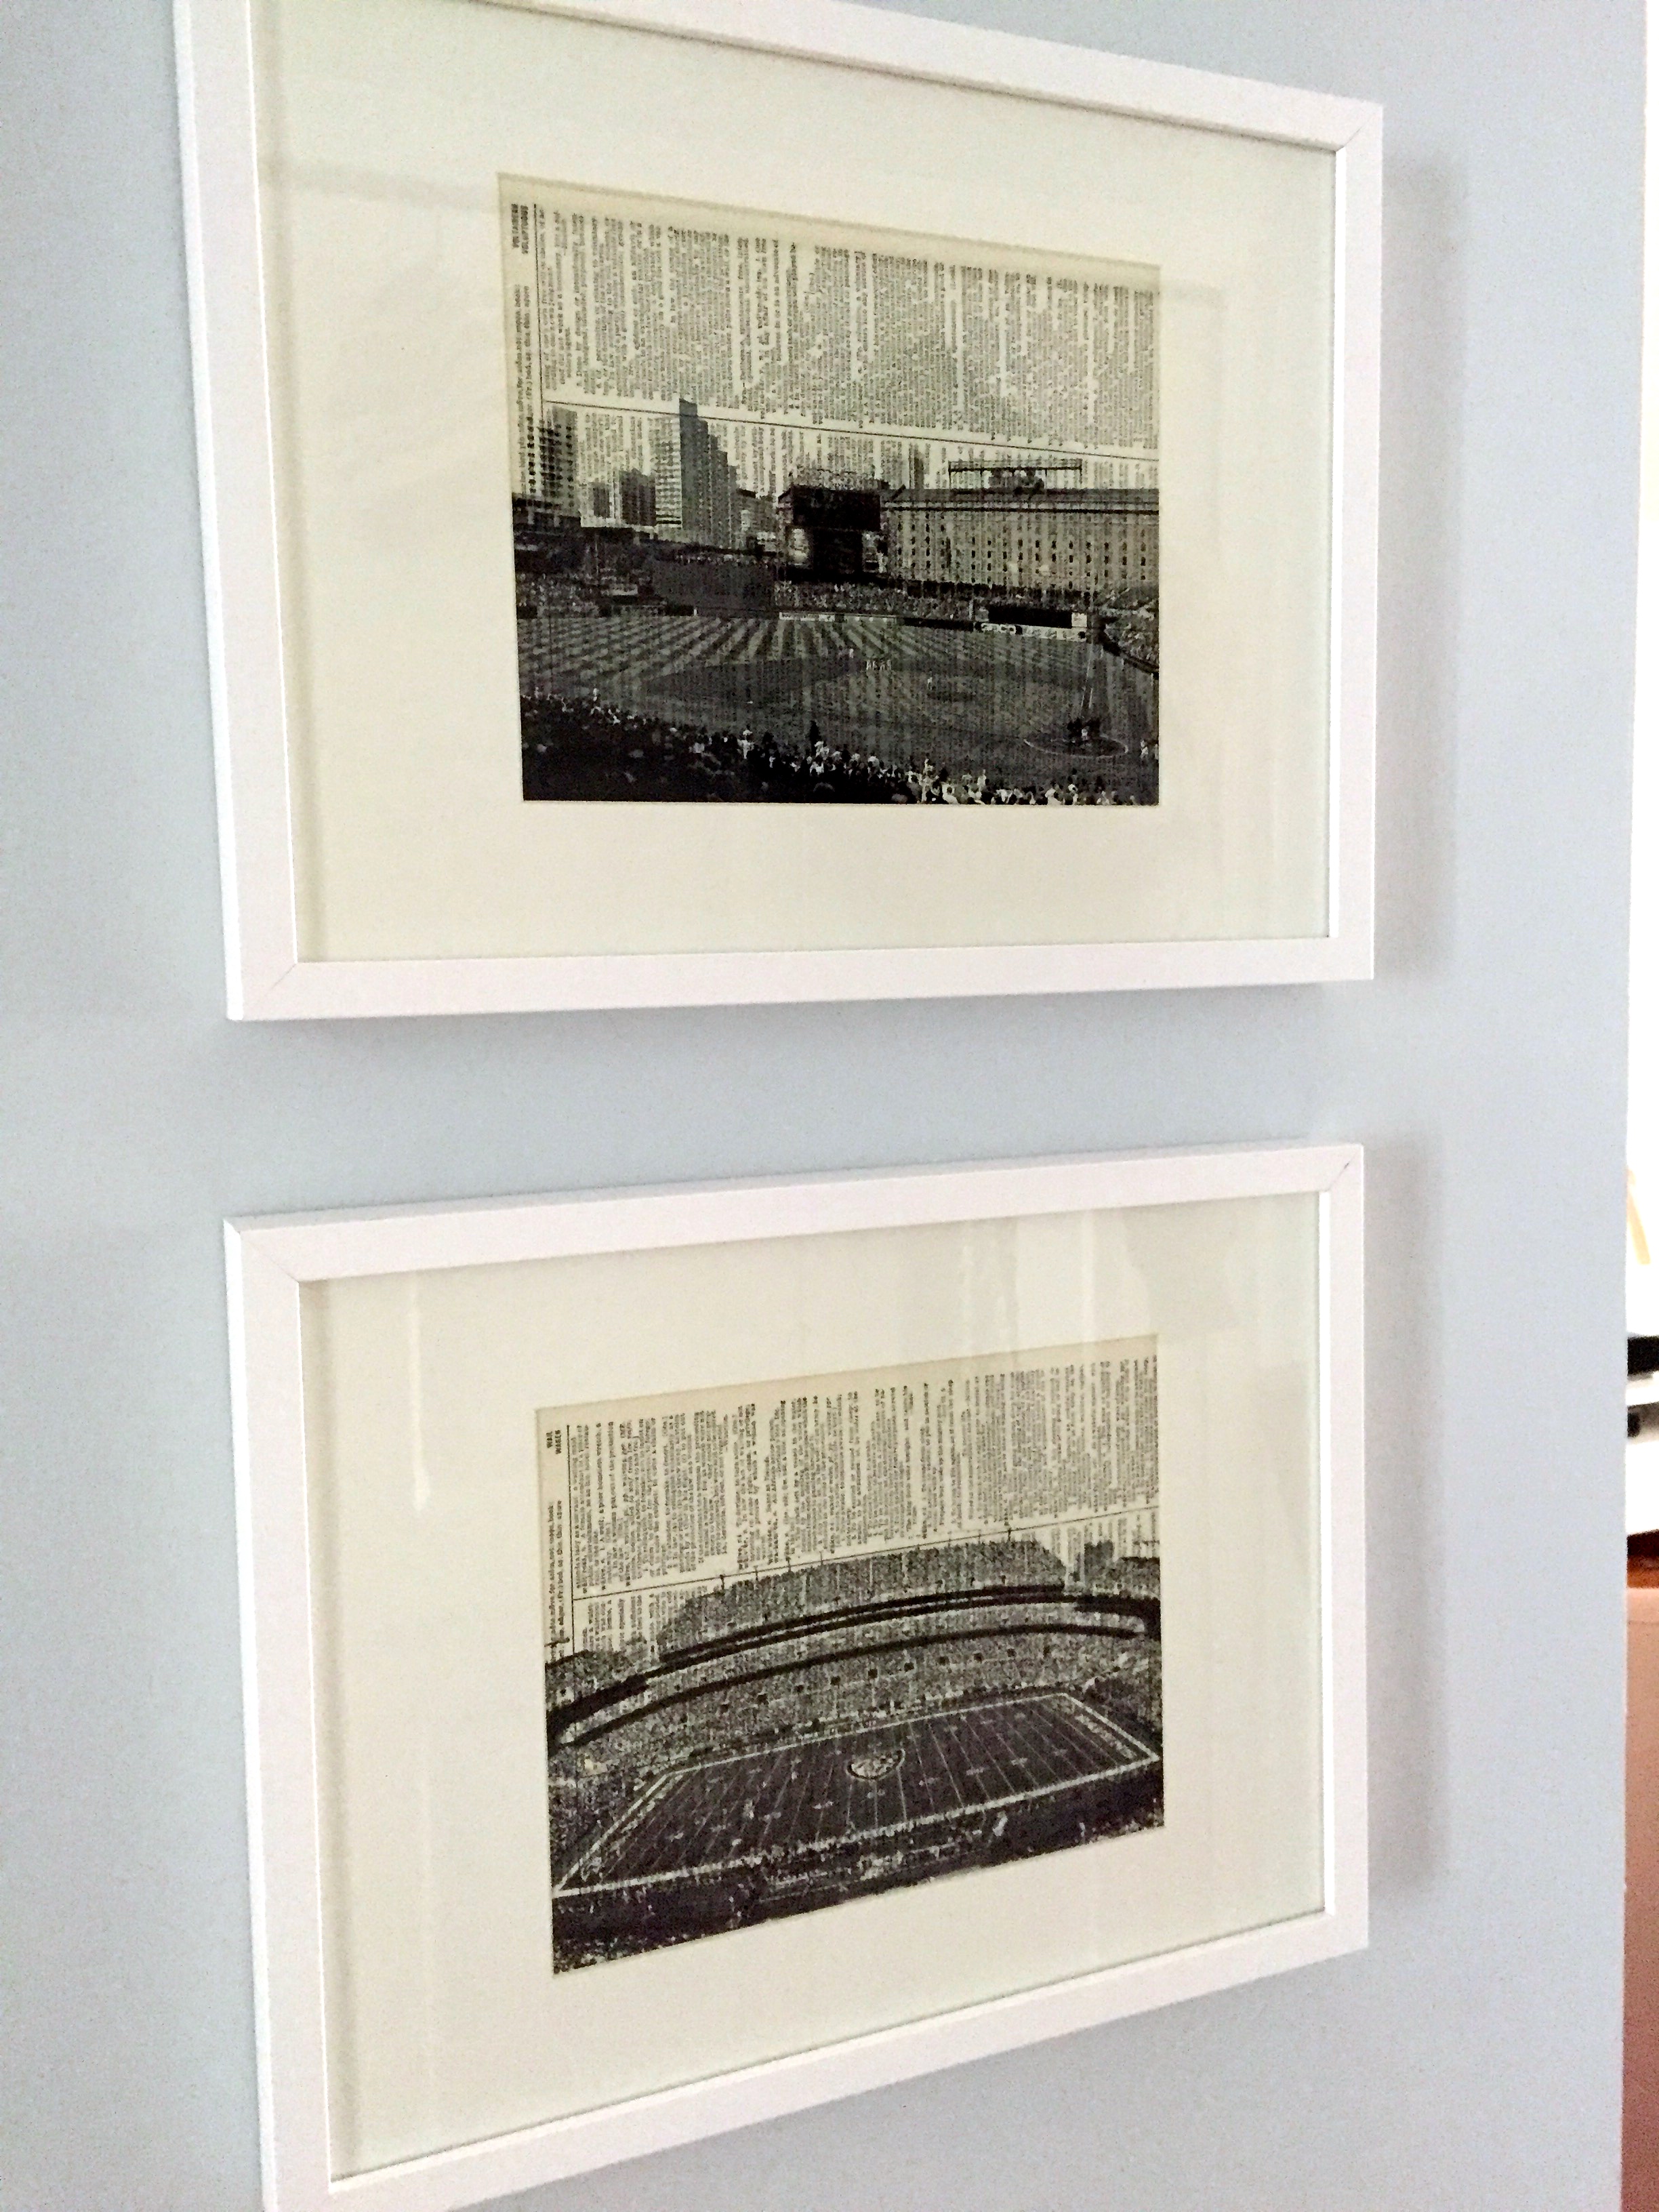
Last month, I purchased some Baltimore-themed prints from a wonderful Etsy shop, RetroBookArt. They actually had a promo to buy two get one free which made the deal even sweeter. I’ve been dying to get them up on the wall, so some simple frames were on the list. They were up on the wall within 30 minutes of coming home. They look fantastic, and certainly brighten up the hallway much more than I was expecting. (Side note: Ignore the access panel popping out of the wall. I’m still very much living in a fixer upper. The access panel is merely propped there to keep the cats from going into the walls.)

IMG_3891
IMG_3893 2

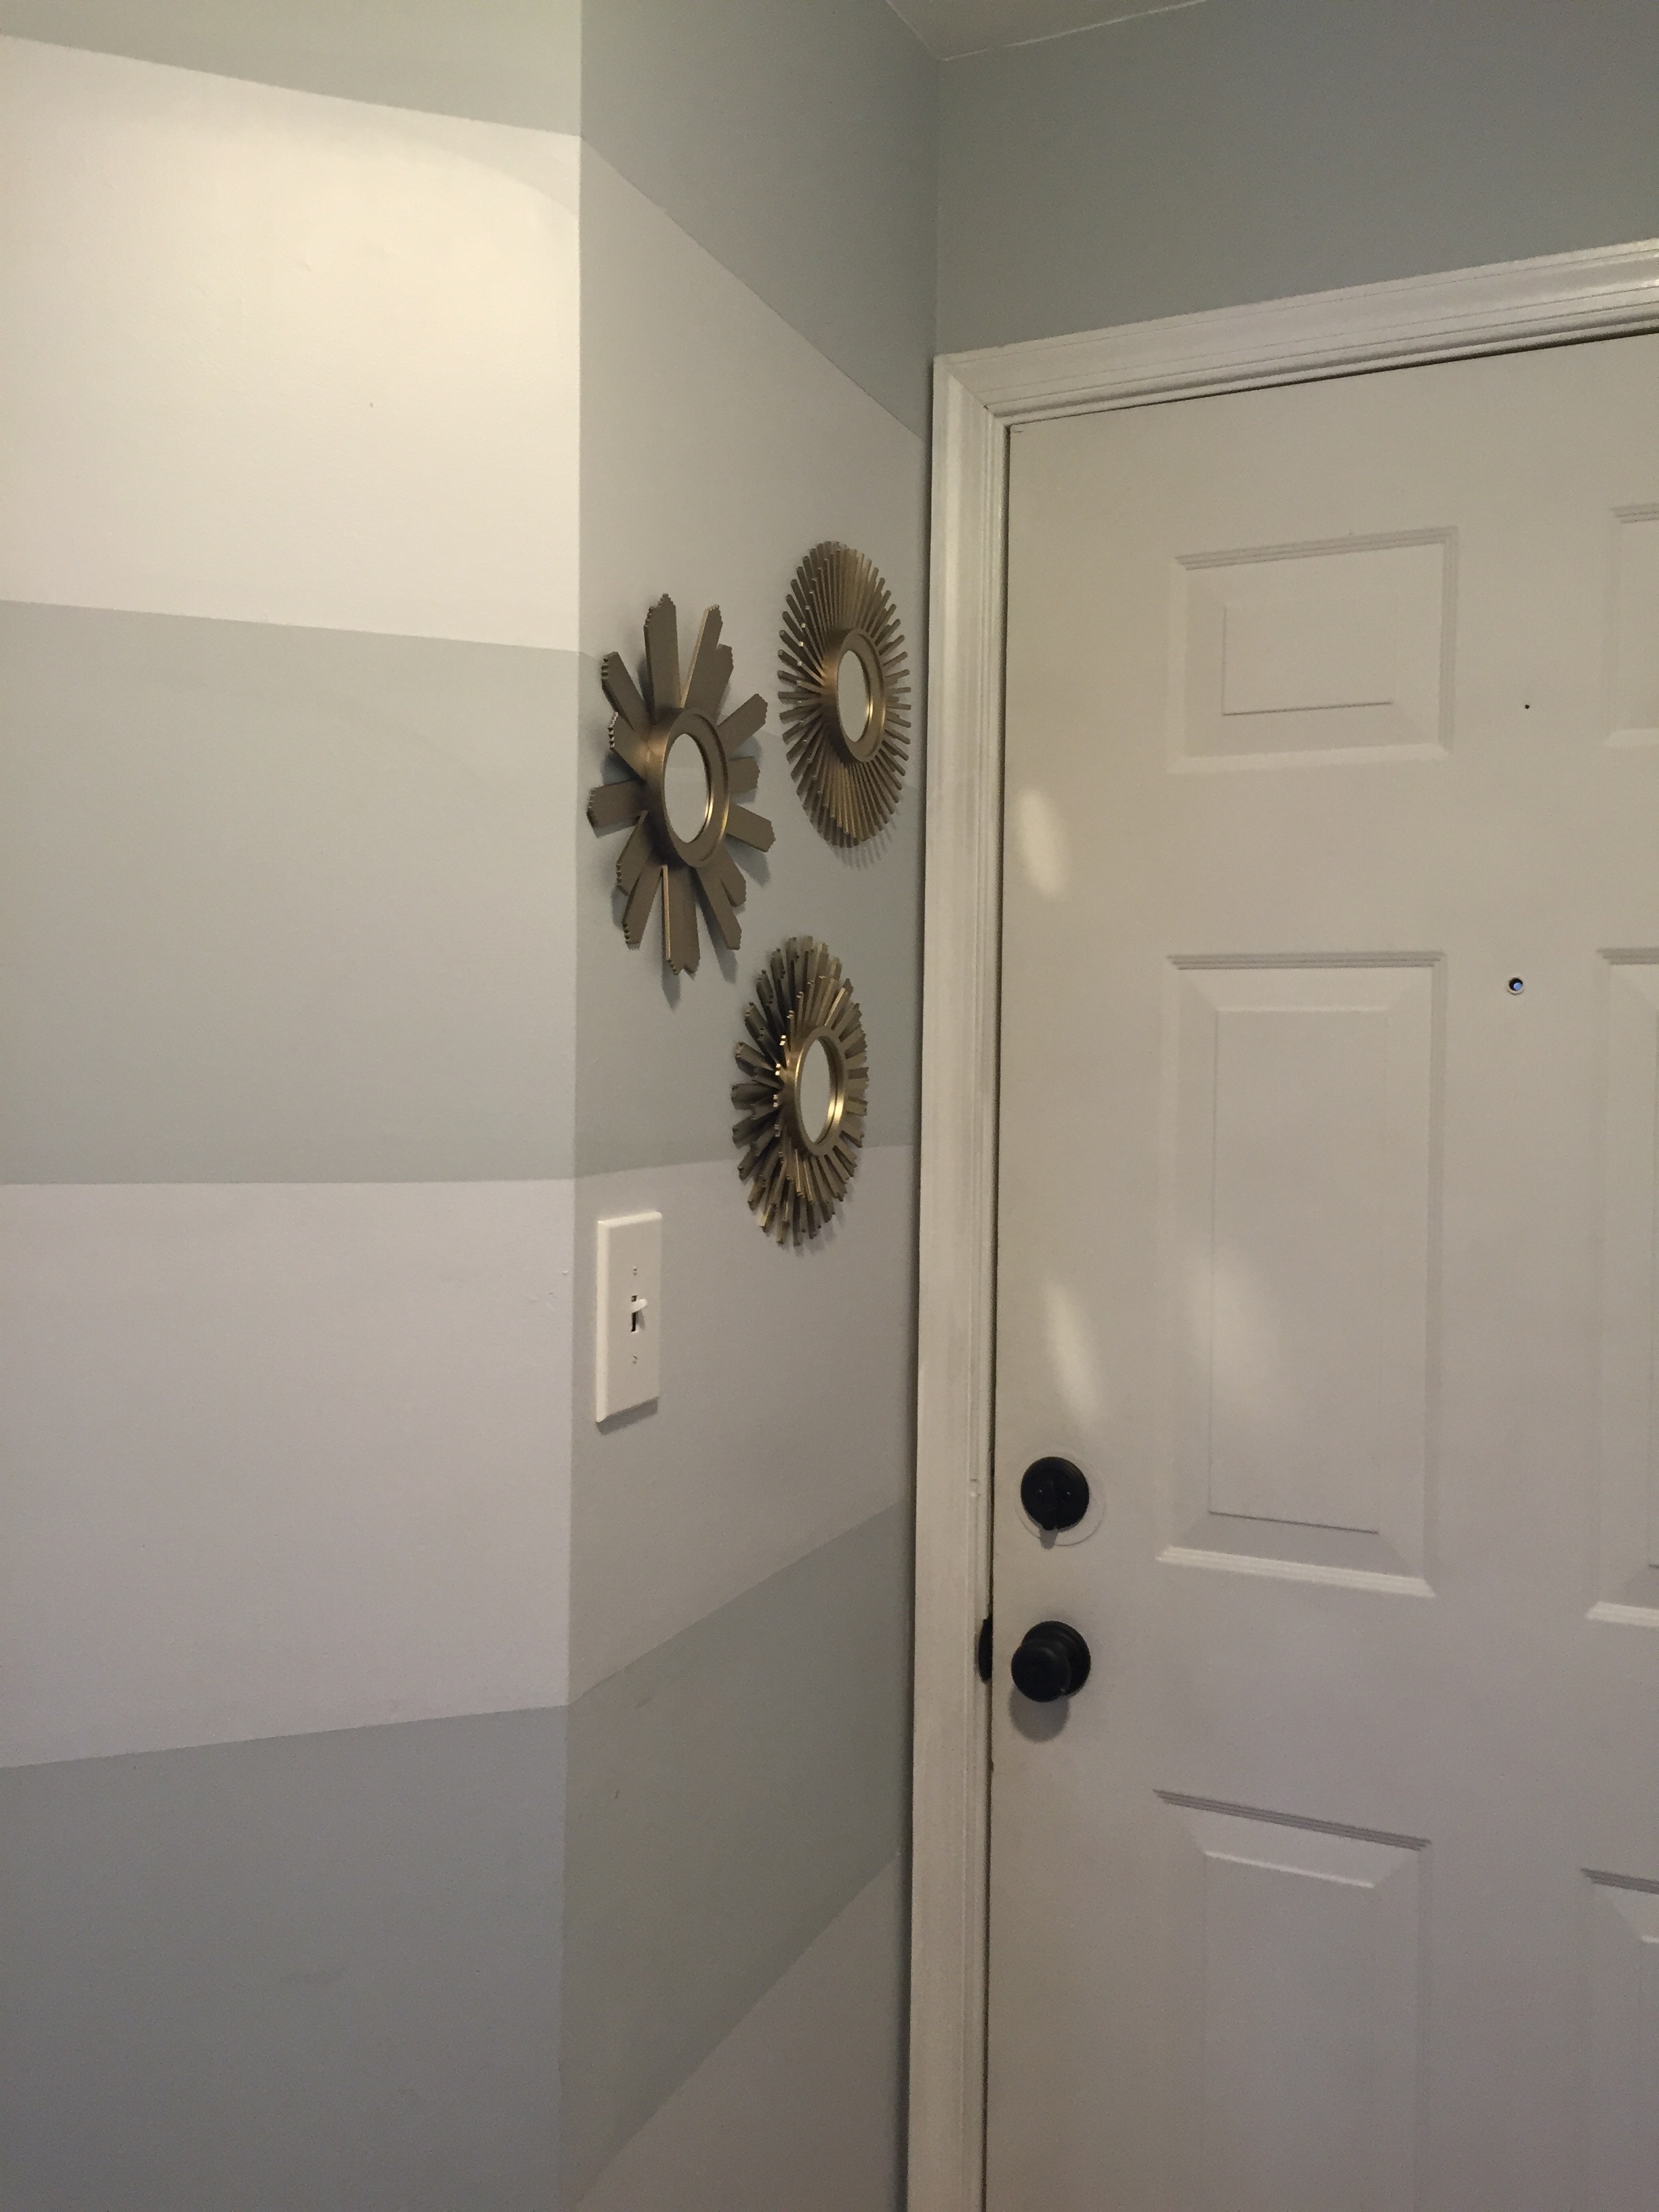
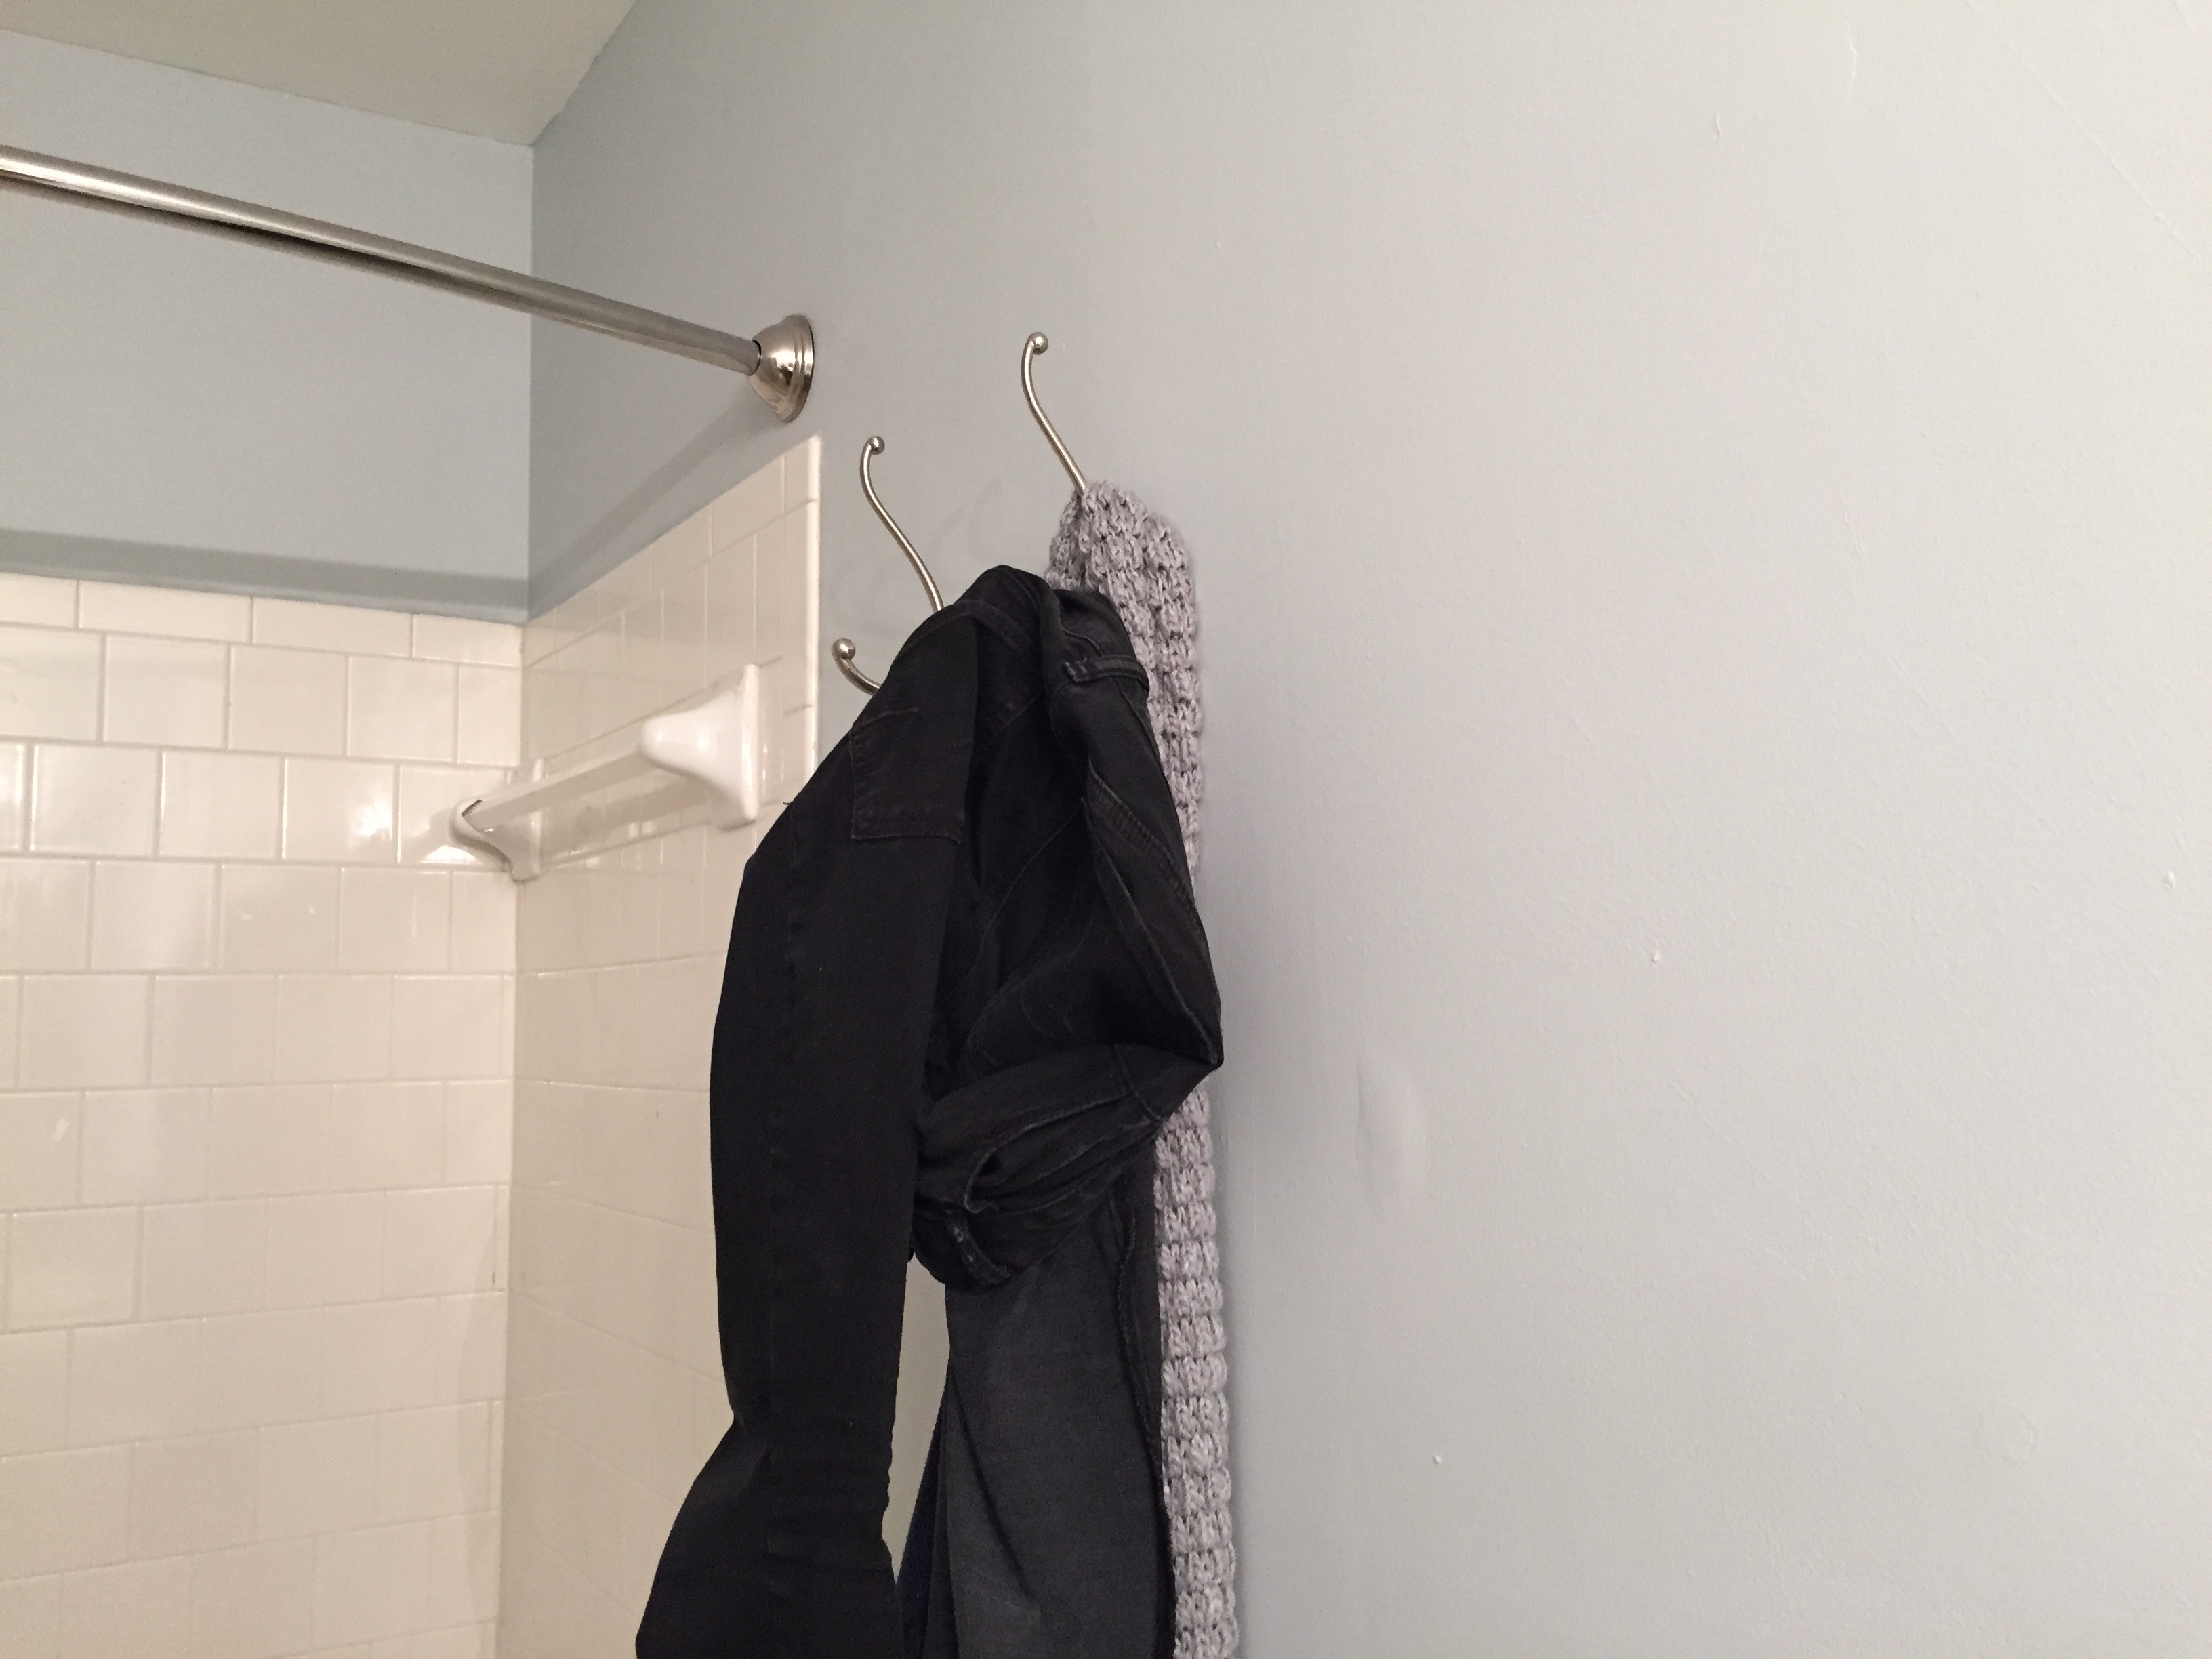
Next on the list was a set of wall hooks and a door mat for the entry way. After a quick trip to Home Depot to get some anchors, the hooks were up. If there was one thing I’m most pleased with, it had to be these hooks. I can’t tell you how much of a difference it’s made in making my space functional. Instead of running all over my condo when I get home to put things away, everything is right at the door in one place. All that’s left for this space is a “Welcome” sign above the hooks, and the Hemnes shoe cabinet on the opposite wall. I’m also toying with the idea of painting the back of the door with the same aqua spray paint I’ll be using on the dining room chandelier.

IMG_3895 2Something else I picked up were some feet for my remaining Besta cabinetry. I’d managed to utilize all of the cabinets I originally purchased for the wall unit I designed before I moved out except for one. I figured I could use it in my living room, but I needed one more set of feet for it. After waiting months for any IKEA within driving distance to get them back in stock, I learned that IKEA is likely revamping the Besta line, and they might not come back for a while if at all. I wanted to use the cabinet so I came up with plan B: I’d buy any feet that were in stock and swap them out for two of the back feet from the cabinets in my bedroom which you never see. It turned out to be a great plan, and the cabinet went together.IMG_3899 2
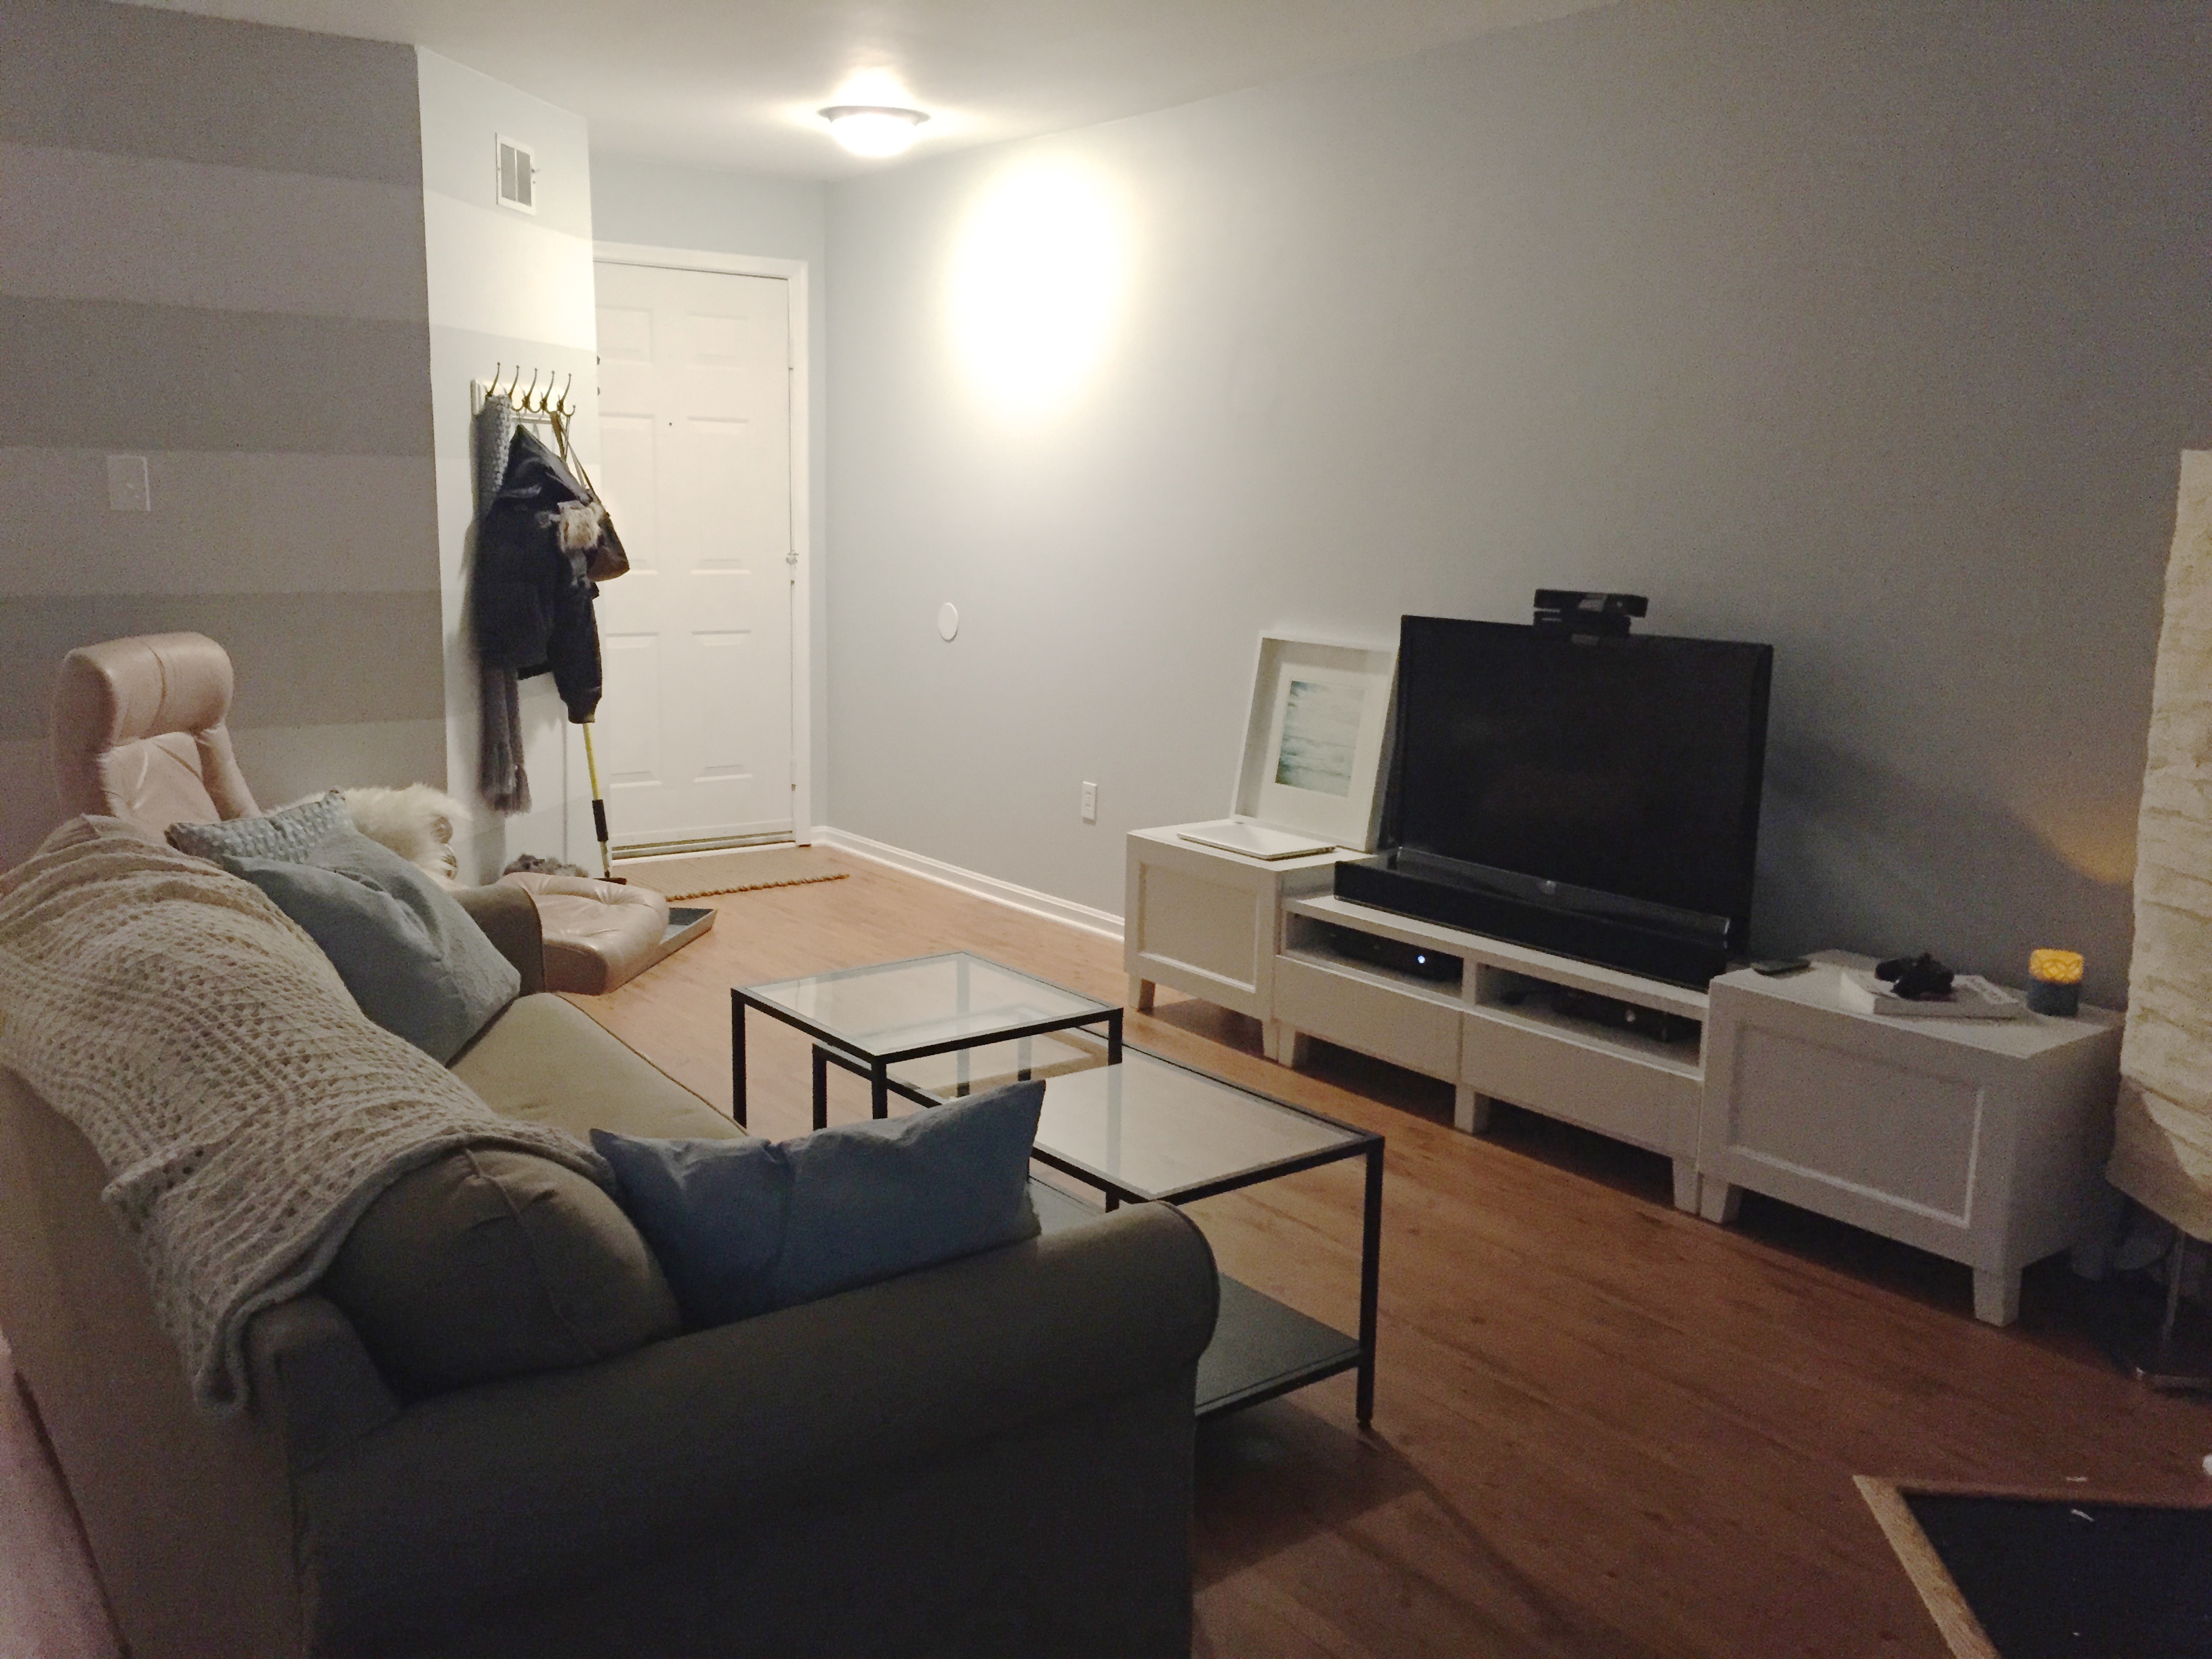
There was only one problem. After seeing the cabinet together, I realized I had to get another one to balance it out. Back to IKEA I went for a second trip to get more mismatched feet (these went in the back of the TV stand this time) and a second cabinet. The end result gives me a more storage and ties the room together much better. (In case you’ve noticed the picture that’s floating around in the last two pictures, it will be part of the gallery wall I’m putting together in my bedroom, but I don’t have any place to put it right now.) I’ve ordered two mirrors to hang above the end cabinets which will hopefully brighten the room up.

IMG_3901
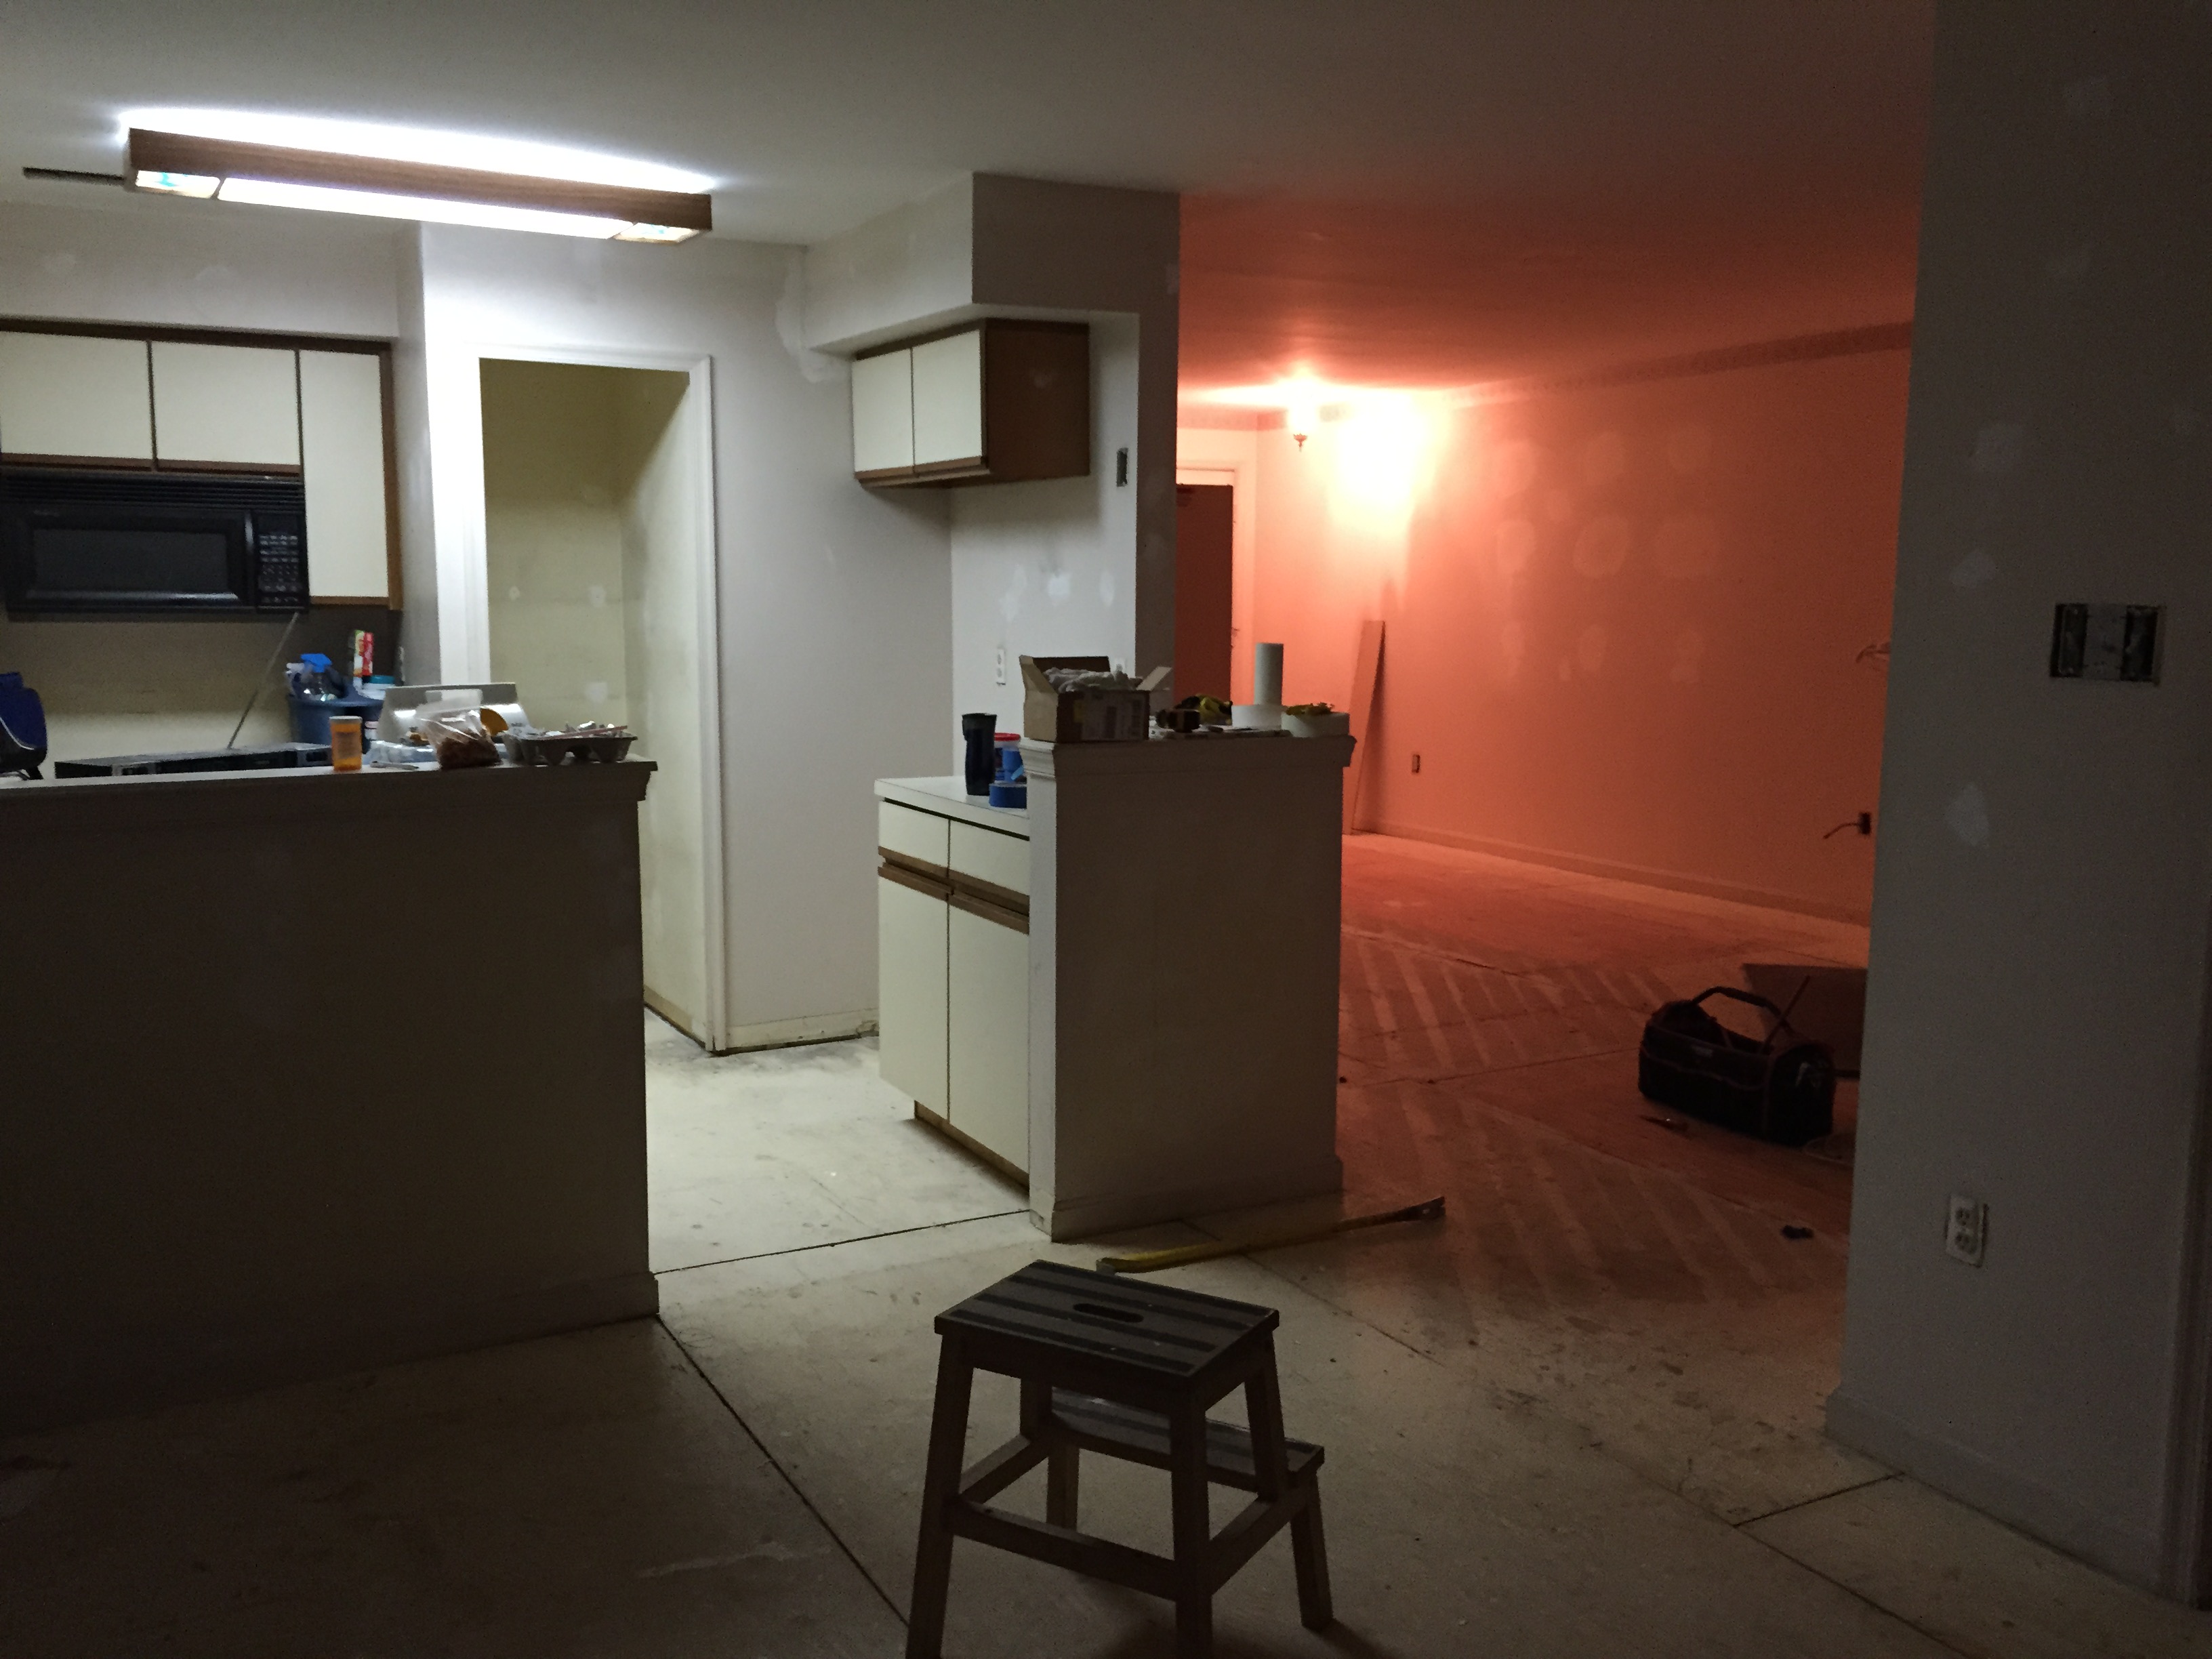
And just for the heck of it, I figured I’d throw in the picture of this room from the listing. I’m still shocked at the transformation.IMG_3896 2
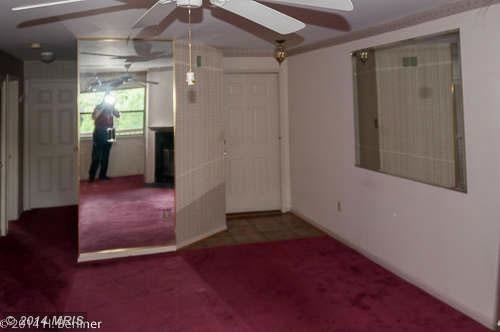
Still left on the to-do list for this room:

  • Buy the Hemnes Shoe cabinet
  • A rug
  • Artwork for the fireplace (potential candidate)
  • A larger tv (mounted to the wall)
  • Hanging up the mirrors I ordered
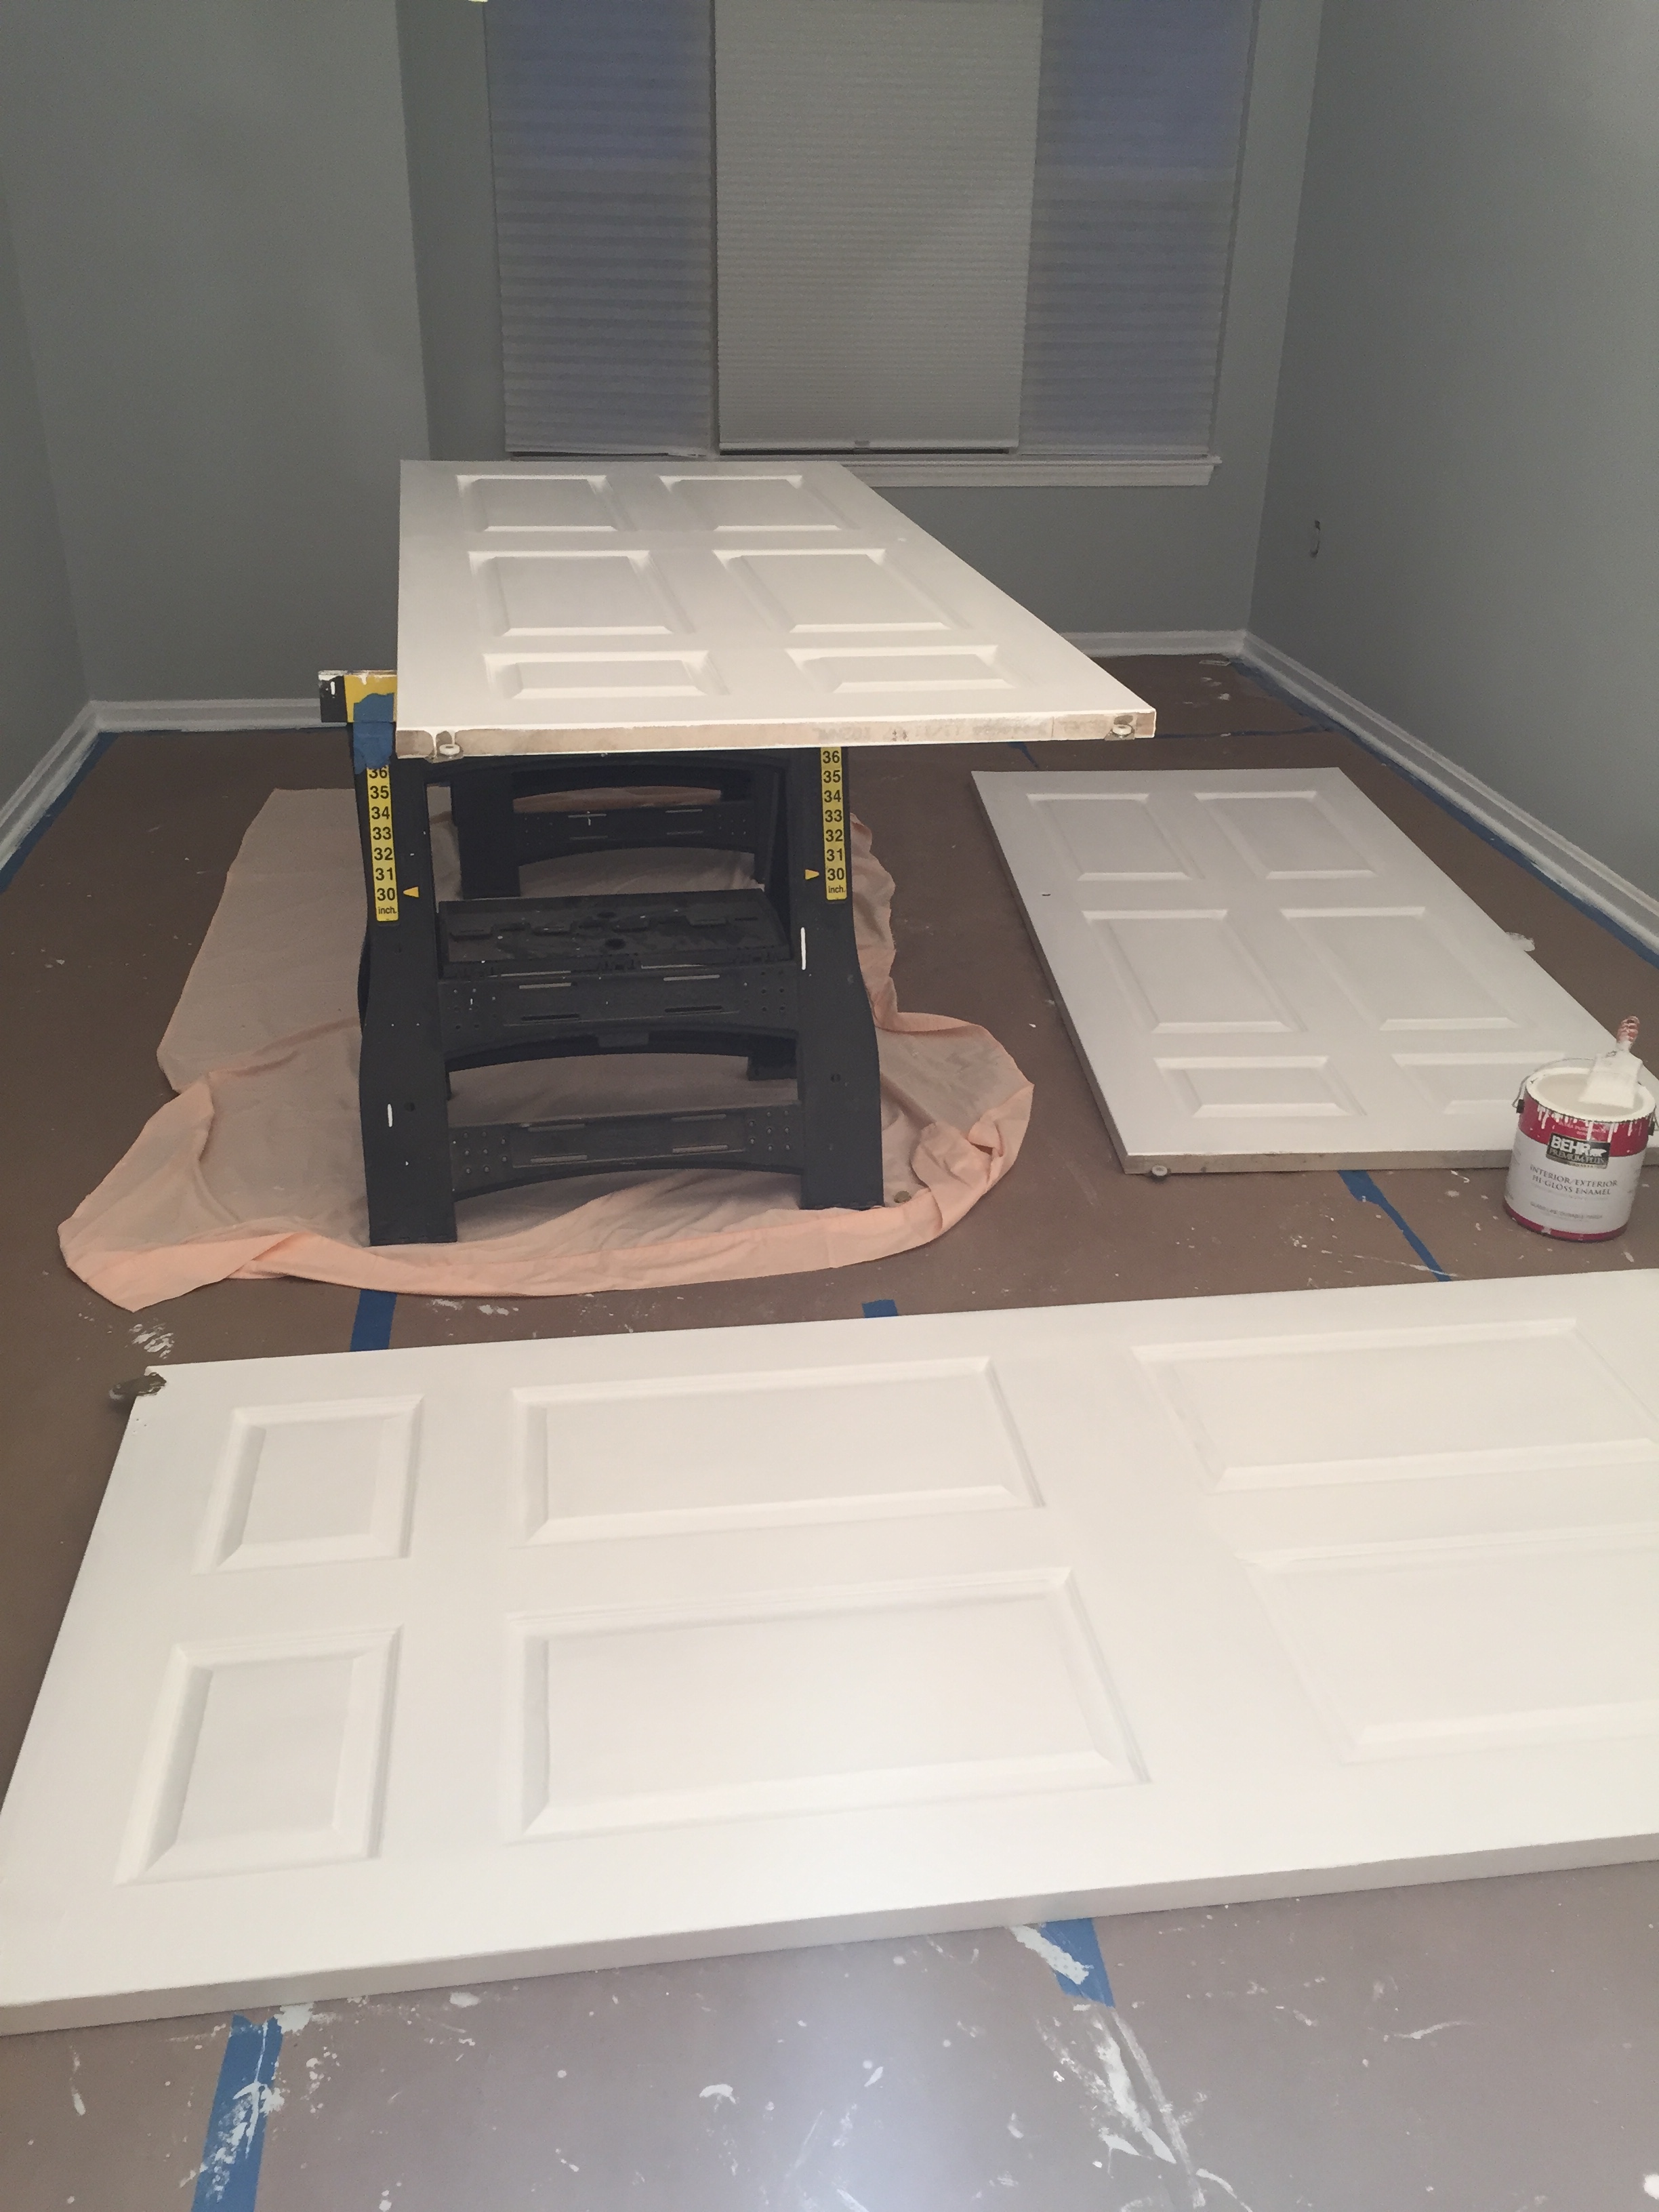
  • Painting the door
  • And some plants and decorative items.

All in all, it’s nice to finally feel like at least one space is nearing completion. My Pinterest board is becoming a reality, little by little.

Andrea


Condo Project – The Past Two Months

My how time flies. Apparently it’s already been two months since I last left you with any sort of update on the condo. By my calculations we’re approaching the 22 week mark of when I first started on this journey which is simply scary to me. That also means I’ve been a homeowner for nearly 5 months at this point!

When I wrote my last post about the condo, I was in a state of dismay. It seemed like every day something new was breaking, and if I wasn’t already at the condo, I was rushing back to it hoping the place wasn’t falling apart. I basically spent the first month questioning what I had gotten myself into and wishing I had decided to buy a a place rather than just rent. For now, *fingers crossed*, things have finally stopped breaking, at least on a daily basis, and I’ve been able to spend the past 2 months getting things livable. I’m naturally interested in finding efficient, organized solutions, so every day I find a new thing to tweak or fix. Nothing like actually living in a house to find out all its quirks.

The Living Room

One of the first things I did after moving in was pick up some necessities from IKEA. Most of what I bought were odds and ends for the kitchen, but I picked up some throw pillows and a sheepskin for the pink chair in attempts to pull the room together. Since taking this picture way back in December (Note: the Christmas tree…) I’ve moved the pink chair to the other side of the sofa, which has made it everyone’s favorite chair now that you can actually see the TV from it.

There’s still a ton on the list for this room:

  • Find artwork. The blank walls are driving me insane much faster than I anticipated.
  • Purchase a larger TV. My 42″ TV worked fine in my bedroom, but it looks minuscule in my Living Room. It will eventually be mounted to the wall.
  • Assemble the remaining Besta cabinet for additional TV storage – I have one remaining cabinet from my former bedroom’s wall unit to repurpose, and it will work perfectly next to my TV stand for more storage. I’m just waiting for any nearby IKEA to restock the feet that match what I already have. I already have one set of 2, so I only need one more box. Sadly they’ve been out of stock for months at this point and I’m worried they’ve been discontinued.
  • Up for debate – a rug. While I love the way rugs anchor a room, I don’t love how the catch dust. I’m not sure if I’m willing to give up the ease of sweeping for a rug.

IMG_3731

The Kitchen

The old black dishwasher that started leaking unexpectedly has been replaced with a new white one, and the mice-chewed wiring was replaced for both the garbage disposal and dishwasher. I can’t even begin to describe how excited I was to have a working dishwasher. My nights are no longer spent washing dishes. I did have to buy a lot more dishes and silverware though because I started running out of things before the dishwasher was full. (Worth noting, the day this picture was taken, the dishwasher had just been delivered hence the dishes in the sink still.)
IMG_3735

Another ongoing project is the cabinets. Little by little I’ve been lining them. I was so shocked at how much better the guest bathroom vanity looked lined, I had to snap a picture. Life without cabinet doors and drawer fronts has also been an interesting one, especially with my OCD. I had been planning to wait until the weather warmed up to paint them at my mom’s house, but I gave up and started bringing them back home to paint in the dining room. As of today, I’m happy to report that all drawer fronts except for one that needed to be repaired have been reinstalled. I’ve also started on the cabinet doors. I can’t wait to see what the bathrooms and kitchen look like with all the doors back up and the new hardware installed. It’s no Pinterest worthy dream kitchen, but for the $200 I spent, the before and after will be dramatic.

IMG_3853

IMG_3852IMG_3857


The Entry Way

Thanks to all this winter weather, it didn’t take long for me to realize how much I desperately needed to do something with my entry way. Coming home with wet boots meant taking my shoes off at the door, carrying them to the fireplace (the closest place with tile), then walking back across the room to hang up my coat on a hook I hung on the coat closet door, and dropping my work bag somewhere in the process. And because my unit has a second bathroom where the coat closet would normally be, my unit’s coat closet is actually about 10 feet into the condo around a corner making it useless for storing things I need when heading in or out. So here’s my plan:

  • Hang up hooks on the angled wall by the front door paired with a boot tray so that I can hang my outdoor things up and take my shoes off on the way in. I plan to hang a Welcome sign above this too.
  • On the opposite wall, I’m going to purchase a Hemnes Shoe Cabinet. I don’t necessarily plan to use it for shoes but rather odds and ends like sunglasses or outgoing mail. I may stash the throw blankets that live on my sofa during the winter or when people stay over there too.

As of today, I’ve added some mirrors to the wall right by the door and a boot tray, both from Target.
IMG_3845


Other updates not pictured:

  • I’ve started repainting the louvered doors for both the utility closet and laundry closet.
  • I repaired the trim that was damaged when bringing the washer and dryer back in.
  • I replaced all of the interior door knobs (all 4 of them) from their mixture of brass and chrome to a satin nickel finish.

And last but not least, the cats have settled in nicely and spent a lot of time lounging around (well at least the boys lounged around). Skyler quickly took to watching the birds out the back windows.IMG_3739IMG_3728


Stay tuned for more updates.

Andrea

Condo Project – Week 6

The countdown is on, and my brain is in a constant state of “Are we moved yet?!”

Nearly everything but the necessities has been packed up since August which has been frustrating. Now that the seasons have changed from Summer to practically Winter, I’ve been struggling to not unpack everything before I move. My cats have also loved the mountains of boxes resulting in most of them starting to collapse in too. Some of them were so bad, I actually had to repack their contents in new boxes.

Little by little, I’ve been moving things over to the condo, but Saturday was probably the first real big move day. My goal was to get as much moved as we could, and we managed to fill up my car, an SUV, and a small work van. My hallway in my current bedroom was completely full of boxes for a large portion of Saturday morning and afternoon.

IMG_3643

By 6PM, we had assembled the “temporary” dining room table on loan to me until my farm table is built. The table was the same one I had when I was growing up, but it’s funny how tiny it looks in this room. I always dismissed the comments of how my dining room is bigger than my mom’s, but I think she may be right. With the leaf in the table (as it is in the picture below) this table barely fit in her living room.
IMG_3647

The next big project was tackling the cabinets. After cleaning layers of grease and gunk off of the fronts and insides of the cabinets and drawers, the first of two coats of paint went up on the cabinet fronts in the kitchen and bathroom vanities. The kitchen already looks much brighter. The jury’s still out on what I decide to do with the counter tops. For now I’m not absolutely hating the color against the white, and lets face it, nothing matches in there anyway (black dishwasher and microwave, white fridge, almond stove) so what’s a cream colored counter added in until I can get the kitchen completely redone.IMG_3645

After everyone had left, I started putting things away. I managed to unpack a couple of boxes in the Master Bedroom and Linen closet, and also took a first stab at putting the Guest Bedroom (my soon to be Office/Gym) closet together. The guest bedroom has been serving as a catch all for all the boxes that we’ve been moving, but since a treadmill is coming into this room, I needed as much room cleared as possible.IMG_3646
Not pictured:

  • The remaining 2 closet doors were cleaned and got their first couple coats of spray paint. These two doors were louvered for the utility and laundry closets so painting them with a brush was going to be a massive ordeal.

That’s week 6. Not very eventful in terms of the condo because I needed a break so that I could focus on other things like school, work, and birthdays.

Signature Update

Condo Project – Week 5


And I’m back. I don’t have many updates of the condo because, honestly, the big projects are wrapping up and moving to the garage at my mom’s home.

Now for the few pictures I do have:

The rest of the bathroom hardware and the shower curtain went up in the guest bathroom. That’s 1 room done.

IMG_3590
Fun things started going up in the master bath including my favorite spice racks from IKEA for getting things off the counter as well as my make up mirror.
IMG_3604 IMG_3605

These hooks have been wonderful for hanging up my clothes each day when I change into my “condo” clothes instead of dropping them on the dusty floor. One day soon they’ll be for towels.

IMG_3606

The chandelier has begun it’s transformation from brass to mint.IMG_3609

One of my favorite decisions was to work my grandmother’s pink leather chair into my living room. The chair is incredibly comfortable, but its color has caused it to get passed around from relative to relative over the years. Thankfully it doesn’t look quite so pink but rather beige in my living room. I’m hoping it’s finally found it’s permanent home next to the fireplace.
IMG_3702

Not pictured:

  • In addition to the leather recliner, the sofa, coffee table,  and several cars full of boxes have made their way out of the garage and over to the condo. Hooray for finally having a place to sit, and not having rooms quite so full of boxes.
  • The fireplace got its first bit of cleaning.
  • The temporary blind in the guest bedroom has been replaced with the permanent one.
  • The remaining doors have been brought home to be painted.
  • My balcony is now free of all appliances.
  • A new showerhead was installed in the master bath replacing the old plastic white handheld one.
  • Many trips to Home Depot and back, the Rustoleum Cabinet Transformations kit is finally tinted and I picked up some chalk paint for the dresser project.
  • And lastly, work on the dresser has begun. Sadly we found the top wasn’t solid pine but veneer, so sanding it didn’t go as planned. Onto plan B.

The big news however is that I have a soft deadline of November 22nd as move in day! I have to say though, now that I have a Keurig, sofa, and internet, it’s getting harder and harder to leave each day.

Signature Update

Condo Project – Week 4

Happy Halloween! I can’t decide whether I’m more excited to give candy out tonight {I haven’t lived in a neighborhood with Trick-or-Treaters for years!} or just because it’s Friday and I’m exhausted.

This condo is kicking my butt. Add working full time, graduate school, and also being sick, and I’m just over this week. Things are moving along slowly, but I have lots of pictures this week, and lots of proof that things are wrapping up little by little. I still don’t have a move-in day, but I’ve been gradually moving my stuff over in hopes that it will speed things up.

The painting of the doors is wrapping up. All doors with the exception of two louvered doors have been painted.

IMG_3527

We actually ran out of room in the master bedroom to paint the doors, so we started painting them in the dining room too.IMG_3528IMG_3538 Also on the list of things to paint was the oak light cover in the kitchen. I’m not a big fan of fluorescent lights in kitchens, but given that I’m on a limited budget, this one had to stay for the time being. Thankfully the stained glass panels were a more generic design rather than the flowers I normally see them with. Eventually it will be swapped out for recessed lighting. White spray paint did it wonders.IMG_3531 The fun touches started including the stripes in both the back wall of the master as well as the entry way. After years of doing stripes in many rooms, knocking these out is now a piece of cake.IMG_3537

IMG_3542 IMG_3543This picture without the tape shows how fantastic the satin paint looks against the flat paint I used.
IMG_3557

And my next ambitious paint project was the “painted wallpaper” project. My plan is to do this on the back wall of the dining room, but with the weather getting cold fast, priorities have shifted to moving ASAP. I did a test run on the back wall of the pantry instead. First step was stenciling the wall.
IMG_3550 Then came the tedious process of hand painting inside each line. I have to be honest, I almost gave up at this point because up close it just didn’t look good.IMG_3551 The finished project makes me smile though and I’m glad I pressed on and continued.

IMG_3554

I also purchased door knobs for the closet doors. Getting rid of the various door knobs that had geese and Native Americans {I didn’t know these even existed…} on them was something I was super excited about, and seeing something else completed makes me smile.

IMG_3564

Another discovery this week was that my windows and doors are actually white. They were so dirty everyone thought they were silver… GROSS
IMG_3573 And some finishing touches started going in. The shower rod was replaced in the master bath.IMG_3577A toilet paper holder has been installed in the guest bathroom.
IMG_3579And sadly, I came to terms with the fact that it’d be cheaper to just buy a new light for the foyer than to find a new globe and salvage the old one.
IMG_3581

Other things notably missing in the picture:

  • Both mirrors have been rehung in the bathrooms.
  • The fridge arrived.
  • The plumber fixed the broken shut off valves in the laundry closet.
  • Light switch plates are going up.
  • The chandelier in the dining room has been taken down in preparation for paint.
  • I’m in the process of getting the broken blind in the guest bedroom replaced.
  • My Nest Protect smoke detector had to be sent back due to a wonderful defect that caused the smoke alarm to go off anytime it was left on for more than 10 seconds. {Sorry to any neighbors reading this.}

Thanks for stopping by. Until next week…

Signature Update

Condo Project – Week 3

You know that point in every HGTV remodeling show where the couple is just DONE… I’m there. I can’t wait to just be done and moved in, and it seems like every time I turn around something else needs to be fixed whether it be mice chewing through electrical wires in the walls, my new Wemo light switch controlling everything BUT the light it should control, or even just realizing the shower curtain rod in the master was about to fall off the wall. Also adding to my frustration, in August, when I anticipated getting ready to move, I packed up everything but the necessities. Fast forward 2 months later and I’ve run out of necessities and have had to start unpacking again. I also packed up all my cold weather clothes which isn’t so enjoyable when the weather has been cold and rainy.

So what has gotten done other than the depletion of my energy?

Floors have been taped and painting has resumed. That sheet unfortunately is here to stay a bit longer. The shade I received from JCPenney was damaged. It’s also backordered, so I’m looking at November when I might actually get the remaining 3 blinds installed.IMG_3498 Again, I apologize for the awful lighting. With the Wemo switch not working properly, the living room no longer has any light except for the light in the hallway. If you look closely to the left of the fireplace, however, you’ll see the glow of a modem and router. Thanks to a surprisingly wonderful rep that came out from Comcast to fix the waste of time I spent on the phone (Comcast, if you’re listening your phone support absolutely sucks, and it was ME who actually discovered the problem after an hour of your reps putting me on hold, transferring me, and hanging up on me). The problem –  the line to my unit was disconnected out back. (8 units, 8 lines coming into the building, mine was the only one not connected, and not one the jacks coming in was free which means someone is using up more than they should). In any event, every things resolved and I’ve officially stepped back into the 21st century and have high speed internet at home. Hooray!IMG_3500 Doors and trim started getting painted or touched up.IMG_3501

This wonderful array of doors is 3 out of my 4 closet doors for the master.IMG_3510 And the last big project has also started. cabinet doors came off in the kitchen and bathrooms to be prepped for paint.IMG_3515You might also notice that my stove made it back into the kitchen, which means things are coming back in from the balcony finally.
IMG_3516

Last but not least, we have a plumber/family-friend coming tonight! He’s going to do the work a little at a time, but the plan is to get the kitchen sink working again, get a line to the fridge run for the ice maker, see what needs to be done with the dishwasher, replace the hoses and valves in the laundry closet, check what’s going on with the master bath tub, and also pull the toilets so that we can lay new vinyl in the two bathrooms.

By the weekend, hopefully I will have a semi-functioning kitchen that includes a working sink, stove, microwave, and fridge that holds more than 6 cans of soda.

It’s coming along slowly but surely.

Check back in for more updates soon.

Signature Update

Condo Project – New Floors

I was planning to include the pictures of the floors in my Week 3 post, but I just can’t wait any longer. The suspense is just killing me.

I bought this condo knowing it was a huge project, and I will admit, there was a huge part of me that doubted I could even do it. While I was getting everything started with the purchasing process, I avoided showing anyone the place. I mean I buy overly priced Apple products because they look nice, and then I turned around and bought this condo which was the furthest thing from being simple and well designed. I had a vision – a vision that scared me to no end because I felt it was completely unrealistic. I kept asking people, “I’m not crazy for doing this, right?” I was scared that too many episodes of Fixer Upper, Property Brothers, and other HGTV shows convinced me I could do something I really couldn’t.

Every place I looked at had carpet that I planned to replace, so the pink carpet didn’t really deter me that much. I really didn’t care what I put down as long as it looked like wood and wasn’t carpet. I started looking at wood-look sheet vinyl, but I couldn’t find any samples that weren’t so obviously vinyl. In the end connections paid off, and I happened to find enough of a discontinued laminate at the right price. Truthfully I wasn’t sold though. For the price, I couldn’t beat it, so I went for it because the pink carpet had to go. The color and pattern on the sample weren’t something I absolutely loved though.

And then the sample arrived, and I started warming up to them.IMG_3420

On the day the floors went in, I had this crazy moment of “Wow! This is really happening. I own this place!” I still can’t get over it, and the floors are absolutely perfect. The difference floors make is so incredible.

IMG_3431I’m thrilled that they could be run straight down the unit lengthwise. It makes views like this fantastic.
IMG_3433 IMG_3434 IMG_3439 IMG_3442 And just for comparison, I’ve included a before and after pic. IMG_3443

As I mentioned earlier in the post, I’ve doubted myself throughout this project. The timeline seems like it keeps getting longer and longer, and it feels as though I might never move in, but seeing this transformation is so gratifying.

The rest of Week 3’s updates are coming soon.

Signature Update

Condo Project – Week 2


Ready for Week 2’s progress? It’s pretty dramatic!

We hit a major milestone in Week 2 – removing the last of the wallpaper. Sadly, I did not document the momentous occasion. There were many jokes of how I had changed my mind on paint and opted to go with wallpaper over every wall again, but I think the wallpaper is gone for good.

With the wallpaper down, we could start patching walls. {For those of you that are curious, we’ve been working our through the rooms starting with the kitchen and ending with the bathrooms with each stage of the process.}

IMG_3394

Hopefully my HOA understands I’m in mid renovation; because my balcony looks like this… Right now I’m sure I’m that neighbor everyone hates, and I hate it.
IMG_3395We painted and primed the shoe molding in preparation of the floors going in.
IMG_3400 And then the first coats of paint started going up.

10712893_10202897038326880_4161795704258519326_nIn this picture, the ceiling looks grey as well, BUT I assure you it is white.IMG_3405IMG_3425
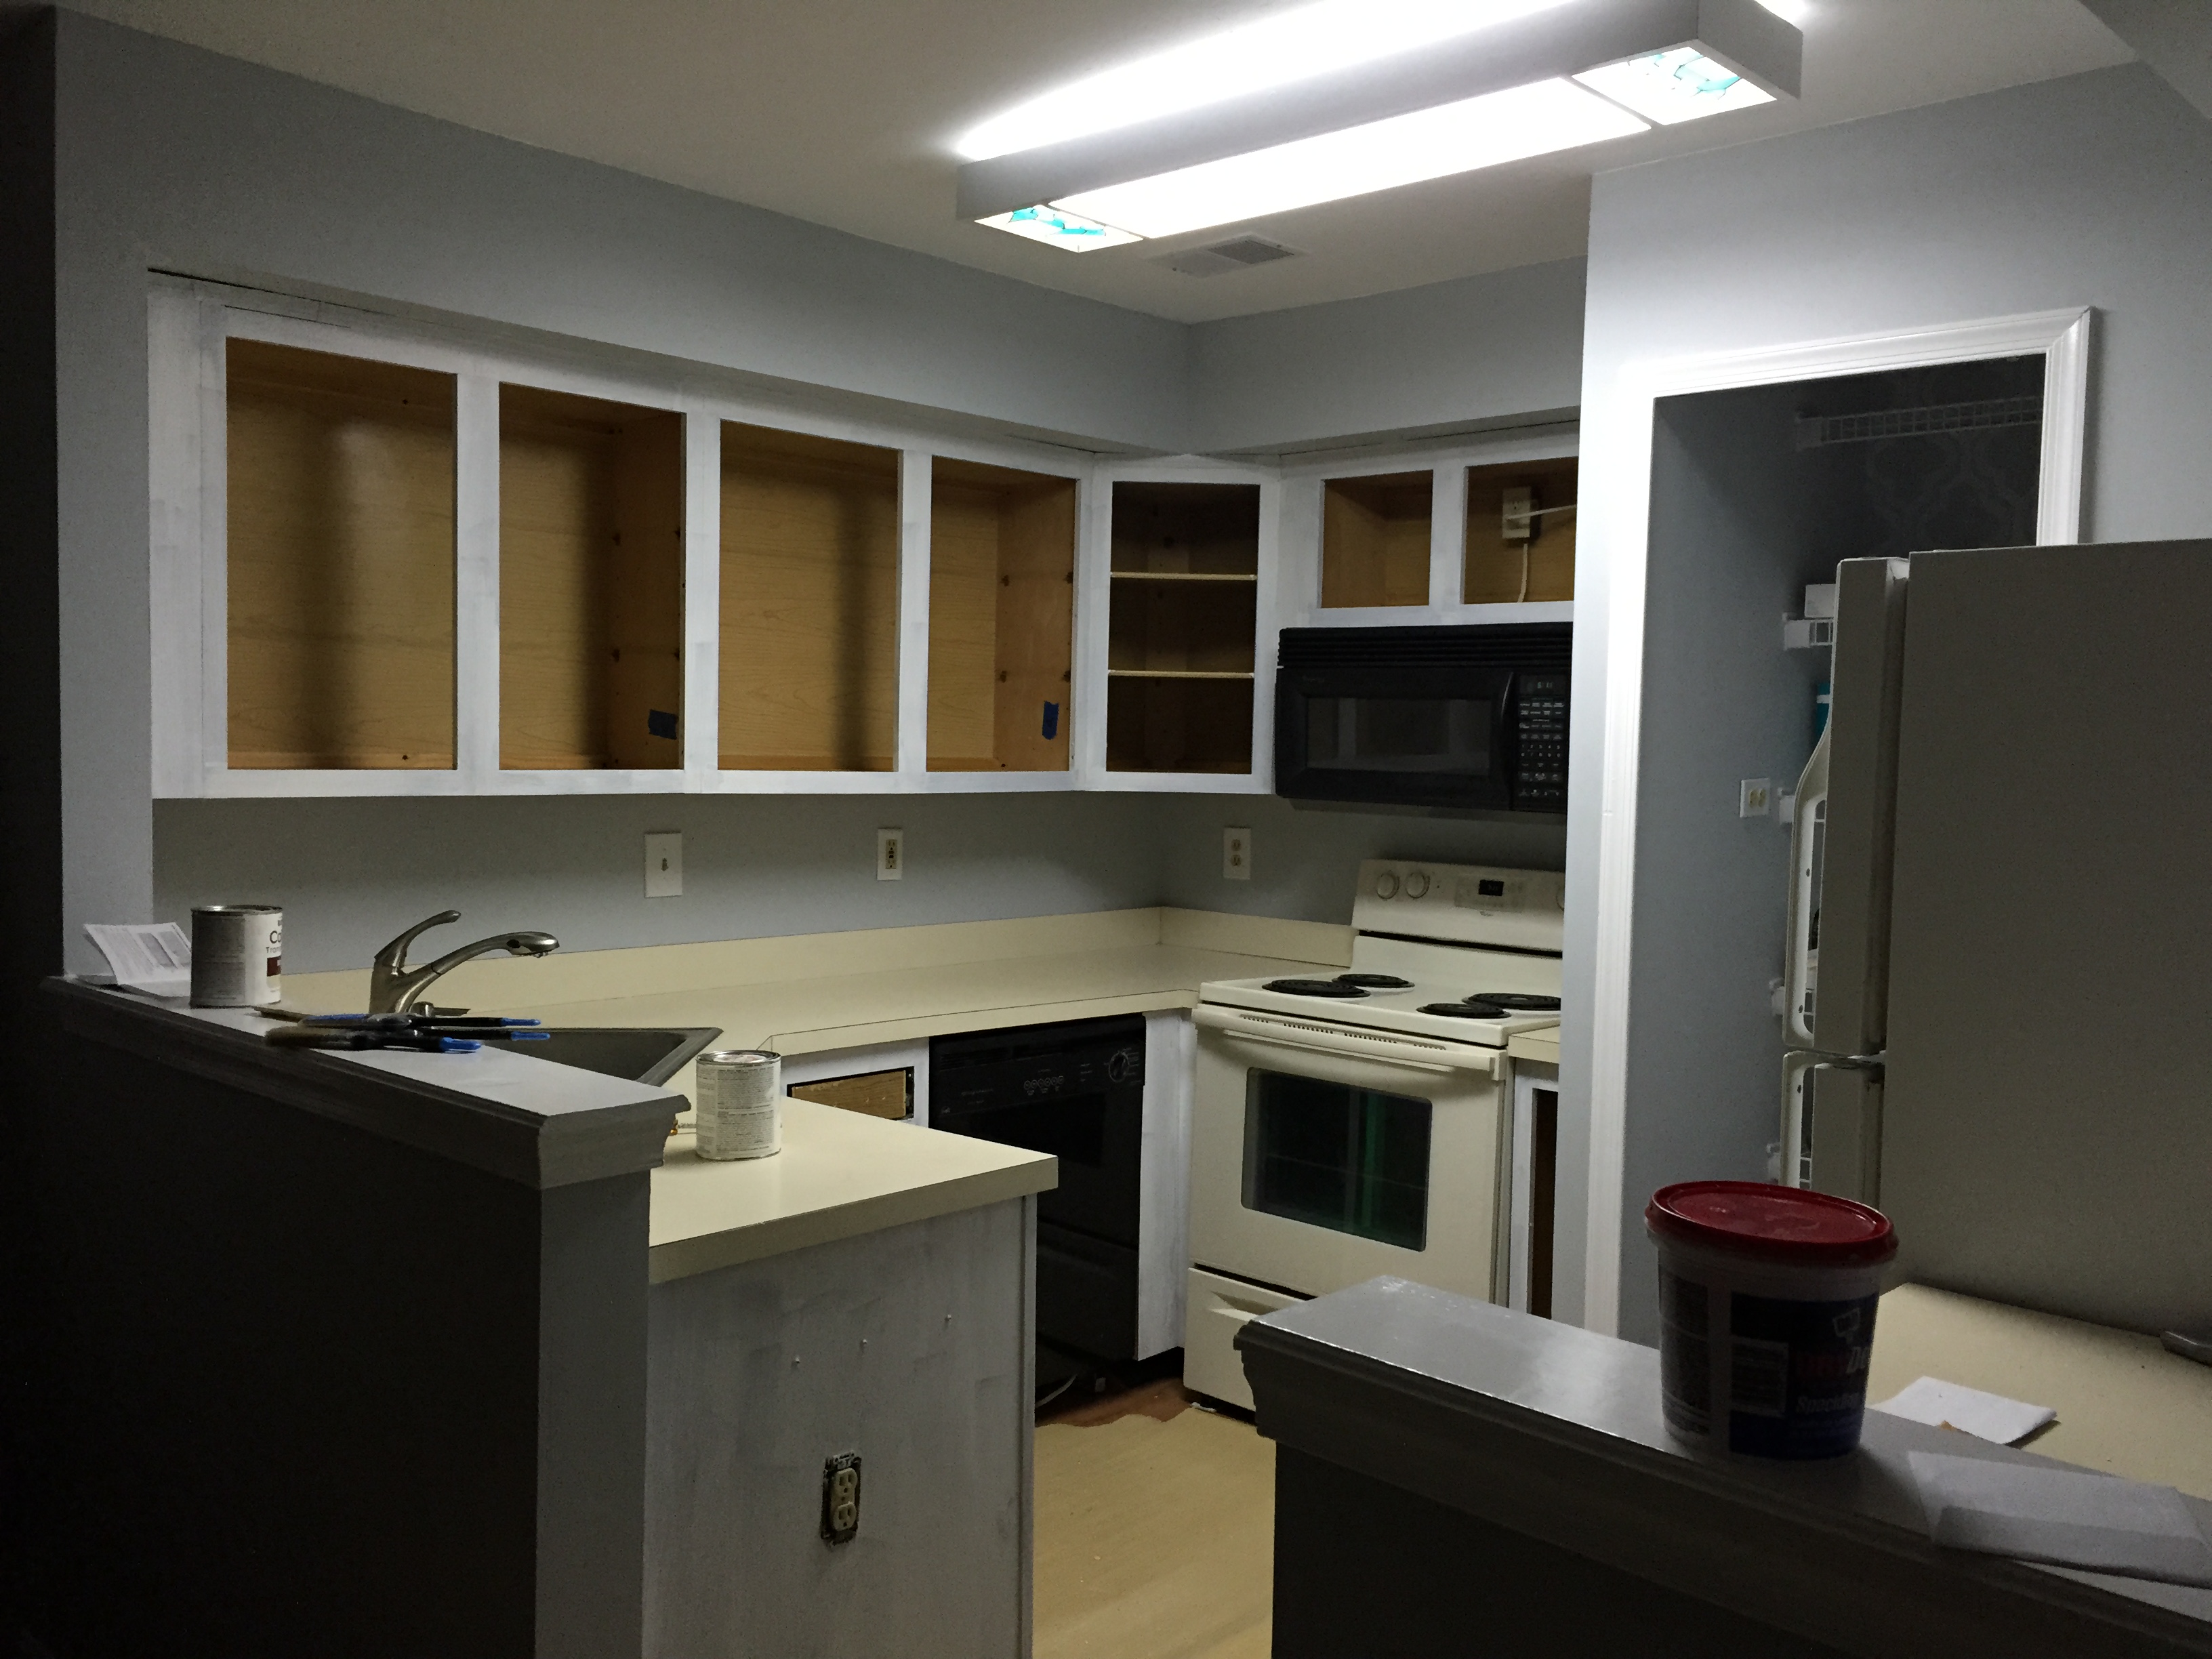
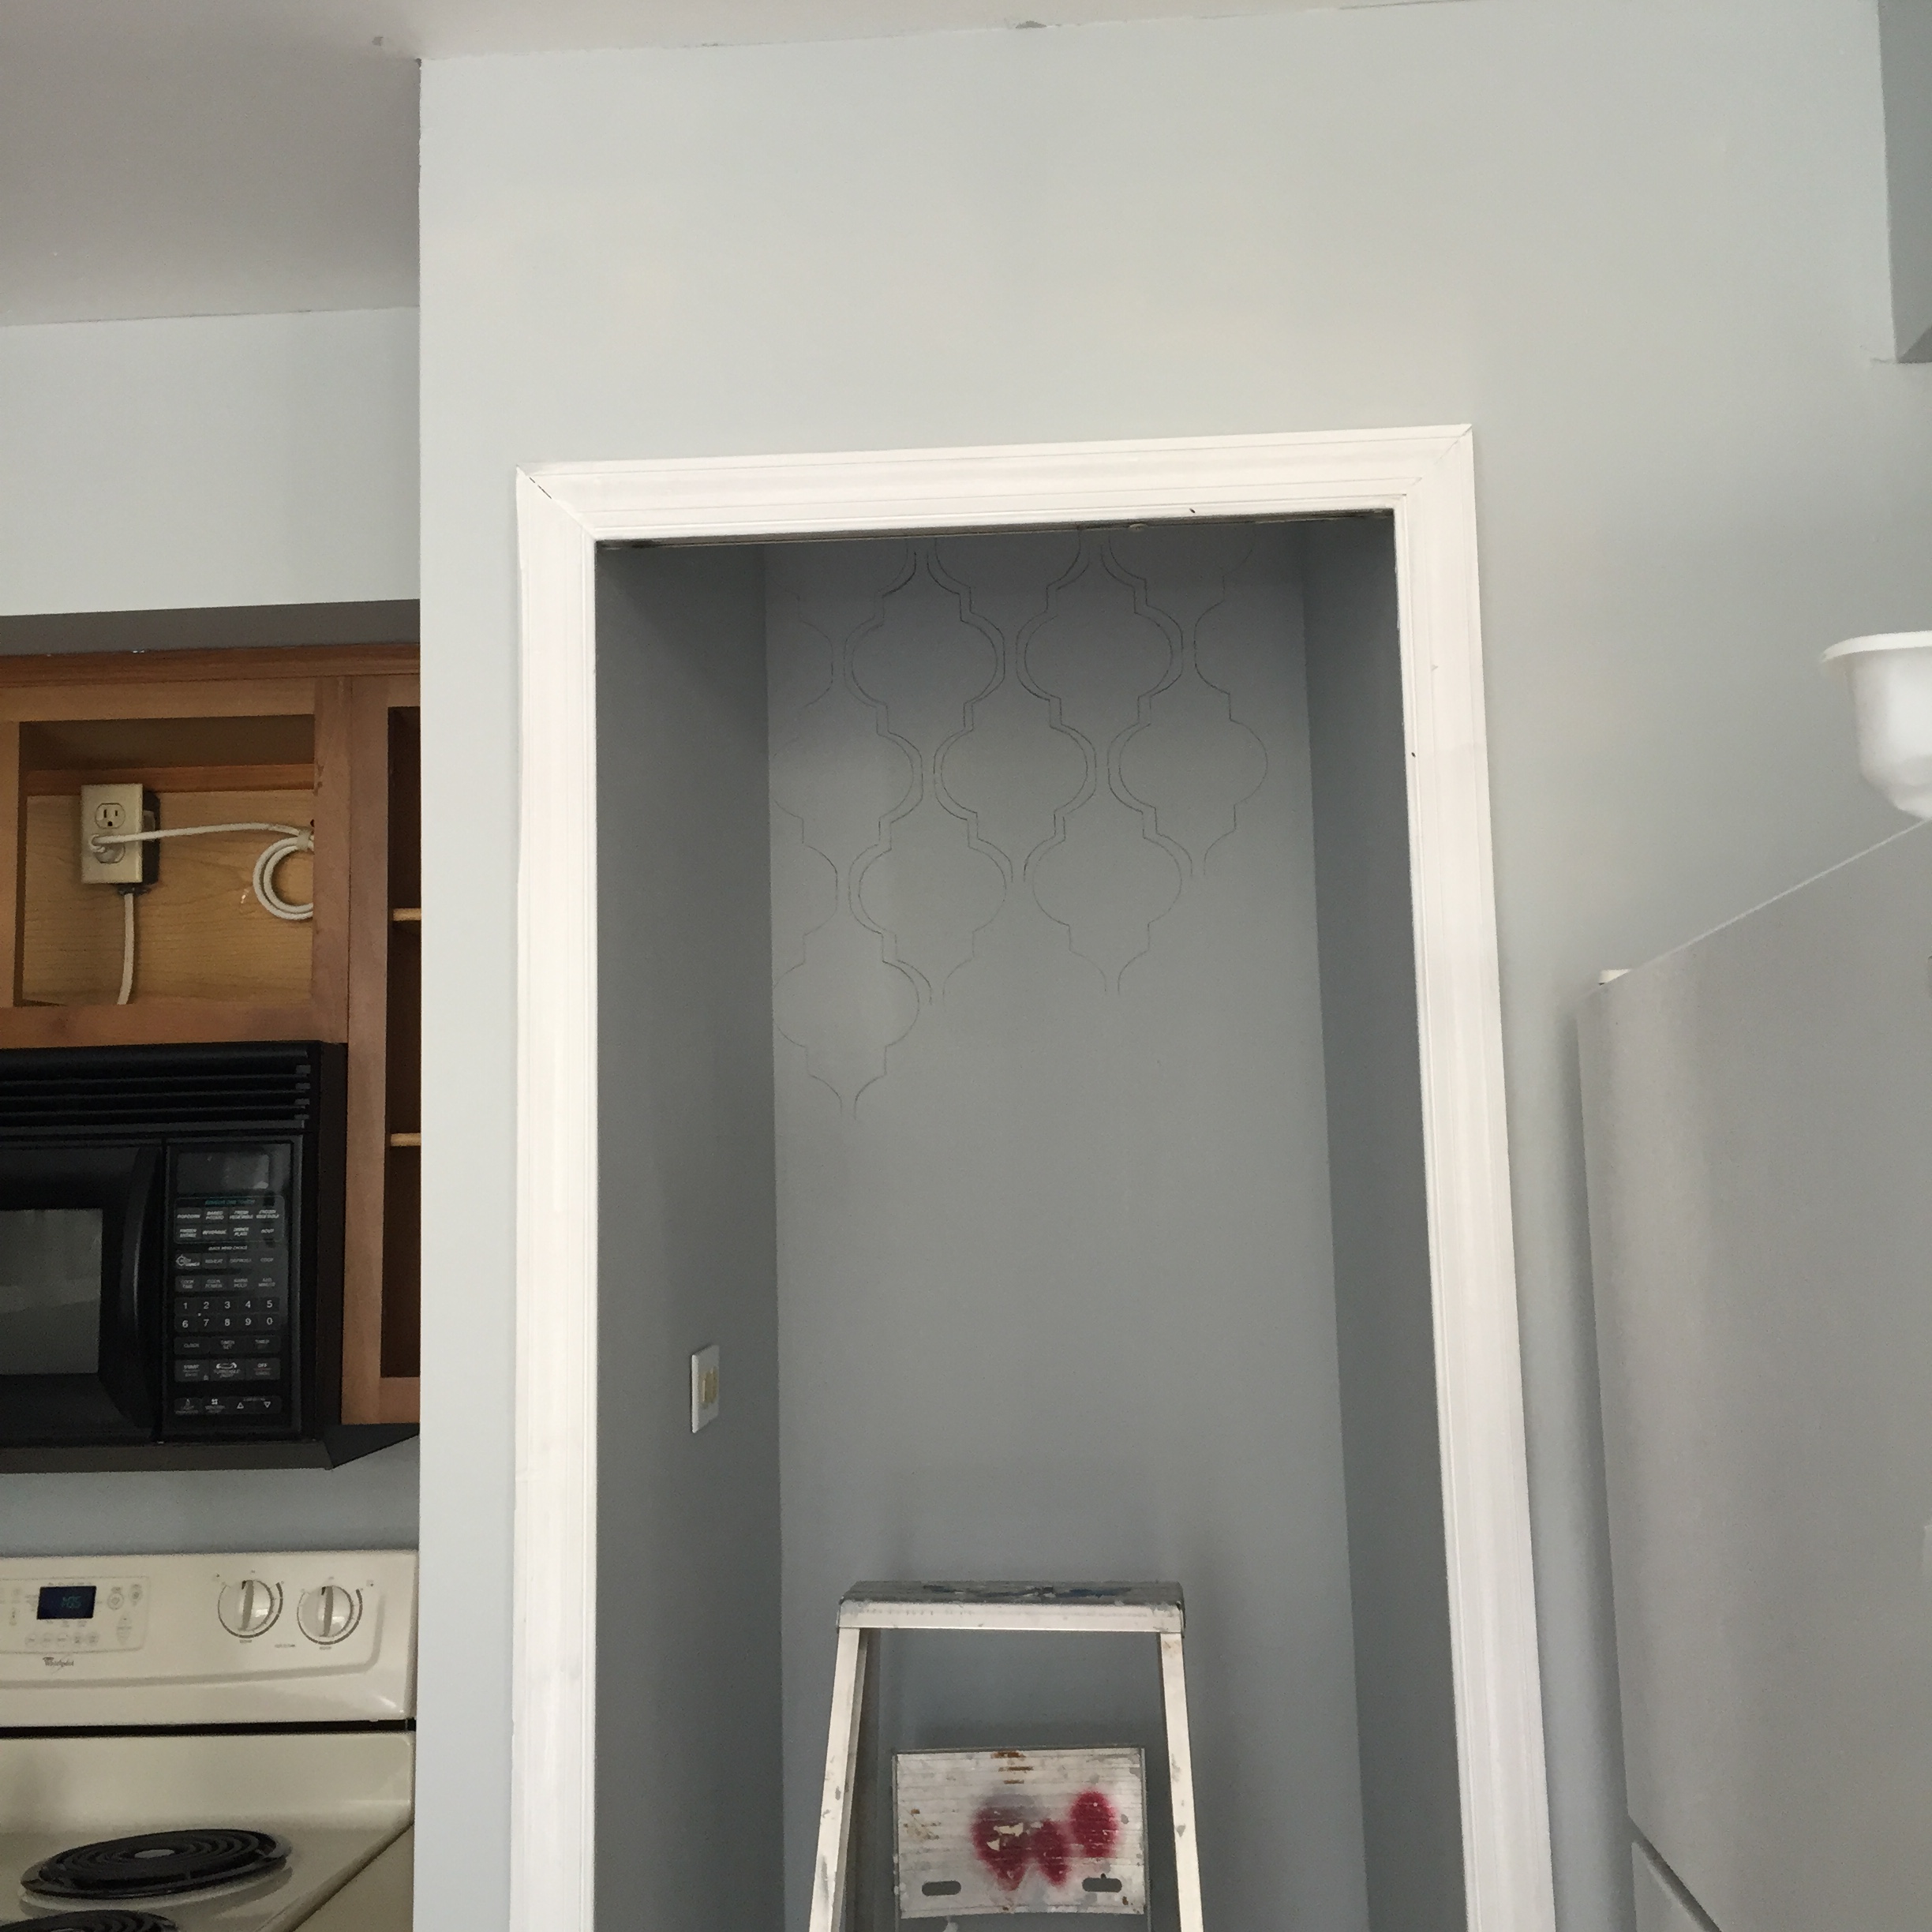
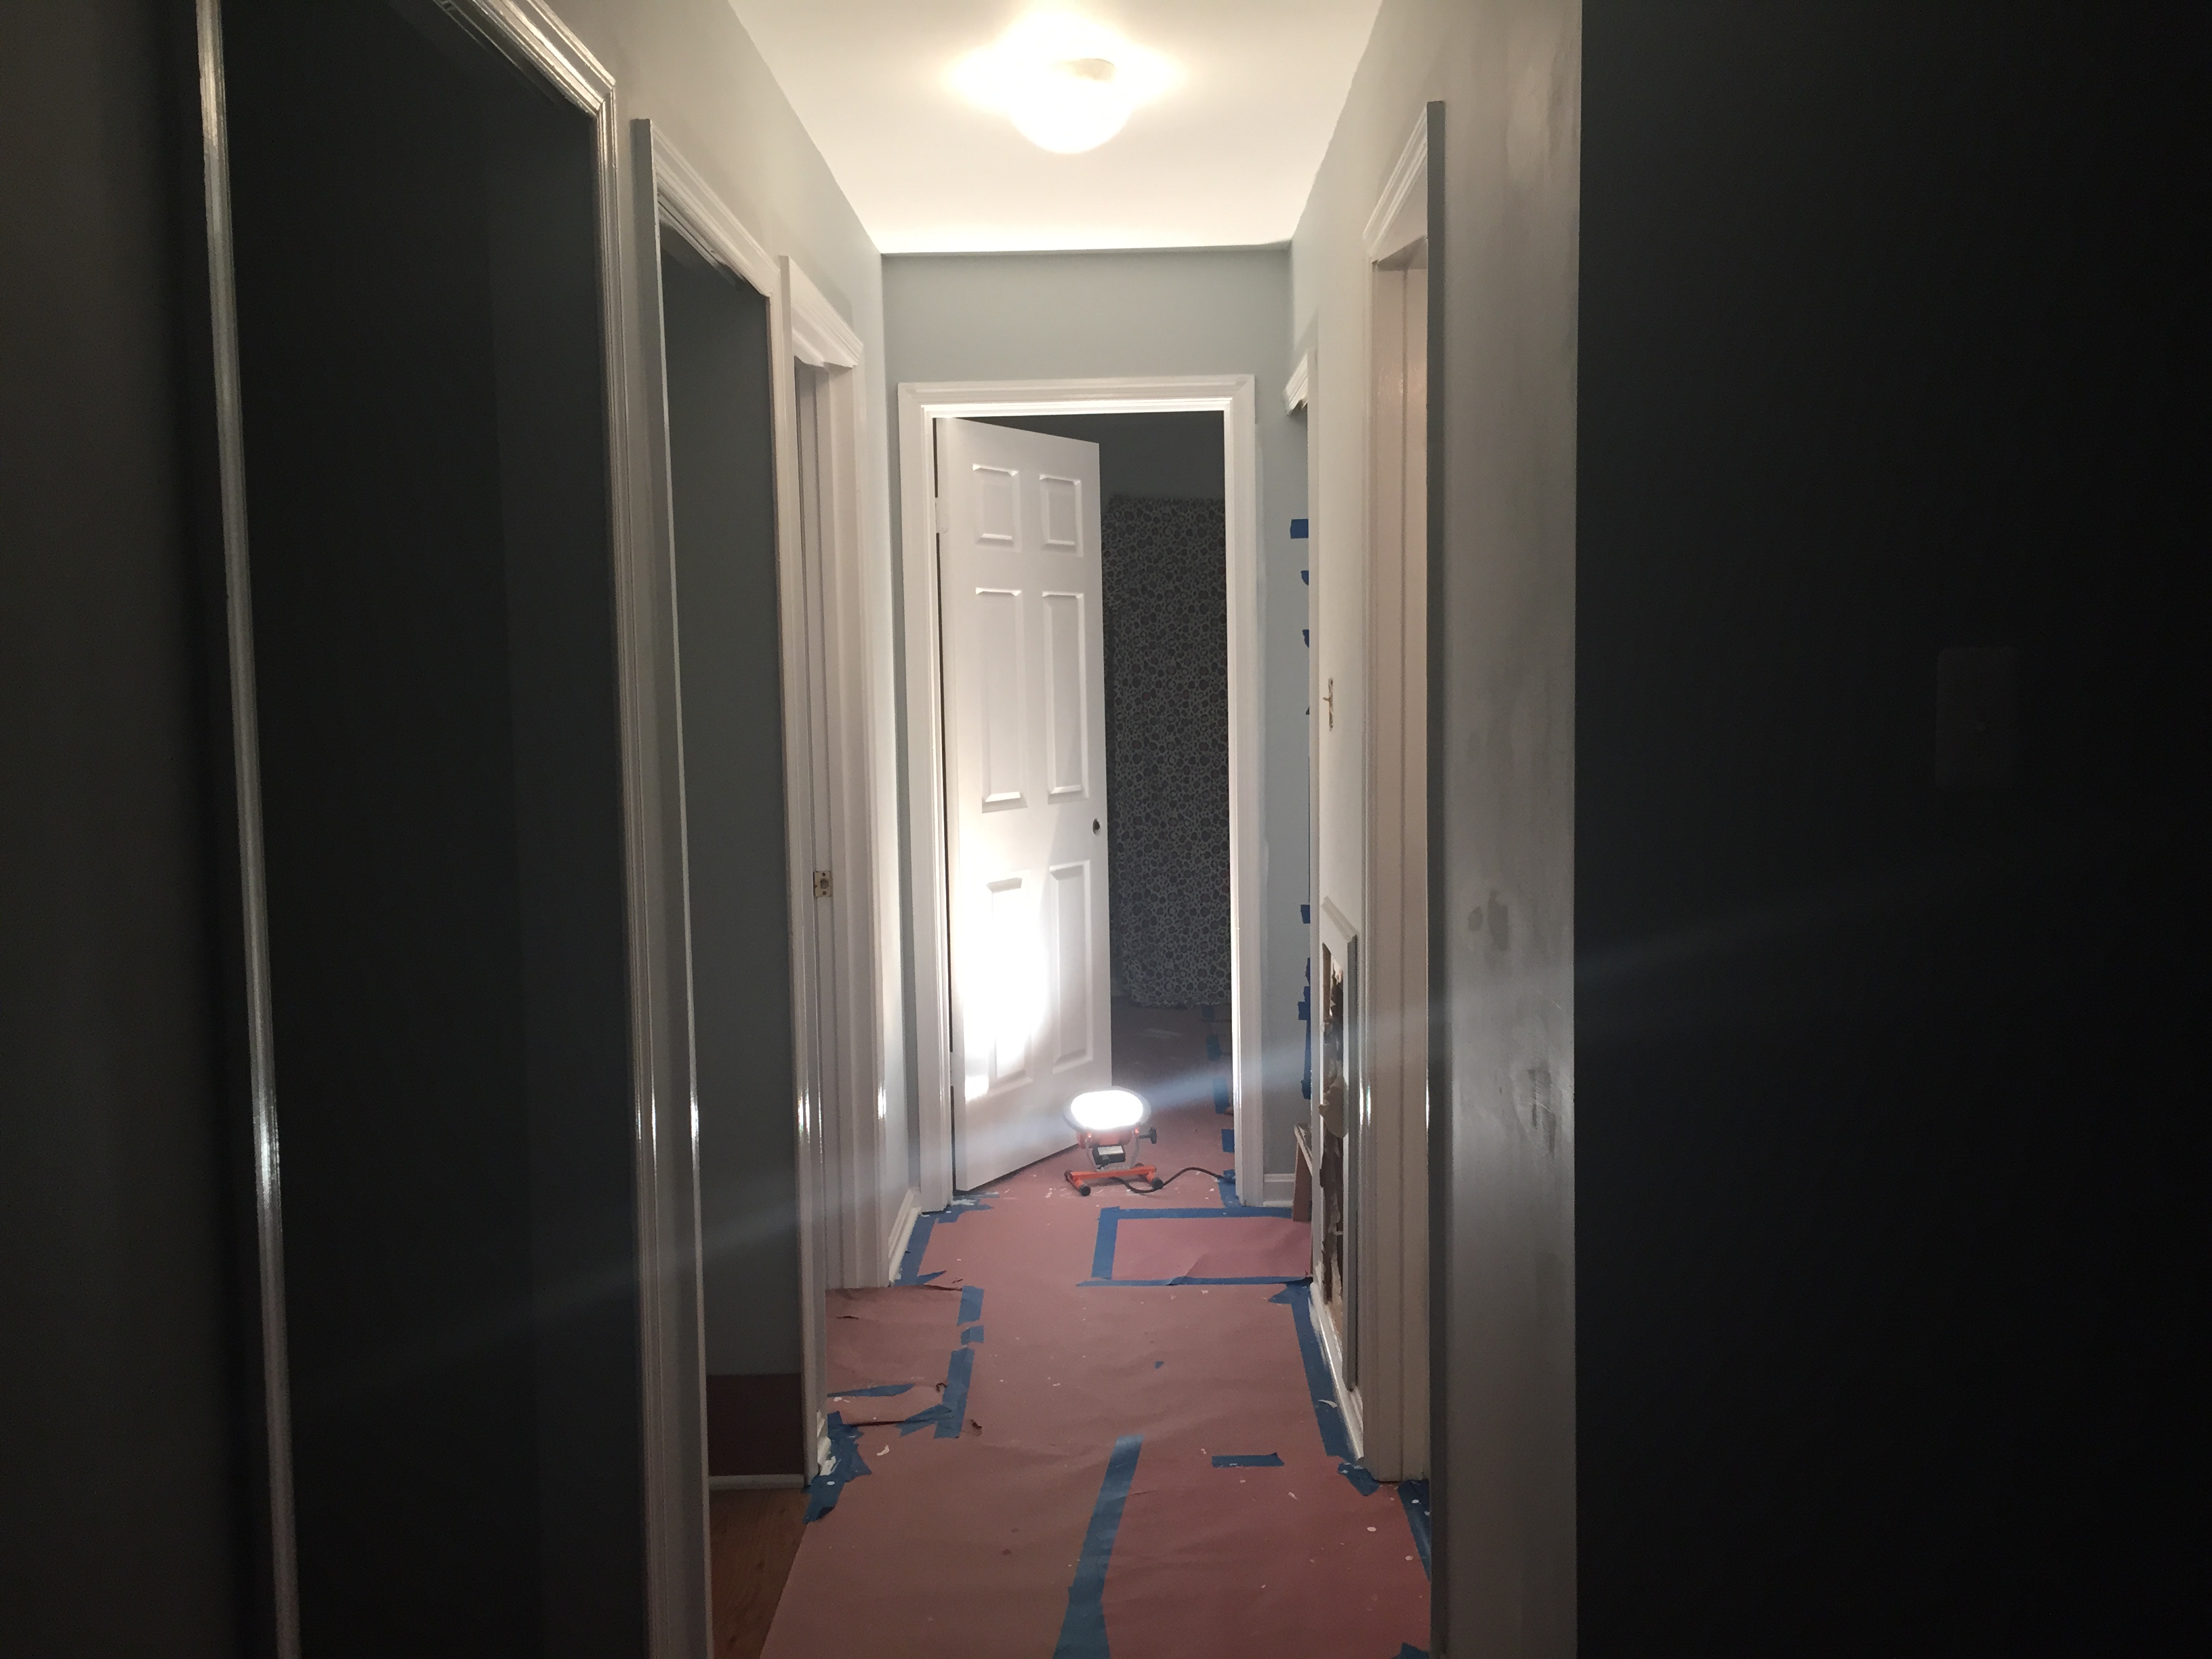
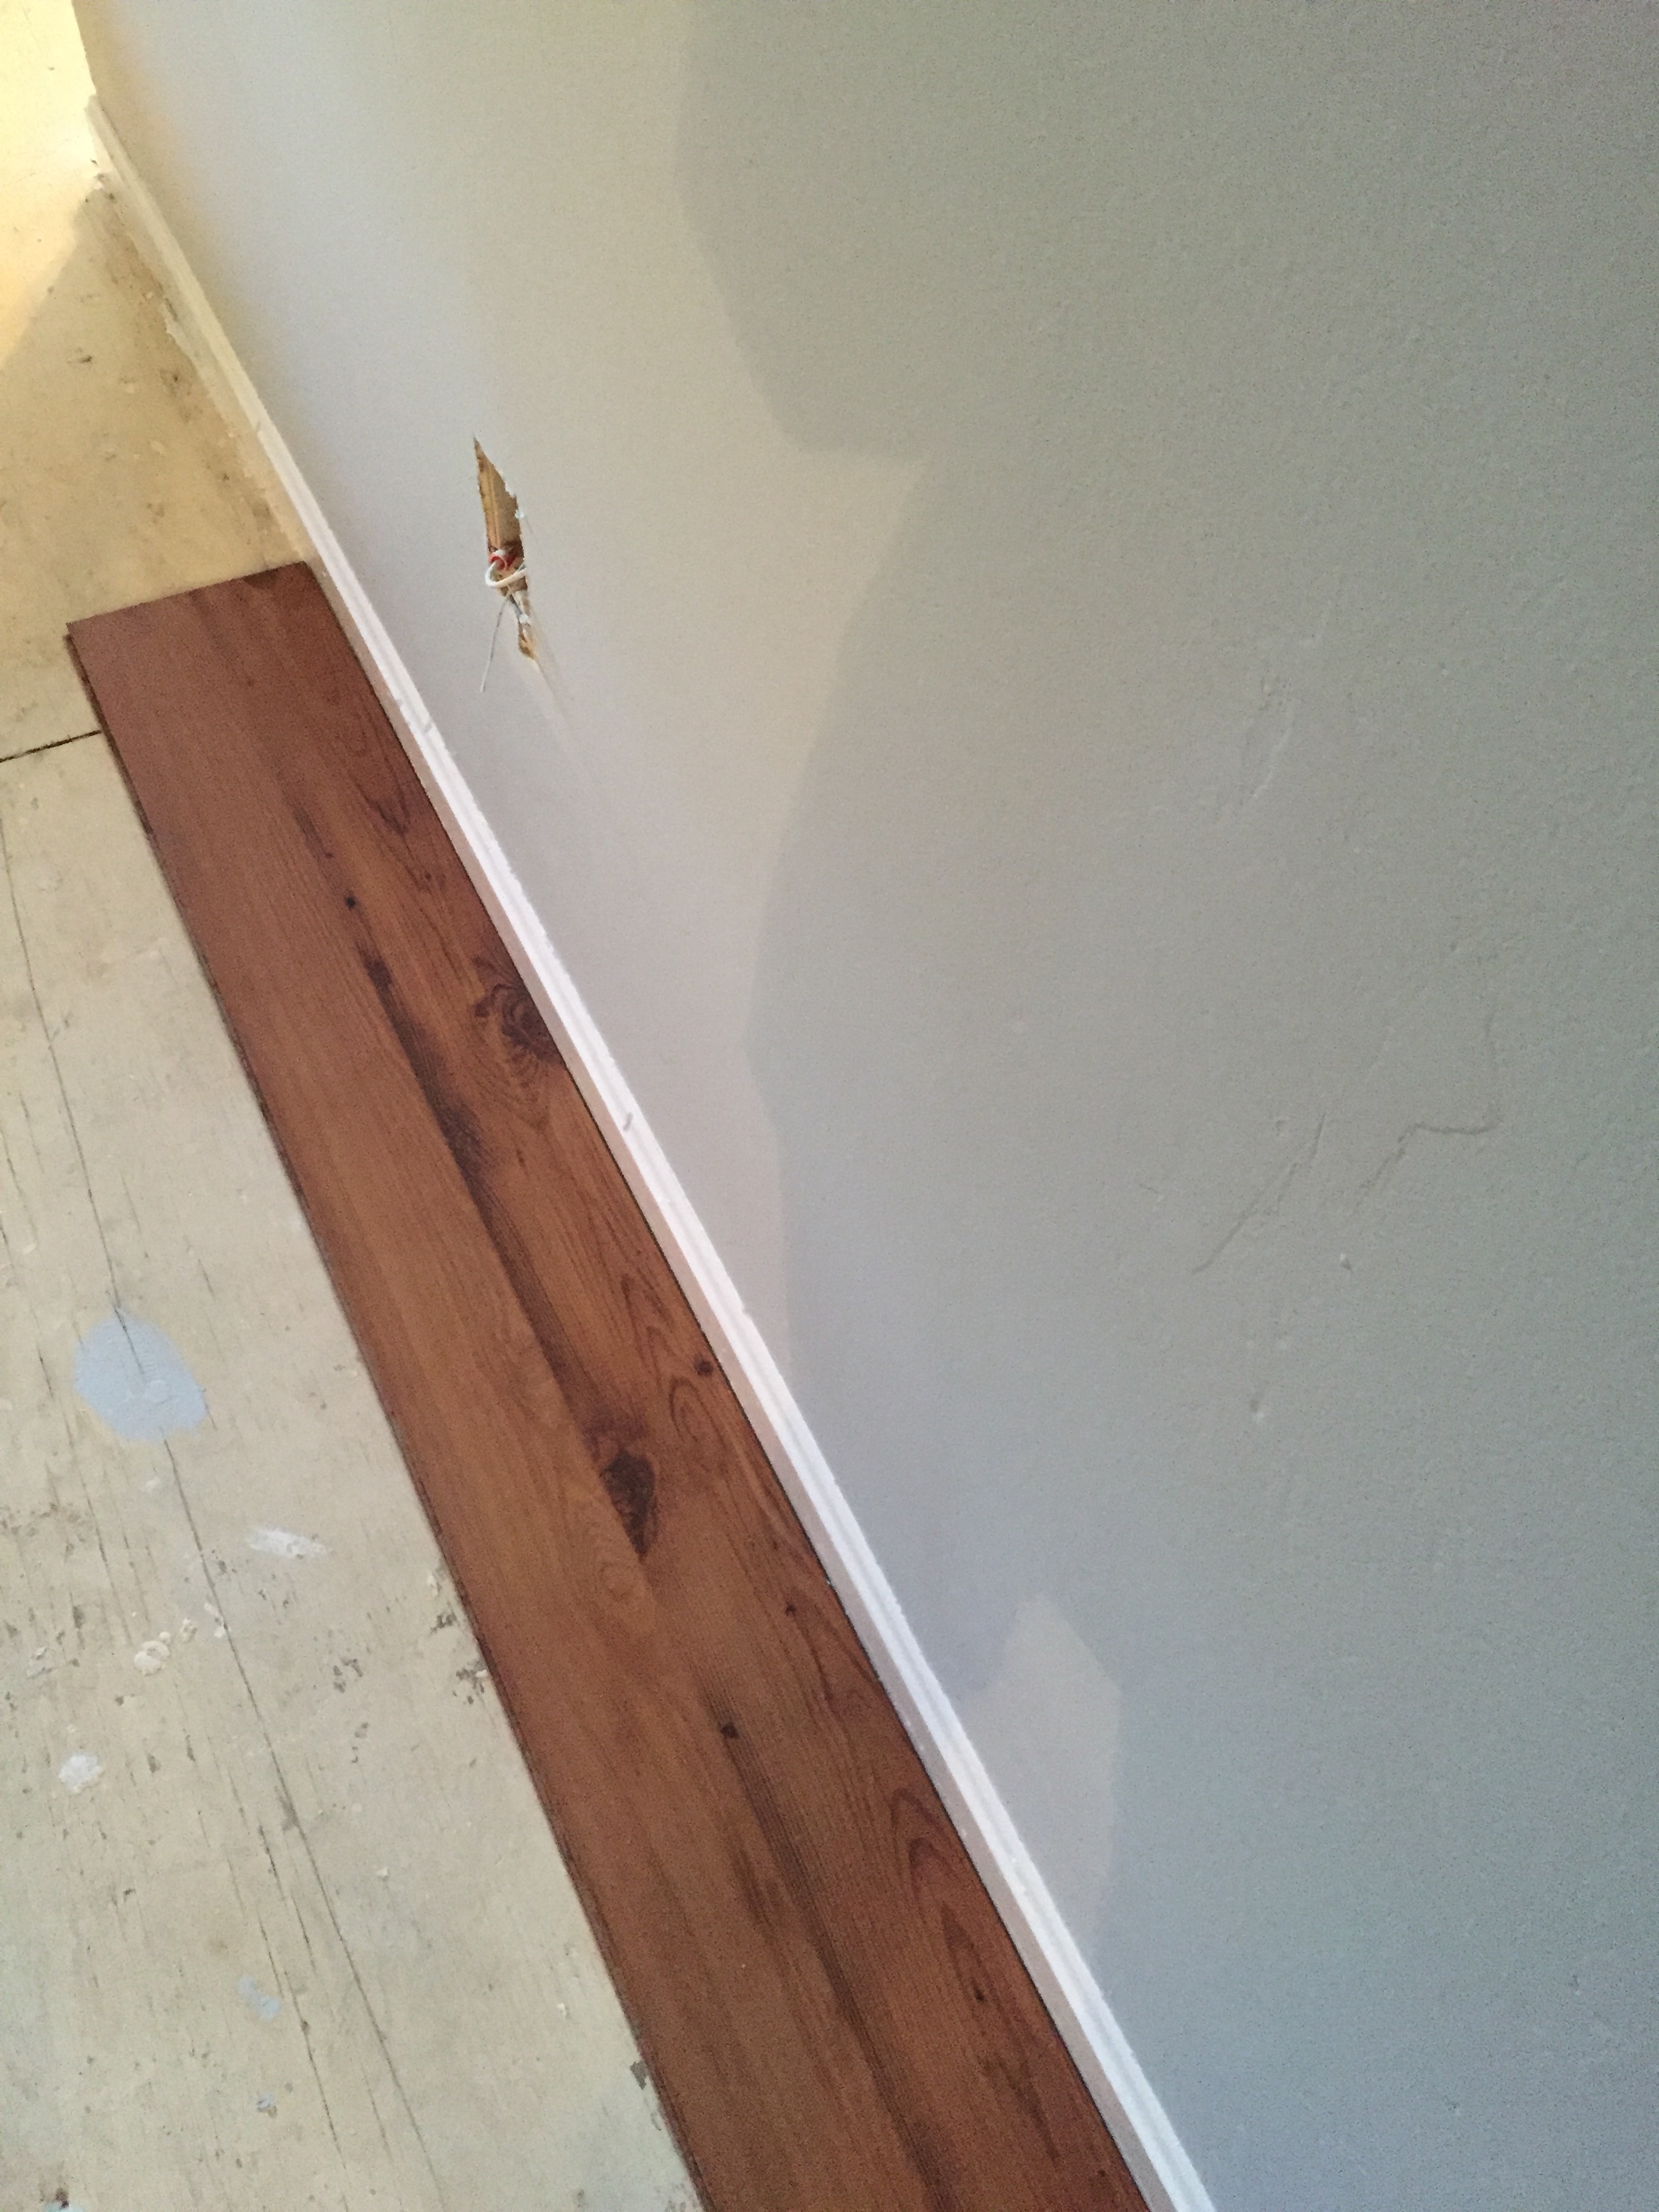
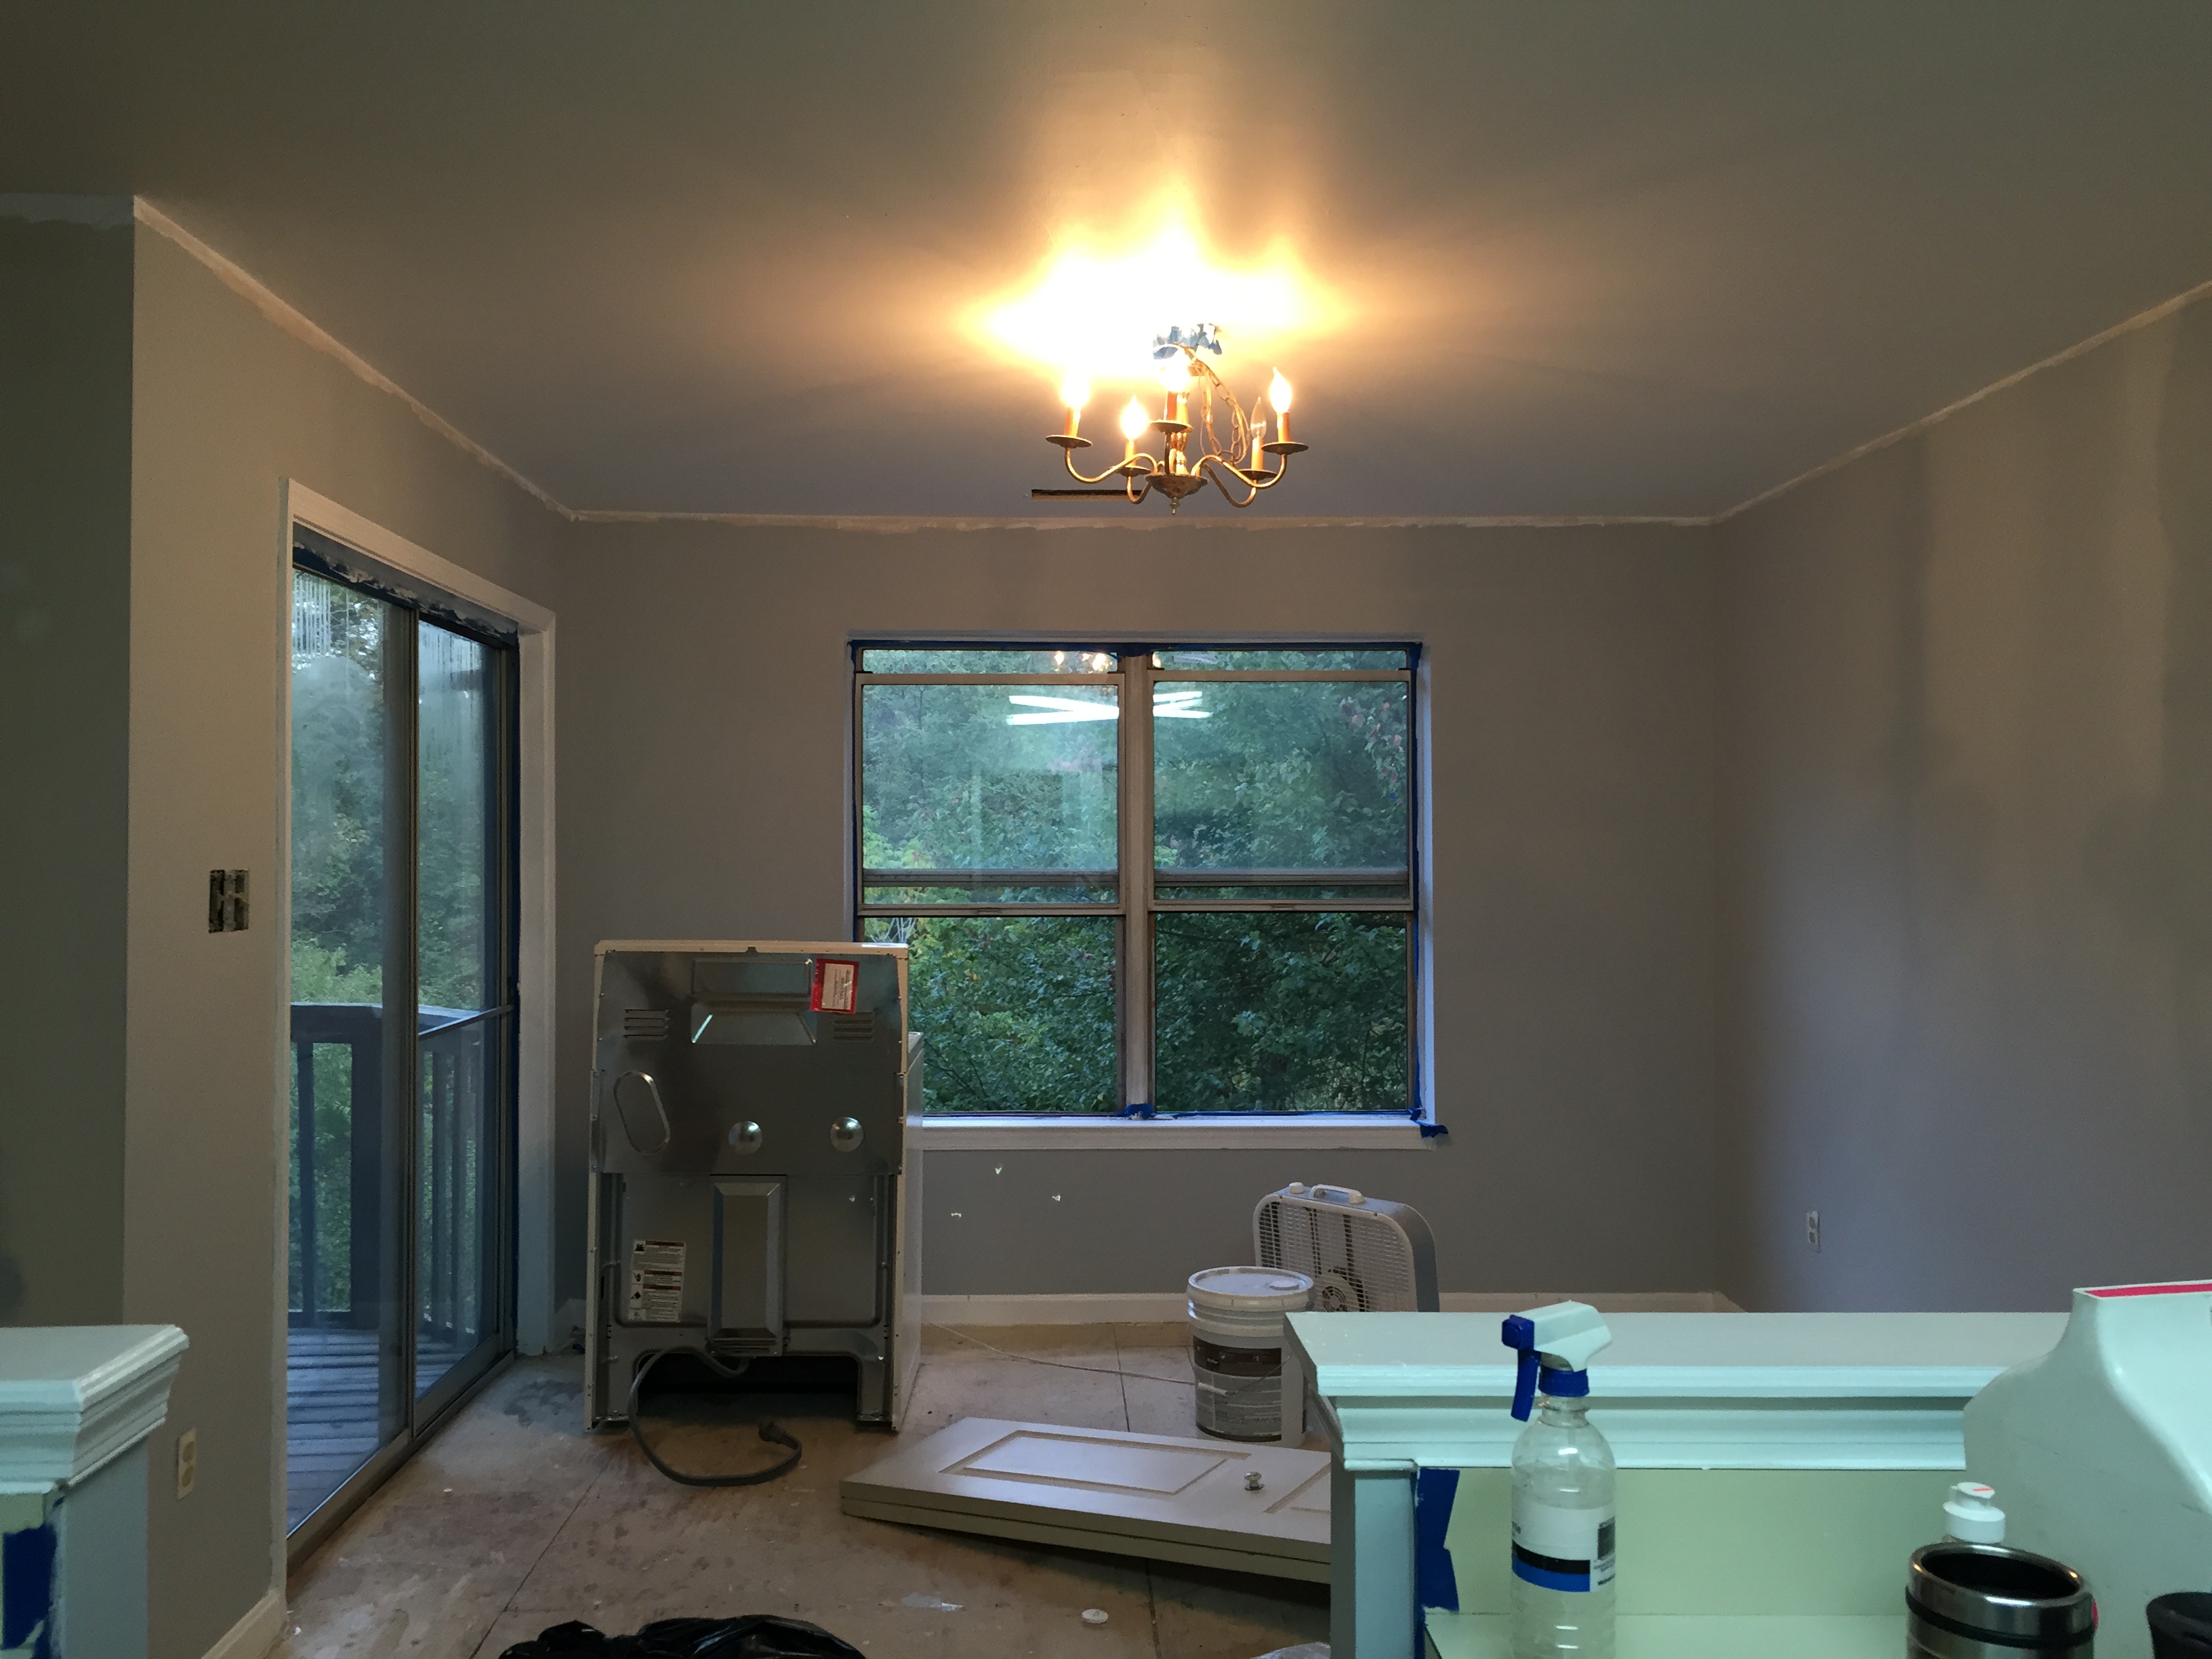
I bought a 5 gallon container of Behr’s Light French Gray to paint the entire place. I didn’t expect the color to look so drastically different on each of the walls. Thankfully the shades all go together and add a bit of dimension to the place.

IMG_3411
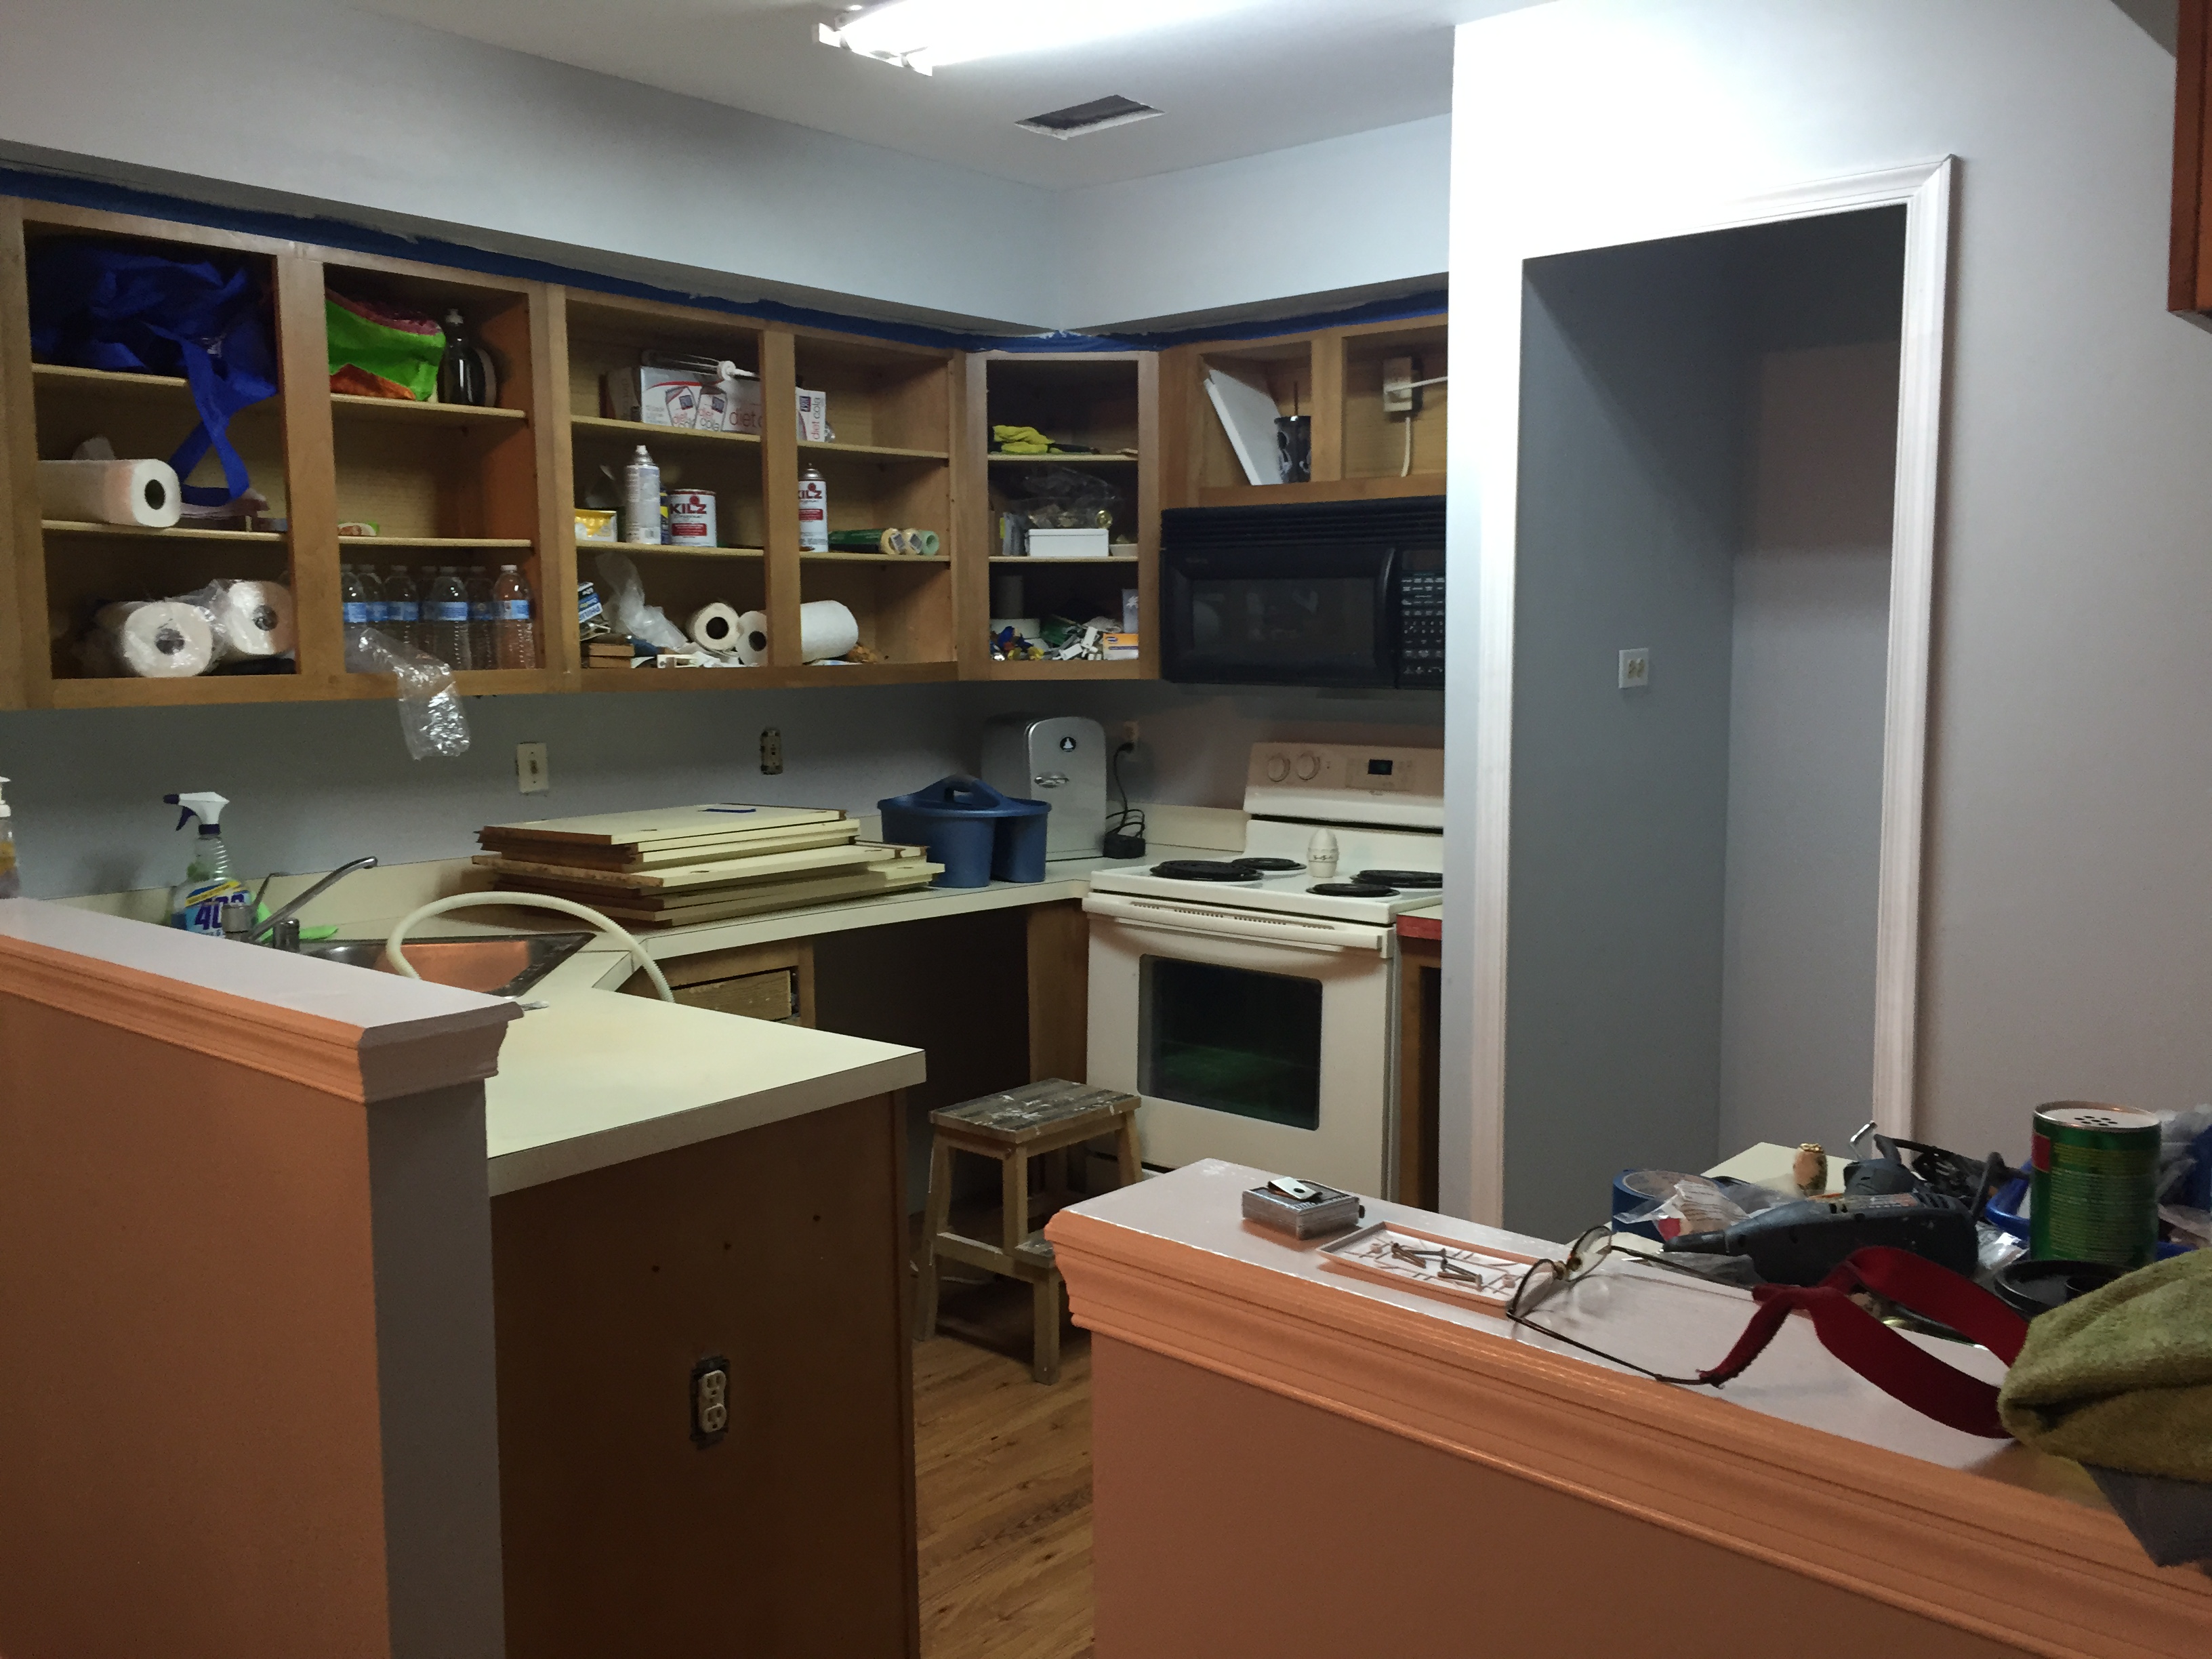
Of course there was a hitch in my plan. The cabinets now look atrocious next to the grey walls and white trim, so the painting of the cabinets has been moved up in the timeline.
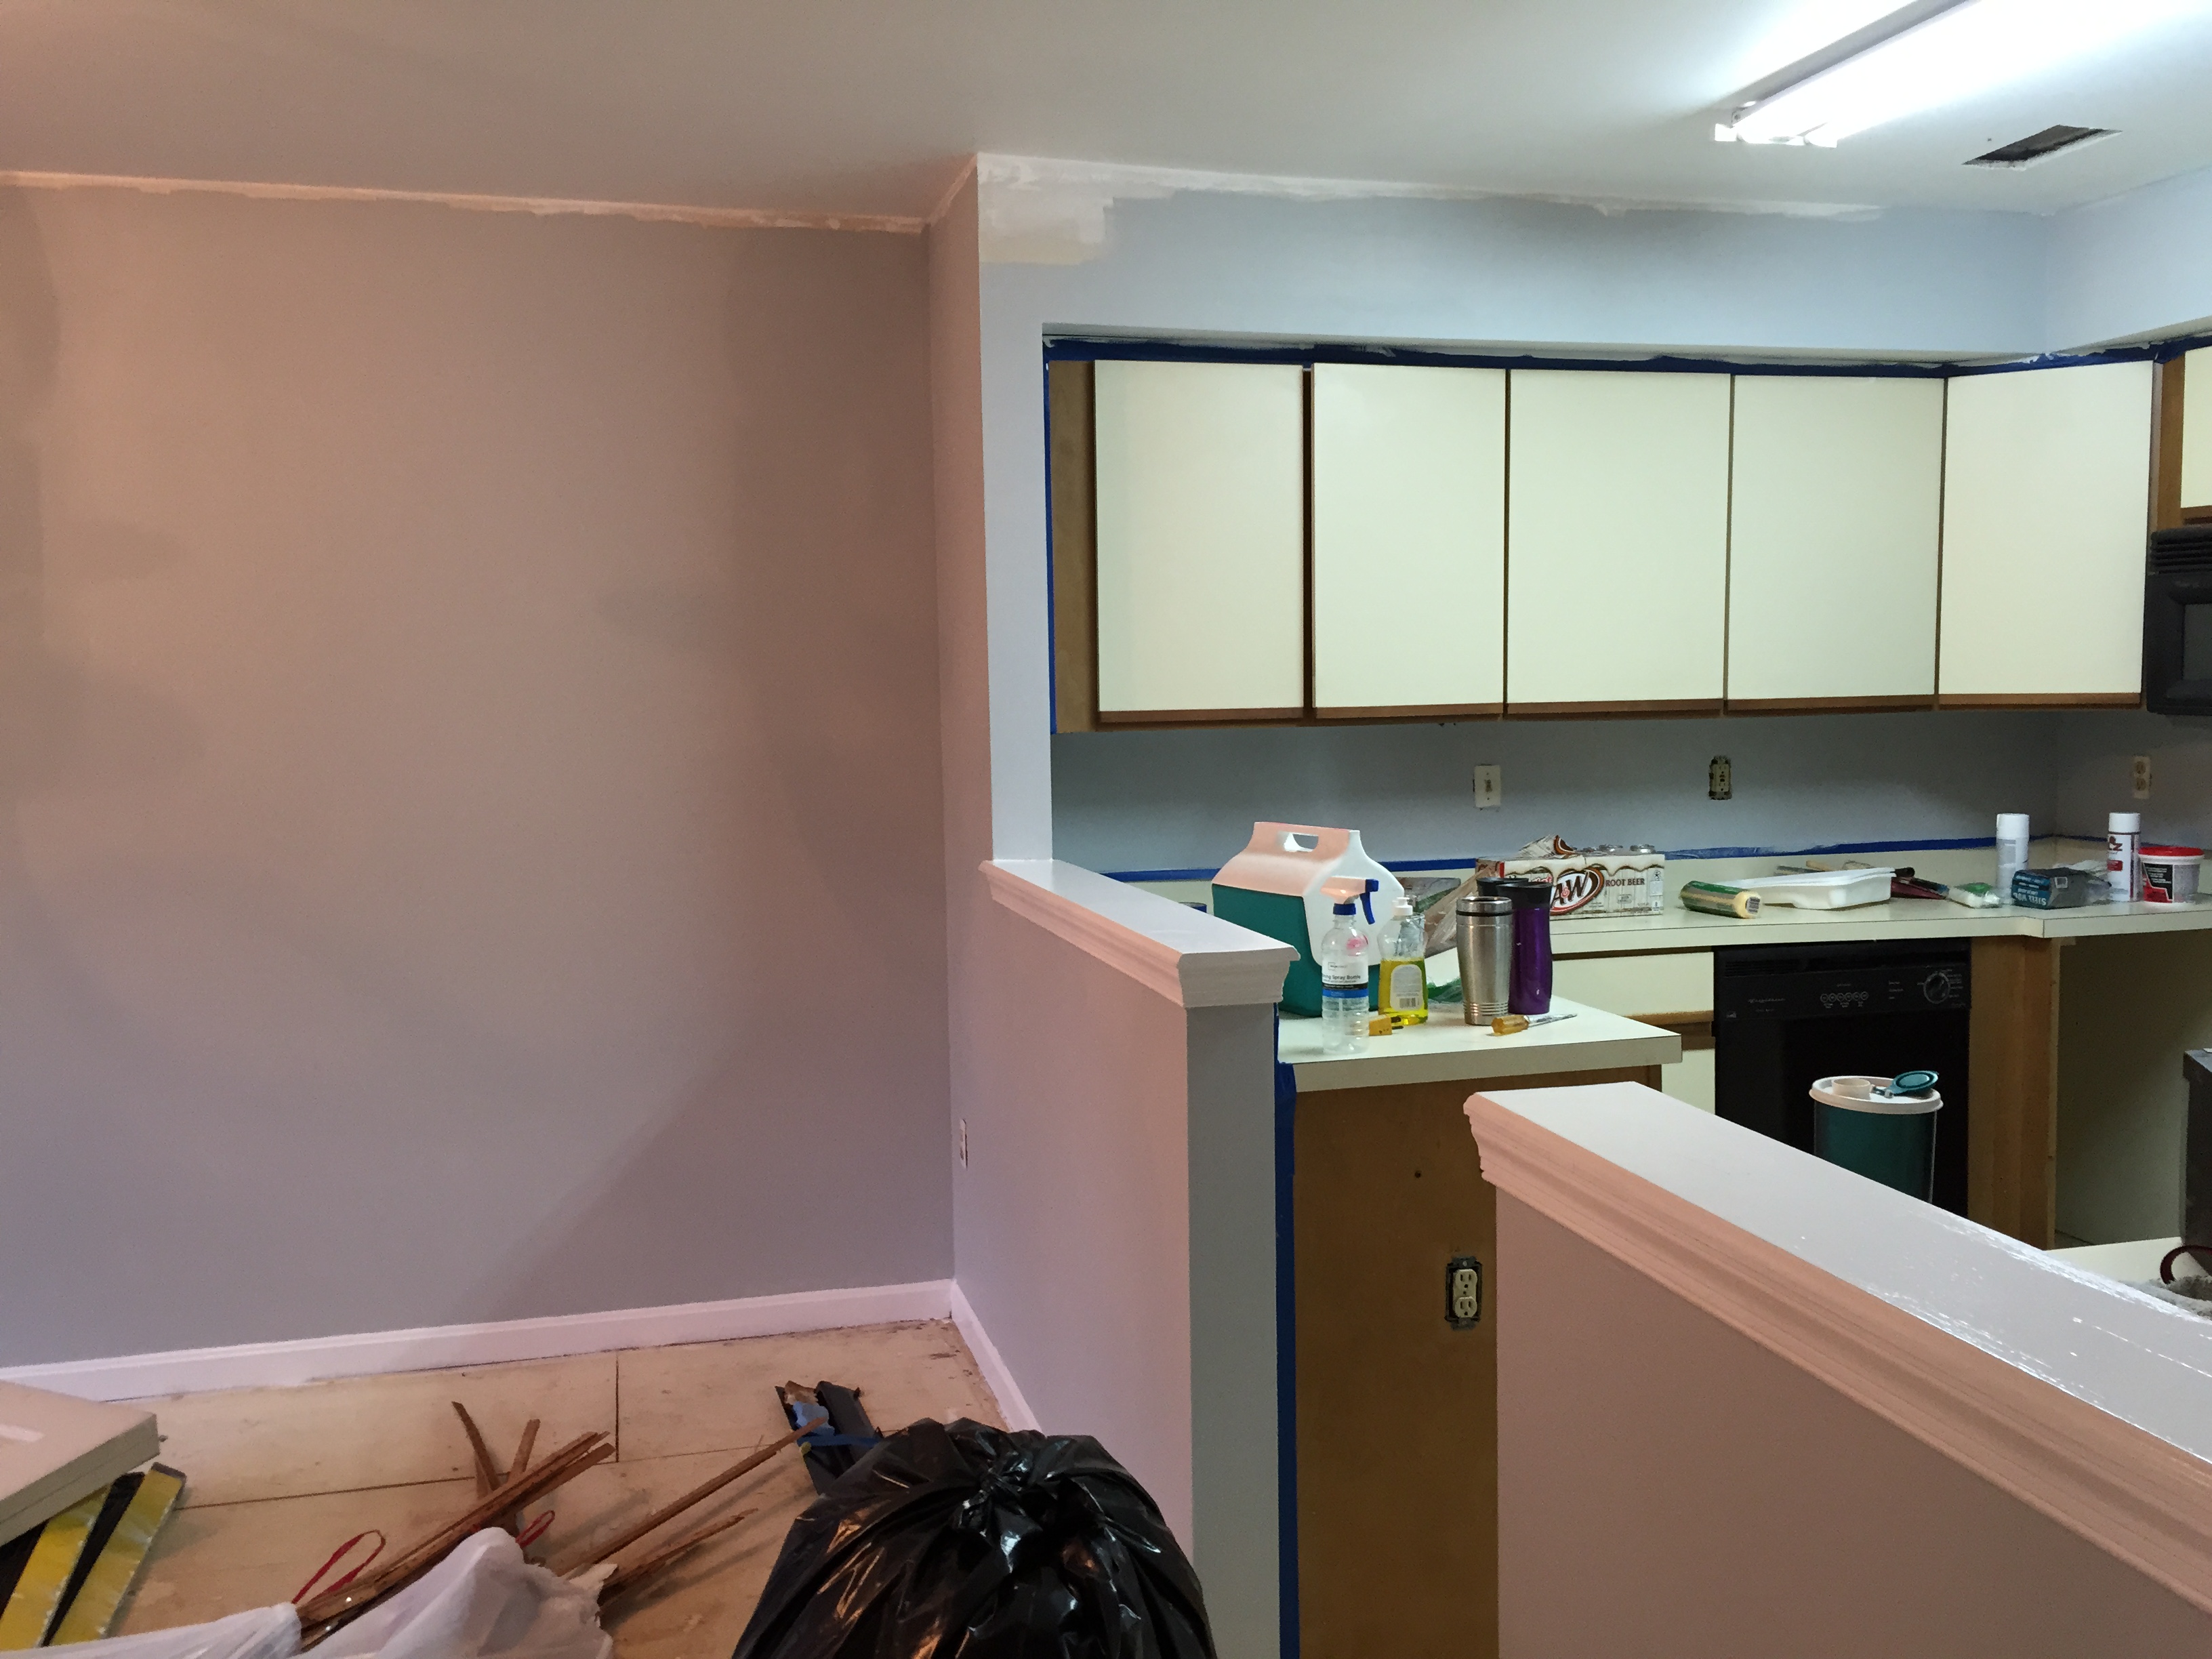
IMG_3406 I also scored this beauty of a dresser for $16. Yes, $16! The drawers are behind it. It was just too heavy to move with them. The plan is to refinish the top to match the farm table we’re building, and paint the base white.IMG_3416 We also got the first boxes of flooring. Here’s a sneak peak.IMG_3420I can’t wait to show you the floors installed.

Signature Update

Condo Project – Week 1

Happy Monday everyone!

I’m hoping with these weekly posts, I can start to catch up on all the progress we’re making. After this post, I’ll be 1 post behind where we’re actually at.

I was lucky enough to take off Monday-Wednesday, and it was definitely necessary given all the wallpaper.

We got the border off in the kitchen and dining room, and started working our way into the living room.

IMG_3369 IMG_3370

The wallpaper on the back wall of the living room, entry, and hallway started coming down too.IMG_3371 IMG_3372

Then, I figured out we’d been using the wall paper steamer all wrong. Things would have gone much more quickly had I left the steamer on the wall slightly longer. With the technique down, I got to work in the hallway, and managed to do the majority of it in about an hour.IMG_3376 IMG_3377 We also got the multi layers of border out of the master.IMG_3382 The border in the guest bedroom was by far my favorite to remove. It was basically a sticker so I knocked this out in twenty minutes, no steamer required.IMG_3384

By Friday evening, I was pooped. I came home and flopped on the sofa for some cuddles with the dogs, and wrestled with Remington a bit, and then came the fun part. He knocked me off the sofa onto Zoey. Apparently 100+lbs of Andrea is too much for her bad back, and in a moment of panic, she managed to do this to my forehead. I’m fairly certain she was more scared than I was, and as you can see in the picture, she was more than apologetic and insisted on lying on top of me and giving me kisses until my mom came back home to patch my head up.

IMG_3388Coming up next, week 2’s progress. Once I’m caught back up, I’ll be back to a weekly schedule simply because my days are literally “Go to work, go to condo (or class), go home to eat, sleep, and repeat.”

Thanks for reading,

Signature Update

Condo Project – Day 2

Are you ready for Day 2? I am. Things have been so hectic, it’s hard to believe Day 2 actually happened 10 days ago.

Day 1 was focused on junk. Day 2 can be summarized by wallpaper and staples.

Day 2 kicked off with a dozen Fractured Prune donuts, because why not. {They were gone by 1PM}.

The floor to ceiling mirror in the living room came down {in pieces…}.

IMG_3342


And for once I was glad there was wallpaper behind it because the excessive adhesive would have destroyed the drywall even more than it did.

IMG_3345_2IMG_3346_2

This is the part in the project where my ADD really shows – a lot of walls with partially removed wallpaper. I kept jumping from wall to wall in various rooms which in hindsight wasn’t the most efficient way, but there really isn’t any efficient way to remove an entire condo full of wallpaper.
IMG_3344IMG_3347The ceiling fan in the master bathroom came down. {By the way check out the awful cat border!}
IMG_3353

We busted through the access panel for the master bath. During the home inspection,  we actually took this panel off to see the plumbing only to discover that there was actually just a piece of drywall behind it. That had to go.IMG_3354We started patching walls.
IMG_3356

The washer and dryer were moved to the living room for cleaning and preparation for the new floors.IMG_3358

It’s areas in the condo like these I’m disgusted by. This was bad enough, but the kitchen was BY FAR the grossest room of the house. I’m still amazed anyone cooked food for consumption in there.IMG_3359


Not pictured, my best friend, who played a big part in the networking to make me buying this condo possible stopped by for a few hours, and we started removing wallpaper in Master Bedroom. That’s when we discovered that there was not 1 but 2 layers of wallpaper in the Master. Thankfully, the wallpaper only existed in the closet, and they seemed to have removed first layer from the harder areas like the skinny sections around the bathroom door for us. Both the master bedroom and bathroom still had 2 layers of borders on most of the walls.
IMG_3361

I stayed late and tackled the closet before heading back home for bed.

From here on out, pictures trickle down. As much as I’d like to spend every waking hour on this project with several helpers, most people, including myself have other commitments like work, so work has slowed down considerably. I’ll be doing weekly updates from here on out.

Signature Update