Using Workflow to Launch Spotify Playlists

For as long as I’ve owned an iPhone, a music app has occupied the fourth spot on my dock and for nearly as long, that app has been Spotify. Those who saw my last post about what’s on my homescreen will notice it’s been removed from the dock. That’s because I have an even easier way to use access Spotify.

After dipping my toes in some Workflow ummm… workflows?… I started playing around with other things I could do which lead me to my Spotify workflow. Spotify lived in my dock primarily so I could have quick access to one of the few playlists I listen to while driving, but the app isn’t as intuitive as I’d like so I usually ended up fumbling around. That all changed with one simple workflow that I can access from a Today widget.

Image-1

Tapping on “Open a Playlist” gives me access to my top three playlists from anywhere on my phone simply by swiping down. Even better, it was a breeze to set up because Spotify allows you to copy the deep link directly from the app (either the Mac version or iOS version). You can modify the workflow for yourself by going the the album or playlist and clicking the three dots to access the Share menu where you’ll have the option to “Copy the Playlist Link”. Once you have the link, you’ll need to modify it a bit so that it opens the Spotify app rather than Safari. Your link should look something like this (minus the quotes):

"spotify:user:yourusername:playlist:playlistcode"

I’m toying with the idea of adding a 4th option to search Spotify entirely, but for now this has been sufficient. It’s also a heck of a lot simpler than fumbling through Spotify’s unintuitive app layout.

What’s on my home screen? (2016 Edition)

It’s been a while since I’ve posted my last home screen post, December of 2014 to be exact. I was surprised to see that many of the apps I used back then are still on my phone (14/20 are still there), which reaffirms my belief that innovation in the App Store has someone stagnated. Despite my interest in trying new apps, none seem to come close to the ones on my home screen and the top lists on sites like Homescreen.is and the App Store itself seem to point to other people agreeing as well.

IMG_5770

I’ve always viewed the home screen as a dashboard of sorts. Across the top row, you’ll find Fantastical, Dark Sky, Omnifocus, and the Fitbit app. Together these apps paint a pretty good picture of my day: where do I need to be, how’s the weather, what do I need to do, and general activity stats (sleep, heart rate, weight, etc). (I also use Fitbit for tracking how much water I drink.)

The next row is for reference: Day One for journaling, Momentum for habit tracking, Mint for finances, and Notes for capturing bits and pieces I want to remember (carryout menus and what we usually order, date ideas, restaurants to try, etc.)

My third row is for media: Reeder and Pocket for RSS and anything else I want to read or watch later, Overcast for my ever-growing podcast obsession, and Spotify, which for the first time ever has moved out of my dock. I’ll explain why in a future post. (Hint: Workflow is involved.)

The next two rows are kind of my miscellaneous frequently used utilities: Waze, Phone (although I rarely use my iPhone as a phone), 1Password, the App Store and Settings.

Last but not least, the dock, which also features an Andrea-home-screen first – only three icons: Messages, Airmail primarily for triaging mail that I later process at my Mac, and Safari.

For those of you wondering, no I didn’t clean this up for the screenshot, and no I’m not one of those people who turn off all notifications. Anything that happens to have a badge on the home screen is incredibly important though and deserving of pretty rapid attention so it doesn’t stay with a badge for long.

Using Workflow with Day One

This blog got a huge traffic boost last week after Day One shared my last post, How I’m Using Day One 2. People really liked my Review journal for capturing my thoughts on everything from food and drink to movies and books. My process is straight forward. Each entry contains a photo of what I’m reviewing (if I remembered), what it’s called, who makes it, a rating between ★-★★★★★ and a tag describing the type of item. Day One automatically adds the location and time information. The result is a collection of journal entries I can narrow results by search or filter by tags (e.g. only show me books). I can also see my reviews on both a map or calendar showing me where I’ve been and when.

My process involved some combination of Text Expander snippets and Launch Center Pro actions, and a lot of people wanted to know more. With the update to Day One 2, I started having trouble with Launch Center Pro reliably sending my text to Day One, so I went back to just using Text Expander for a while. More often than not, I just typed out the 1 line of text on my own though. I wanted something better.

Queue Workflow

Workflow is one of those apps power users seem to love talking about. However it seems like most of the talk I’ve seen centers around figuring out what in the world to actually do with it in the first place. I’m no exception. Workflow was an “insta-buy” for me when it hit the App Store mainly because I was convinced it would be taken down and wanted a chance to try it. Miraculously, Apple has allowed it to stay in the App Store and even promotes it. Try as I might though, I could never find a use for it. Periodically, I would reinstall it in hopes of a new idea, but it always ended the same way – uninstalling it from my phone – at least until my Day One post came out.

Workflow for a Gratitude Journal

I have to give a lot of credit to reader Todd, who shared a workflow for a Gratitude Journal made by Ashley Theiss in the comments of my previous post. As far as Gratitude Journals go, this is a pretty darn thorough one. I still prefer the simplicity of capturing 3 things I’m grateful for each night. (Day One shows all three things in every entry without having to open up the entry allowing me to see everything I’m grateful for right away.)

I may have passed on using the workflow, but what was useful was seeing how it worked. Anyone who’s ever learned to code, knows that a big part of it is looking at code that’s already written and learning how it works. Understanding Workflow is a lot like that. Seeing how it worked, I was quickly able to modify the workflow to make a template for my own Gratitude Journal, and now I can launch it from my Today screen each night. You can find it here.

Workflow for Reviews

Tweaking the Gratitude Journal template got my wheels spinning, and I started thinking I could use it for my food and drink templates for my Review Journal. How hard could it be, right? Surprisingly, not too hard at all. After a bit of trial and error, I ended up with a Workflow that replicated my beer template, asked me to take a picture, and passed it all along to Day One tagged correctly.

Once I had the basics down, I just copied the Workflow and changed the wording a bit until I had one that worked for food. It wasn’t long before my Today screen started growing out of control though. By the end of it I had 4 separate Workflows just to add various types of food and drink.

Being a minimalist, I want my Today screen as simple as possible. Each of my workflows was fairly similar, and I’d already figured out the Menu action, so I took it a step further, and added one more menu. The result is the workflow you’ll see below – a single “Log Food or Drink” workflow fully capable of setting the tag based on what you want to log. I’m really happy with the results. You can find the full workflow here.

LogFoodorDrinkWorkflow

How I’m Using Day One 2

I purchased Day One for both iOS and Mac years ago, but, admittedly, using it as a journal never really clicked no matter how hard I tried. I spent a lot of time perusing Day One’s Uses section, until at some point, I stumbled upon Giftttdy and decided I would use Day One as a lifelog. Fast forward a few months, and Day One had quickly turned into a jumbled mess of duplicated posts due to crossposting to various platforms and a long list of tags that made me cringe whenever I opened it. Don’t get me wrong, Giftttdy is a great idea. It just didn’t work out for me, and I eventually painstakingly deleted every auto-logged entry one by one. If only I had waited until Day One 2, which added the ability to edit multiple entries, came out, I could have saved myself a lot of time.

Nevertheless, it’s been about a month since Day One 2 was released, and despite my past troubles with journaling, both the Mac and iOS versions were “insta-buys” and also “insta-recommends”. Much to my surprise, the added features were exactly what I needed to fuel a new journaling habit. I was instantly trying to find new things to journal. Sadly, despite my countless searches, I’ve yet to find many people discussing how they’ve decided to take advantage of Day One 2’s features. I have, however, found quite a few people looking for exactly that that have also come up empty handed –> queue the rationale behind post.

Day One 2 now supports multiple journals (up to 10), and this may be the single most behavior-changing feature for me. As I mentioned before, I hated opening Day One to a jumbled mess. I had plenty of things I wanted to capture, but everything was lumped together. With Day One 2, thats no longer the case.

So without further ado, here is how I’m using Day One 2. I currently have 6 journals:

Journal list

  • Gratitude for logging 3 things I’m grateful for each night. This habit is something I continue to see recommended time and time again, and having done it off and on for a few years now, I can attest to its benefits. I don’t regularly review my entries, but on days I happen to see one, it’s nice to look back at what made me happy that day. I use a super simple Text Expander snippet for this that just puts “I’m grateful for…” followed by 3 bullets.
  • My second journal, Moments, is for recording any special moments I’d like to remember later. I tag them accordingly based on what type of moment they might be: conversations, dreams, something I feel the need to vent about. This journal gives me an outlet for my thoughts other than my boyfriend or best friend who I’m sure both appreciate the decrease in the number of rants I share.
  • I also have a Goals journal where I store my yearly list of goals I’d like to work towards. I used to keep text files for each year, but it’s nice to be able to look back at them in one place whenever I want.
  • Quotes is for, well, quotes. I’d always been envious of those people who kept a list of quotes. While I’ve highlighted or saved some over the years, I never really settled on a single place to keep them, so the majority disappeared, never to be seen again. Now whether I snap a picture of a quote I come across in a hardback book or copy and paste one I find digitally, they all can live in one place.
  • Reviews is probably my most favorite journal. Despite the picture below making it seem like I only eat at DuClaw, my boyfriend and I actually do enjoy trying new places to eat and drink, and this journal gives me a place to record what I love and, occasionally, what doesn’t love me back so that I know never to order it again. I also use it for books, movies, and music. It’s turned into my own personal combination of Yelp, Untappd, Goodreads, and Rotten Tomatoes. Plus it’s downright nice to look at. It takes 5 seconds to grab a photo and use Text Expander snippets to log what and by whom or where, along with a 1-5 star rating. Day One also tracks location and time so I can quickly see a map of where I’ve eaten and the calendar view provides a nice overview of when. I also tag these by type which allows me to filter the list based on type, location, date, or name.

Review List

  • My last journal is entitled TIL, “Today I Learned”. It’s the newest journal and came from a recommendation on Lifehacker which happened to feature Day One in the screenshot. I haven’t been noting something I learned each day like the recommendation, but it will be helpful for capturing tidbits of information that would be helpful to retain that don’t necessarily have a place to be stored (e.g. where to send that random support request that only comes in once every 2 years).

Tags haven’t really changed in Day One, but paired with multiple journals, they’ve become much more useful because they can be applied across journals. The minute this occurred to me, I was flooded with inspiration. Filtering by the tag “Book” pulls up entries for book quotes in the Quotes journal and book reviews in Reviews. Similarly, a search for the tag “work” might pull up entries in my Moments journal or TIL.

So that’s how I’m using Day One.

Update: See my latest post on how I’m using Workflow to automate logging food and drinks to my Review Journal

Creating a Smart Grocery List in Omnifocus

Last week, I added an Amazon Echo to my slowly-growing collection of home automation devices. The recently added Spotify integration is what sold me, but within a few days, Alexa, unexpectedly, made herself known as the missing link in how I collect my grocery shopping routine. I’ve written about my set up before, but it’s evolved since then especially with the addition of Alexa in my kitchen.

**Disclaimer: References to products on this page may contain affiliate links.**

To start, it’s probably best to share a few basic tidbits of my routine:

  1. I tend to make 1 weekly trip to the grocery store (typically Aldi).
  2. Paprika is my recipe manager of choice. Two years ago, I was keeping a messy collection of recipes on Pinterest, which I later found out consisted of mostly dead links. Now all of my recipes get saved to Paprika for safe keeping and are meticulously organized based on meal type and whether or not I’ve made them before. I also only save things I’d truly want to make, so no more 30 unprounceable-ingredient, 25+-step recipes.

    Paprika OS X

    Paprika for Mac

  3. Omnifocus is where my grocery list lives along with all of my other tasks. I’ve tried keeping a separate list, but I really prefer having my lists in as few places as possible.
  4. Both Paprika and Omnifocus are available on Mac and iOS meaning the majority of my workflow can be used anywhere.

Getting Things on to the Grocery List

  • Things I buy regularly on a predictable schedule – These are set up as recurring tasks in Omnifocus based on how often I buy them – the”defer another” option, if you’re curious.
  • Things I need for a particular recipe – One of Paprika‘s best features is it’s ability to make grocery lists. It even combines quantities if multiple recipes call for the same item. While you can use the Paprika app to manage your list entirely, I prefer Omnifocus. Thankfully, Paprika also has the ability to export their grocery list to Reminders. I know I said I prefer Omnifocus, but stay with me here. Omnifocus can capture tasks sent to Reminders. With that you can essentially export from Paprika to Omnifocus.
  • Things I want or don’t necessarily buy on a predicable schedule. Not everything in my kitchen is part of a recipe or something I buy regularly – sale items, less used staples, etc. I could just manually add these things to Omnifocus, and when I’m out of the house that’s what I do, but when I’m at home the Amazon Echo makes things crazy easy. I set up an IFTTT recipe so that any time something is added to my Echo shopping list, it gets added to Reminders. Again, Omnifocus is set to capture anything sent to Reminders. The result, whenever I run out of something that’s not a regular buy or I think of something I’d like to buy and I happen to be home, I simply say “Alexa, add <item> to my shopping list.”

Items added either via Paprika or the Echo are added to the inbox in Omnifocus where I process them with the rest of my tasks. Once processed, they get added to my Shopping List single actions list. Anything I need to buy gets added to this list with the “Shopping” context. If they happen to be grocery-related, they get added to a special “Shopping: Grocery” sub-context. That used to be where the filtering stopped, but the lack of organization left me scrambling around the store. (If any of you are familiar with Aldi, you’ll know it’s set up much like an IKEA where you’re supposed to go in one direction.) To account for this, I recently added sub-sub-contexts to further sort my list. Since I always shop at the same store, my Grocery sub-contexts are set up to match the layout of the store. Aldi happens to be a small store so this ends up being about 6 sub-contexts.

Getting to the Grocery Store

When I arrive at the store, Launch Center Pro prompts me to open my Grocery Store perspective. Any items with a Grocery or Grocery sub-context appear sorted by context. The result: A grocery list sorted by aisle.


Grocery List Perspective on iPhone

Grocery Perspective in Omnifocus for iOS


*Other people have suggested using recurring projects to sort your grocery list. I decided to go with contexts because it allows me to add one-off items along with my recurring items each week. If using recurring projects, those one-off items would also end up as recurring items which required an extra step of removing them from the next week.

Shop Amazon Echo – Always Ready, Connected, and Fast. Just Ask

{March Topic: Meal Planning} My Routine

Since moving out on my own, I’m pretty surprised to admit that the most challenging thing I’ve had to deal with has been shopping for food. I finally feel like I’m about 80% there in terms of figuring things out, but some weeks are inevitably better than others. I thought I’d share my “fun” journey as it might help some others that live alone.

When I moved out, I was offered the opportunity to “shop” the shelves at my mom’s house before I bought anything. {Another perk of having family members with hoarding tendencies} I didn’t really have any sort of plan though. Long story short, after a trip to her house and the grocery store and many trips from my car to the kitchen, I realized I’d ended up with a whole lot of condiments, coffee, snacks, and things for lunch, but not much for any other meal. It was pretty comical. A friend even stopped by and asked “Wait, you already went shopping? Where’s the food?!”

The next week, I planned to rectify my lack of any actual food, so I picked out two recipes to make for dinner that week figuring that each one typically lasted my mom and I a couple days. Again, I came back with bags of food, but I had a plan so I was set. It wasn’t until I started cooking that I realized one recipe called for a 1/2 can of soup. I ended up doubling the recipe to use the whole can which ended making it enough food for the week. I never did end up making the other recipe, and a lot of the ingredients went bad. Fail on my part for not checking the recipe in the first place.

One way or another this went on for weeks. Buying too much food, spending too much money, forgetting to cook something before it went bad, and then having a fridge full of food I was stuck with until trash day. A lot of it has been learning what doesn’t make sense to buy, e.g. an entire gallon of milk for 1 recipe and I don’t drink milk. I’d like to think those days are past me, but having a plan has made a big difference in both having a kitchen with actual food and my wallet.

At some point during the weekend, I open up my recipe manager, Paprika, to find a recipe for the next week. As a creature of habit, I’ve grown used to eating one thing for a few days, so one recipe actually works. Another perk to this is I typically only have to really cook once during the week. Lately, I’ve been picking a lot of casseroles because they’re easy enough to make and reheat well. If for some reason I can’t find something I want to make in Paprika, I turn to Pinterest.

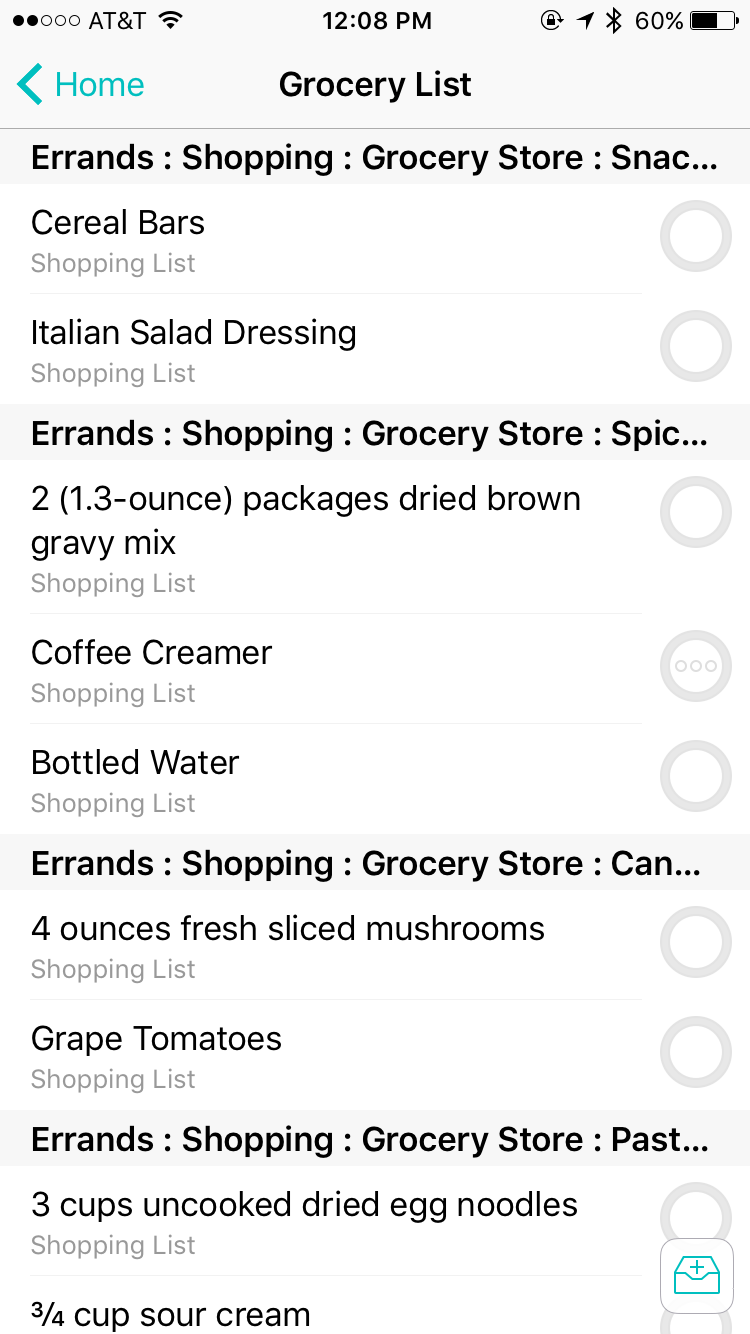
Once I’ve picked out a recipe, I add it to Paprika’s Meal Planner just so I can keep track of what I’m making each week, and add any ingredients I’m missing to my Shopping List project in Omnifocus. Paprika actually has it’s own grocery list feature, but I’ve found I prefer Omnifocus because I can set the items I buy frequently to recur every week or every other week. I also like having my lists in one place. I have a “Grocery List” perspective in Omnifocus to show any items with the “Shopping: Grocery Store” context. It’s also a “starred” perspective on my phone, so it’s 1 tap away once I open up Omnifocus when I’m out shopping.

I try to do my grocery shopping on Monday after work partly to save some gas, but mainly because I found myself putting off weekend trips in favor of lounging around the house in pajamas. I try to do most of my shopping at Aldi, but if for some reason, they don’t have somthing, I can save it for a trip to another grocery store or add it onto an order from Amazon. I generally try to keep to my list, but truthfully, Aldi’s prices are low enough on most things that if I throw in a few extra things, I’ll still stay under budget for the month. Another perk of Aldi is that you bring your own bags. One week of groceries fits in 1-2 bags for me, so I’ve eliminated the back and forth trips from car to kitchen.

Monday night is also typically my cooking day. Once I get home, I grab my iPad or computer and open up Paprika to the recipe I’m making. I like to listen to podcasts while cooking too, and while I’m in the kitchen, waiting for my food to cook, I’ll prep my lunches for the week. Doing all the cooking and prep {and cleaning} on one day means the rest of the week is fairly simple. Whatever I made typically lasts me most of the week, which means after work, I just have to pop some left overs in the microwave. By the time the week starts wrapping up and I’ve likely run out of the meal I made, I tend to make something simple from the freezer like a pizza or order carryout from my local Chinese restaurant as a treat for the weekend.

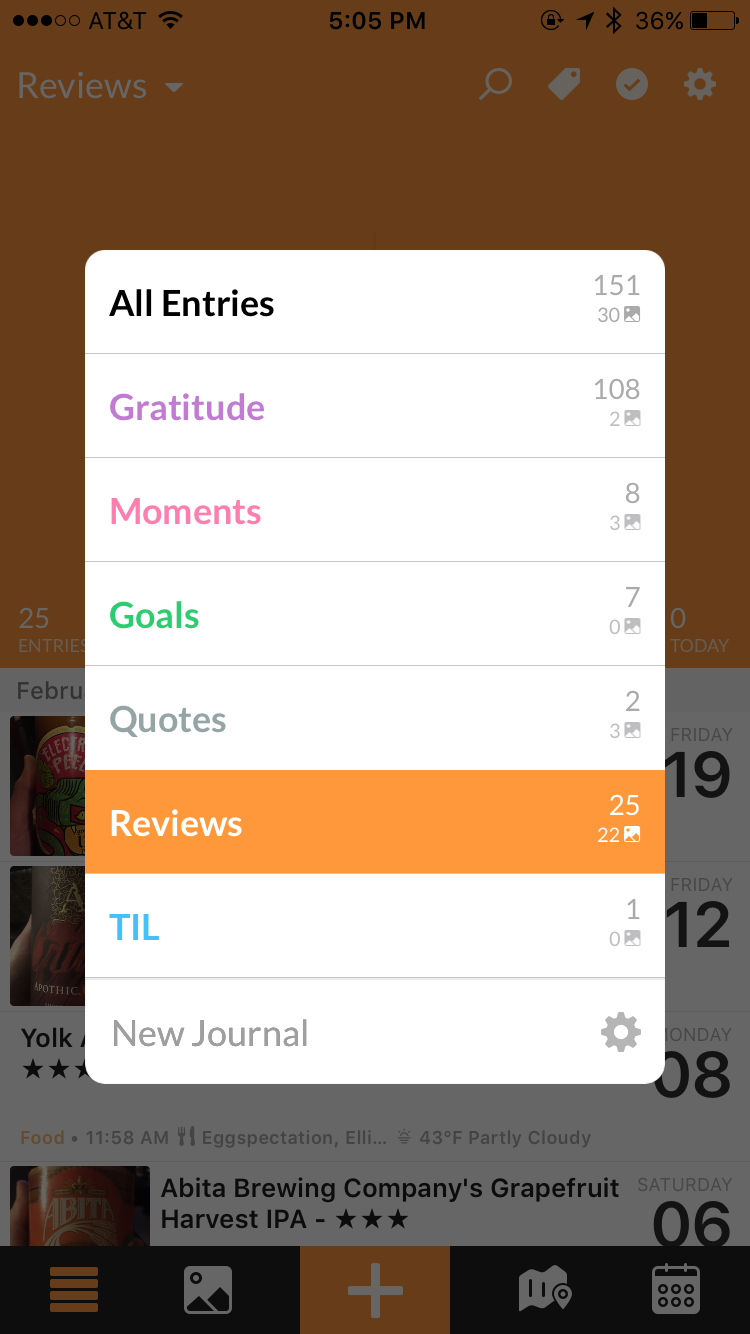
The last step in my meal planning routine takes me back to Paprika. Before I start the process over again for the next week, I use Paprika’s built-in rating system to rate the recipe I picked. My hope is that eventually I’ll be able to use them to simply the recipe picking process down to 10-20 favorites so that I’m not constantly buying new items.

Andrea

{February Topic: Finance} Using ReadyForZero to Pay Off Credit Cards

My most important goal in life right now is paying down my credit card debt. Now, I’ve mentioned in previous posts that I’ve been lucky enough to escape having a car payment and college loans. For that, I’m truly thankful. I can’t imagine having to deal with student loans or car payments on top of what else I owe like most of my friends. However, after graduating, I got a job that paid a fairly decent salary with little to no bills because I lived at home. In short, I made stupid decisions and money burned a hole in my pocket to the point that spending a couple hundred dollars on a Michael Kors bag or new clothes every month became regular purchases for me rather than something I saved up for.

Looking at my transactions in Mint, I somehow managed to rack up nearly $40,000 in transactions on credit cards in about 4 years. To my credit (no pun intended), the balances of those cards never exceeded more than a couple thousand dollars at any given time, but it’s not what the balances were, it’s that I had become comfortable with having balances on them in the first place. I bought whatever I wanted rather than what I needed. Looking back, I cringe at all the interest I’ve paid because I wanted to buy “stuff.” Even more cringeworthy is that most of that “stuff” I bought I probably don’t even use or have anymore.

Now that I’m trying to be a “responsible” homeowner, and am solely responsible for all the bills, I have no choice but to be mindful of my spending. The first step of that involves getting out of my habit of relying on credit cards.

On a regular basis, I keep three cards in my wallet:
My debit card, which gets used for most purchases.
A low interest credit card for routine bills, which I pay for at the end of each month. While I work to get my savings back in order, emergency expenses like the dishwasher I had to replace are also going on this card. (My goal is to build my savings back up so that these expenses can be paid for up front.)
Another credit card from a different vendor just in case they don’t accept the other cards I have since both my other cards are the same.

Unfortunately for me, that very last card, with the highest interest rate, is the one carrying the highest balance at the moment making it my first priority in my payoff plan, which brings me to a service I recently stumbled upon called Ready For Zero that makes putting a payoff plan together a piece of cake.

Like Mint, it’ll ask you to connect your accounts. From there, you tell it what you’re able to pay each month toward your credit card balances. With that amount, Ready for Zero will factor in your minimum payments and interest rates and tell you how much you should pay toward each account each month. However, it doesn’t stop there. Ready for Zero can estimate when you’ll be debt free and even plots out your payments on a graph. I like graphs so this is something I really enjoy.

My favorite feature, by far, has been seeing how much I pay in interest daily because of the balances I’m carrying. It’s a simple number that people don’t pay much attention to most likely because it’s often buried away. Watching that amount decrease with every payment triggers a little celebration in my head, and when it goes up, I actually feel it. It may be only a dollar or two, but that’s money each day I would have rather spent on something else.

Oh, by the way did I mention ReadyforZero is free? If you’re looking for an easy way to visually help you pay off your credit cards, this is fantastic. Definitely check it out.

Until next time,

Andrea

{February Topic: Finance} Keeping Track of My Money with Mint

For February, I’m going to be focusing on finances.

For getting an incredible overview of my finances, I turn to Mint. By connecting all various bank accounts, credit cards, my mortgage, and even some manually updated loans like the one for my orthodontic work, I can quickly see where my money is going.

Mint has a quite a few features that make it worthwhile for me:

1. Creating a Budget – Because Mint has access to every transaction across my accounts, it can not only tell how much money I have coming in each month, but also what I’m spending. Because of this, Mint already had a pretty good idea of what my monthly spending looked like. I just needed to make a few adjustments to get my spending in alignment with my financial goals. After the initial set up, Mint takes care of the rest with minimal effort on my part. Occasionally a transaction will get categorized incorrectly and I’ll need to adjust it, or my mortgage payment will be processed a day or two early causing it to look like I’ve exceeded my mortgage spending. A feature I’ve been enjoying lately is the ability to set up spending categories to rollover to the next month or span across multiple months which I find useful for things like groceries or gas where I tend to spend more or less depending on my plans. Mint really makes it easy to see how much income you have, how much you’ve budgeted, and what’s left over. They even suggest ways to use that left over money like paying off credit cards or reaching your goals sooner.

2. Notifications – The obvious use case for notifications would be if I’m coming close to or have exceeded a spending category on my budget. I love Mint for this alone, but it also notifies me of large transactions or when my spending is abnormal. These notifications has saved my butt on more than one occasion, like when a disgruntled JCPenney support rep charged my credit card without authorization or the morning I woke up to find that my credit card had been used to pay for someone else’s several thousand dollar college tuition balance.

3. Graphs – I’m a sucker for graphs, and Mint has graphs for everything. Given that I’m focused on paying off my remaining debt, the two I use most are Debts Over Time and Net Worth Over Time. Watching the debt fall and the line on my Net Worth gradually increase is beyond satisfying, and Income Over Time is nice way to jog my memory as well. Since I’ve been tracking things with Mint for so long, I can literally see each promotion I’ve ever received on a graph.

4. Available Wherever I’m At – None of this would be useful if I couldn’t access it whenever I needed to. Whether I want to quickly check my accounts from my phone using their mobile app, get a quick notification using their desktop app, or view everything online, Mint makes it super easy to get the information I need wherever I’m at.

The one feature I’d love to have in Mint that actually worked as intended is their Goals tab where you can select a goal like paying off debt or saving for an emergency. The idea is that Mint helps you plan these things out and tracks your progress. Sadly, my Pay Off Credit Card Debt goal has never worked quite right despite reaching out to Mint.

In my next post, I’ll discuss what I’m using instead of Mint to help with paying back my credit card debt. Stay tuned.

Signature Update

{January Topic: Journaling} My Journaling Routine

I’m not one to long form journal about my life. I tend to capture all the silly, sporadic events that happen each day through some combination of posts on Facebook, Instagram, and Twitter. Most of these posts are pulled into Day One, my journalling app of choice, automatically with the use of Giftttdy. The things that aren’t automatically fed in are focused on personal reflection.

Each morning (or at least weekday mornings) I try to reflect on the morning went. With the help of TextExpander, I can quickly pull up Day One on my Mac, type my snippet (.morning) to fill in a template, and jot down some thoughts. The template includes questions things like what I hope to accomplish for the day, how I’m going to do it, more importantly why I’m doing it as well as things like how I slept, how I felt when I woke up, and whether or not something happened to throw my morning routine off. Occasionally, I’ll also jot down some random thoughts about what’s on my mind too. Reflecting on my morning is something new for me, so I’m still tweaking my actual format, but in general, it’s a nice way to start the day. It also forces me to not only see what I need to do for the day, but really determine why I’m doing it and how I’ll get it done.

Before bed, I usually open Day One on my phone, and thanks to another TextExpander snippet (.grateful), I get a nice little template for jotting down 3 things I’m grateful for, what I accomplished, one thing I could improve, and what I learned. Recording three things I’m grateful for each day has forced me to really appreciate everything in my life. Even on my worst days, I can still find something that made me smile.

So that’s all folks – why I journal, what I use (and have used in the past), and how I journal (today’s post).

I’d love to hear how you journal or any tips you might have to share.

Signature Update

{January Topic: Journaling} Journalling Tools

Today’s post is going to be about the tools I use to journal.

Last week, I briefly mentioned my OCD about paper journals. Don’t get me wrong, I’m a sucker for new notebooks. Put me in an office supply or stationary store and watch out. I just hate the feeling of ruining a perfect, new journal with my handwriting that seems to change by the minute. (Think I’m kidding? My handwriting changes so much, I actually got in trouble once because a teacher thought someone else was doing my homework.)

Momento (iOS, $2.99)

Given my inability to stick with paper journals, it should be no surprise I went digital, and I started that journey with Momento. The thing that drew me to Momento was that it automatically pulls my social media posts into the journal. I’ve found a few apps that do this, but none worked as well or looked as good as Momento. You can also, of course, add your own entries, and they even had a section to give a 1-5 star rating to the entry. I liked to use this to rate my days. Momento is lacking in a few areas though. First and foremost, it’s only on the iPhone. I don’t use my iPad for journaling so that wasn’t a big deal, but it’d be nice to see or add to my journal it on my Mac. Another feature it lacks was TextExpander support. (Tip: When I used Momento, I worked around this by using Launch Center Pro to add snippets into my entries.)

STEP Journal (iOS/Android, Free)

After Momento, I flirted briefly with an app called STEP Journal. Unlike what its name imply, this doesn’t track steps (it does, but it tracks more). Like Momento, it pulls in data from various social media sites, but also pulls in events from your calendar, photos on your phone, and even fitness information from Jawbone or Fitbit. Personally, I felt this app just wasn’t ready for prime time. I was spending more time making things pretty and consistent than entering anything worthwhile, and just like Momento, there was also no Text Expander support or Mac version either. It does look like they’re in the process of developing a web app though.

Day One (iOS $4.99, Mac, $9.99)

And this brings us to where I’m at now, my journal app of choice – Day One. When it comes to journaling on iOS or OSX, Day One is the top choice for most people I’ve come across. I actually ended up with both apps at some point, but because journalling was never really part of my day, I never used them. Aside from being gorgeous, Day One offers both native Text Expander support and a Mac client but it doesn’t automatically import social media posts. A few solutions have popped up including Brett Terpstra’s wonderful Slogger, but even the nerdiest side of me got overwhelmed with just reading how to set it up. Currently, I’m using Giftttdy which uses IFTTT and Dropbox to pull content in.

Next week’s post will feature what I’m actually journalling about and how I do it.
Signature Update