Creating Project Templates for Things 3 with Shortcuts and Keyboard Maestro

If there’s one thing I’ve missed since moving from OmniFocus to Things, it’s the ability to use project templates. It’s hard to beat Omnifocus’s support for the TaskPaper format. Project templates can be created in a flash and added by simple text expansion tools.

That being said, it’s also hard to beat the design of Things, and for that reason, I set out to learn how to convert my templates.

In migrating to Things, I decided a number of them would be better off just scheduled as repeating projects in Things, which cut my list in half before I even started. Working at a university, most of my work tends to repeat each semester, but the actual dates of semesters tend to fluctuate slightly, so my projects tend to do so as well. I can, however, count on those projects happening roughly around the same weeks each year. With Omnifocus 2, it wasn’t possible to schedule a project to repeat yearly on say the first Monday of November, but it was in Things 3. It’s worth noting that repeats like this were added to Omnifocus 3, so if I were still using it, I’d have moved these templates back into Omnifocus too.

Unlike Omnifocus’s TaskPaper format, templates in Things 3 are possible through a URL scheme. If you’re interested in testing it out, Cultured Code has a really nice Link Builder to help you get started. While this works great for static projects and actions, it doesn’t let me create the variable templates I was trying to create.

Naturally, I turned to the trusty Keyboard Maestro to see if I could pass variables into a Things URL. It turns out Keyboard Maestro’s variable format doesn’t really get along well with Things’ URL scheme though. All those percentage signs make for a confused mess. I even found a post on Keyboard Maestro’s forums asking for Keyboard Maestro to play nicely with Things URLs, which I nervously bumped 8 months later out of desperation.

After hours of frustration trying to get it to work and searching relentlessly for a solution, I stumbled upon a blog post that used Alfred instead. While I was at least able to get this working, entering the variables was nowhere near as user-friendly as having the dialog boxes that I had been used to while using Keyboard Maestro. That being said, if you’re an Alfred fan, this may be just what you’re looking for!

Things Templates Using Shortcuts

At some point, I conceded that Keyboard Maestro wasn’t going to happen and tried my hand at creating them with Apple Shortcuts. Let me just say Shortcuts handled Things URLs beautifully. Having little to show for all my time dabbling with Shortcuts other than my Spotify playlist shortcut, I was surprised, to say the least.

The basic shortcut is only 5 actions (I’ve used my Book Project to help illustrate.):

  1. Ask for Input (e.g. What the’s title of the book?)
  2. Replace text (This finds spaces in whatever you inputted and replaces them with %20)
  3. Set Variable (In this case, to bookTitle) – I’m going to skip forward onto the remainder of the shortcut here for simplicity’s sake, but it’s safe to say you could keep reusing steps 1-3 to prompt for as many variables as you need. You can use them for any field supported by the URL scheme including (Notes, Tags, Deadlines, etc.) so there’s plenty of room for exploration.
  4.  URL (This is where you’d put your URL you got from Cultured Code’s Link Builder unless you’ve got the URL scheme down to which I’ll say Kudos! This is also where you’ll be replacing the fill-in areas with your variables from earlier. Admittedly this is kind of a pain because the URL is long, and the URL field in Shortcuts is a single line, but copy and paste works quite well if you’re using a keyboard.)
  5. Open URL – You’re done.

I was able to recreate all of my templates in Shortcuts fairly quickly by duplicating and then modifying this shortcut, and I can easily run them from Spotlight by typing in the name of the shortcut.

While I was glad to have my templates back in some form, it was fiddly having to grab my iPhone or iPad to generate a template when I was already on my computer.

Back to trying to get Keyboard Maestro to work…

Things Templates with Keyboard Maestro

Thankfully in the months since I’d bumped that post on the Keyboard Maestro forum, a kind soul by the name of gglick came to my rescue. (Note to self: Pay better attention to forum replies.) I really cannot take any credit for this because he or she really did the leg work to make everything work. Even better, the way it’s set up makes the template super easy to update – even easier than Omnifocus’s TaskPaper format in my opinion.

I’ll give gglick credit by linking to the post if you’re interested in the macro, but in short, the macro is 4 actions:

  1. Prompt the user for input (Note: Unlike with Shortcuts, you can add all the variables you want in this step.)
  2. Set Variable to Text (In this case, Keyboard Maestro is going to be doing most of the link formatting, so you can pretty much write out all your tasks in plain text with the exception of a few bits like the variables and the starting syntax.)
  3. Filter Variable with Percent Encode for URL (This turns all the spaces into %20 like Step 2 of the Shortcut earlier.)
  4. Open URL (Note: the URL you’re opening is actually the Variable you made in Step 2.)

As I did with Omnifocus, I’ve set up a macro palette to display the templates that I can trigger via the same keyboard shortcut (⌘+F4) I used with Omnifocus saving me from having to retrain any muscle memory. All this is is a macro containing the action “Show Macro Group”.

I know I spent countless hours trying to figure this out, so I’m sharing this in hopes it saves someone else time. Happy templating!

Photo by Andrew Neel on Unsplash

Using Workflow to Launch Spotify Playlists

For as long as I’ve owned an iPhone, a music app has occupied the fourth spot on my dock and for nearly as long, that app has been Spotify. Those who saw my last post about what’s on my homescreen will notice it’s been removed from the dock. That’s because I have an even easier way to use access Spotify.

After dipping my toes in some Workflow ummm… workflows?… I started playing around with other things I could do which lead me to my Spotify workflow. Spotify lived in my dock primarily so I could have quick access to one of the few playlists I listen to while driving, but the app isn’t as intuitive as I’d like so I usually ended up fumbling around. That all changed with one simple workflow that I can access from a Today widget.

Image-1

Tapping on “Open a Playlist” gives me access to my top three playlists from anywhere on my phone simply by swiping down. Even better, it was a breeze to set up because Spotify allows you to copy the deep link directly from the app (either the Mac version or iOS version). You can modify the workflow for yourself by going the the album or playlist and clicking the three dots to access the Share menu where you’ll have the option to “Copy the Playlist Link”. Once you have the link, you’ll need to modify it a bit so that it opens the Spotify app rather than Safari. Your link should look something like this (minus the quotes):

"spotify:user:yourusername:playlist:playlistcode"

I’m toying with the idea of adding a 4th option to search Spotify entirely, but for now this has been sufficient. It’s also a heck of a lot simpler than fumbling through Spotify’s unintuitive app layout.

Using Workflow with Day One

This blog got a huge traffic boost last week after Day One shared my last post, How I’m Using Day One 2. People really liked my Review journal for capturing my thoughts on everything from food and drink to movies and books. My process is straight forward. Each entry contains a photo of what I’m reviewing (if I remembered), what it’s called, who makes it, a rating between ★-★★★★★ and a tag describing the type of item. Day One automatically adds the location and time information. The result is a collection of journal entries I can narrow results by search or filter by tags (e.g. only show me books). I can also see my reviews on both a map or calendar showing me where I’ve been and when.

My process involved some combination of Text Expander snippets and Launch Center Pro actions, and a lot of people wanted to know more. With the update to Day One 2, I started having trouble with Launch Center Pro reliably sending my text to Day One, so I went back to just using Text Expander for a while. More often than not, I just typed out the 1 line of text on my own though. I wanted something better.

Queue Workflow

Workflow is one of those apps power users seem to love talking about. However it seems like most of the talk I’ve seen centers around figuring out what in the world to actually do with it in the first place. I’m no exception. Workflow was an “insta-buy” for me when it hit the App Store mainly because I was convinced it would be taken down and wanted a chance to try it. Miraculously, Apple has allowed it to stay in the App Store and even promotes it. Try as I might though, I could never find a use for it. Periodically, I would reinstall it in hopes of a new idea, but it always ended the same way – uninstalling it from my phone – at least until my Day One post came out.

Workflow for a Gratitude Journal

I have to give a lot of credit to reader Todd, who shared a workflow for a Gratitude Journal made by Ashley Theiss in the comments of my previous post. As far as Gratitude Journals go, this is a pretty darn thorough one. I still prefer the simplicity of capturing 3 things I’m grateful for each night. (Day One shows all three things in every entry without having to open up the entry allowing me to see everything I’m grateful for right away.)

I may have passed on using the workflow, but what was useful was seeing how it worked. Anyone who’s ever learned to code, knows that a big part of it is looking at code that’s already written and learning how it works. Understanding Workflow is a lot like that. Seeing how it worked, I was quickly able to modify the workflow to make a template for my own Gratitude Journal, and now I can launch it from my Today screen each night. You can find it here.

Workflow for Reviews

Tweaking the Gratitude Journal template got my wheels spinning, and I started thinking I could use it for my food and drink templates for my Review Journal. How hard could it be, right? Surprisingly, not too hard at all. After a bit of trial and error, I ended up with a Workflow that replicated my beer template, asked me to take a picture, and passed it all along to Day One tagged correctly.

Once I had the basics down, I just copied the Workflow and changed the wording a bit until I had one that worked for food. It wasn’t long before my Today screen started growing out of control though. By the end of it I had 4 separate Workflows just to add various types of food and drink.

Being a minimalist, I want my Today screen as simple as possible. Each of my workflows was fairly similar, and I’d already figured out the Menu action, so I took it a step further, and added one more menu. The result is the workflow you’ll see below – a single “Log Food or Drink” workflow fully capable of setting the tag based on what you want to log. I’m really happy with the results. You can find the full workflow here.

LogFoodorDrinkWorkflow

Using Omnifocus 2 – My Workflow

It’s been a bit since my last Omnifocus posts, and I’ve been asked some questions about my general workflow which I seemed to have miseed in my previous posts that went over more of the structure and why I use Omnifocus.

Background about life: I’m the coordinator for a university help desk. I manage around 10-15 students as well as a full-time employee each semester, and that means I’m responsible for everything from hiring them, scheduling them, training them, and answering their day to day questions. I’m also one of two full time employees in the office, so I’m responsible for triaging nearly all of the support requests coming through our office for the entire university. Outside of work, I’m also getting my Masters in Human-Centered Computing, and for those of you who’ve been following along with my Condo Project, I just bought my first condo, which I’ve been renovating for the last 3 months, and recently moved into. I also take care of three demanding cats, and I try to have a social life if there’s time left over.

So let’s dive in with how I use Omnifocus (or better put, what earned a spot in my sidebar/home screen).

Note: I have the Pro version of Omnifocus. The ability to create custom perspectives like the ones below is not available in the standard version.

screenshot-1
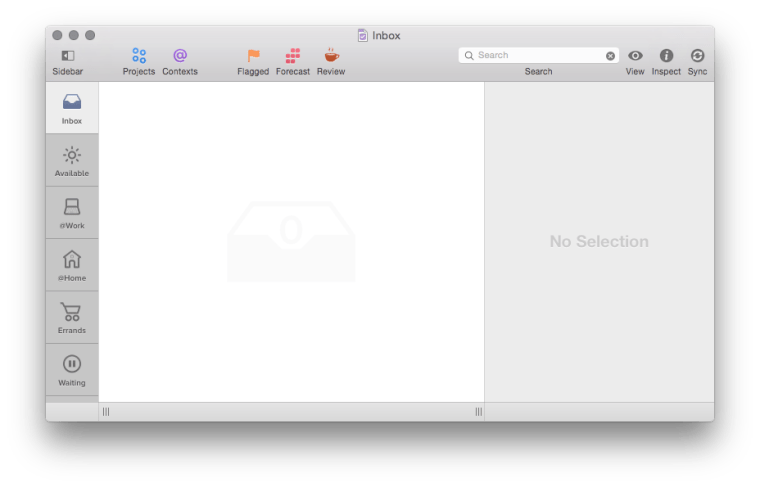
Most of my time is spent at work, so let’s start there. When I’m at my office, I use Omnifocus on my Mac, and it’s usually open to my @Work perspective. This shows anything available that has to or can be done while I’m at work (based on context) grouped by project. These are things like discussing something with a coworker or cleaning up my desk, but can also include things I can do in the background like updating my operating system because the download speeds are much faster. Phone calls I need to make during business hours also fit into this category just so that I can remember to call during my lunch break.

Outside of the office, I primarily work with Omnifocus on my iPhone, and bounce between two perspectives:

Like my @Work perspective, my @Home perspective shows anything available that has to or can be done while I’m at home (based on context), but this time grouped by context (primarily where I’m at in the house, but my Mac/Phone are also included). By having things grouped by room, I’m not constantly running back and forth between rooms.

The other perspective I use outside of the office is my Errands perspective, which shows the available tasks I need to do when I’m out and about also grouped by context. These are things like getting my car washed, picking up something from the store, etc.

@Work, @Home, and Errands are enough to cover all my tasks in Omnifocus, and give me the ability to see everything I can do at any given time depending on where I’m at. I also use the Defer feature heavily, so the number of tasks that appear in each of these perspectives is usually not too high. If the lists do get long, I usually go through and defer any tasks that I can that I can so that it’s clear what I need to focus on for that day.

When defer dates aren’t enough and I’m feeling overwhelmed, however, I have my Available perspective, which shows all available tasks regardless of context or project. This perspective doesn’t have any sort of grouping, so it’s literally just one big list of everything currently available sorted by anything that has a due date. I don’t normally use flags, but it’s from this perspective that I usually flag things, but only as a last resort when I’m feeling frazzled.

The very last perspective in my sidebar is Waiting which holds any tasks that have been assigned the “Waiting for…” context grouped by when they were added to Omnifocus. This lets me see everything I’m waiting on others for in order of newest (at the top) to oldest. I try to periodically check into this perspective just to make sure I’ve not missed any tasks that I’m no longer waiting on that might be holding up a project.

For those of you who hate reading, or maybe just wanted a summary:
– If I’m at work, I open up the @Work perspective on my Mac which shows anything I can do while I’m at work grouped by project.
– If I’m at home, I open up the @Home perspective on my iPhone which shows, you guessed it, anything I can do while I’m at home grouped by context.
– When I’m running errands, I have an Errands perspective that shows me all the things I need to do while I’m out grouped by context.
– My Available perspective shows *everything* currently available in Omnifocus sorted only by due date.
– And the Waiting perspective shows everything I’m waiting on others for.

Omnifocus is an incredibly powerful tool, and figuring out how to best set it up for your own use is an ever-changing process. Hopefully, this has given you some ideas into setting up your own perspectives in Omnifocus.

Signature Update